🍞 Rise to the occasion with the ultimate baking companion!
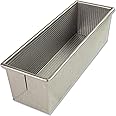
The USA Pan 1165PM Large Pullman Loaf Pan is a commercial-grade baking essential made from heavy gauge aluminized steel. Measuring 13 x 4 x 4 inches, it features a patented nonstick Americoat coating for easy release and cleanup. Proudly made in the USA, this durable pan comes with a limited lifetime warranty, ensuring it will be a staple in your kitchen for years to come.


| Material | Alloy Steel |
| Brand | USA Pan |
| Shape | Rectangular |
| Special Feature | Oven safe |
| Capacity | 13 Inches |
| Occasion | Birthday |
| Included Components | loaf pan |
| Product Care Instructions | Hand Wash |
| Number of Pieces | 1 |
| Item Weight | 703 Grams |
| Is Oven Safe | Yes |
| Is Dishwasher Safe | No |
| Manufacturer | USA Pan |
| Country of Origin | USA |
| Item model number | 1165PM |
A**R
bread pan
Good product . Everyone can buy
L**N
The best loaf pan in the world!
Can't stop raving about these pans, I purchased both the small and the large one. Bakes very evenly, the loafs/cakes just slide out and the pan takes a blink to clean. Absolutely love them!
J**0
Nice bread pan
I use this pan weekly for sourdough loaves. Bread easily slides out and the pan cleans easily. I found the lid to be well fitting and no hassle to remove. I would buy again.
D**.
Works great.
Cake just drops out no issues, and cleans up very nice. great pans
L**Y
Great!
For a novice bread maker, these make great sandwich loaves! These are the perfect size for bread machine 2 lb dough, dividing the dough to put 1 lb into each pan.I have learned a few things along the way. First, the tight-fitting lids are easily adjusted. Place the curled end of the lid that is supposed to go onto the pan and gently massage the curl up a little. With care, this will loosen the lid enough so that it can easily slide on and off. If it is still tight, you might have to ease open the side curls. If the lids are too tight, they may scratch the pan which could leave metal shavings in your pan, so I'd highly recommend loosening the lids.Secondly, I learned that you need to start baking the bread once the dough has risen to about 80-90% of it's height. If you let it rise up to the lid, the air bubbles will be too large, weakening the bread in the middle, and the loaf will shrink inwards.My loaves turn out almost square, but they are not tight fitting into the corners. I would be curious to know how others have achieved such loaves. I know that has to do with technique or the recipe. But, I am very happy with the loaves I do get. They are nicely and evenly compact, easy to slice, and make nice sandwiches.
L**R
Great for dense bread
I bought this to try and get a denser loaf from the Panasonic breadmaker, with smaller slices for sandwiches. The Panasonic SD2501 produces by and large lovely bread, but it tends towards “light and fluffy” which is definitely the opposite of what I’d call good bread, and the slices tend to get a bit tall and unwieldy when cut. While you can tweak the recipes to your hearts content, they never seemed to deliver quite the density I wanted. A bit of googling led me to the Pullman loaf, originally named as it was developed to allow more efficient use of space on Pullman railway carriage kitchens by sizing loaves so that four would occupy the space previously taken by two. Indian Railways still use exactly this size of bread to this day, and the excellent (and doughy!) “sandwich tin” produced by our local bakery chain Percy Ingle are a variation on the idea.Whether you use a breadmaker to make the dough or make your own by hand, these tins knock out an excellent dense and doughy loaf with a soft, thin crust once you’ve nailed the recipe, quantity of dough to use and the exact rise time to hit the oven at just the right moment.I use the standard Panasonic SD2501 dough recipe (menu setting 16, takes 2 hours 20 mins) for 600g flour, with 520g split 50-50 between Mathews Cotswold Crunch and Matthews Bakers white and an additional 80g of either coarse cornmeal (or leftover mashed potato or root veg - reduce the water by 10-20ml if you use this). I also add a large pinch of oregano, mainly for the smell, and 30-40g of pesto for flavour.When the dough’s done, I preheat the fan assisted oven to 180C and split the dough into roughly 840g for the Pullman tin and the remaining 200g odd for two rolls as a kind of treat. Knock all the air out of the dough and knead it for a few minutes, then shape it into a long piece roughly the length and width of the tin. Place it into the tin, make a fist and use the flat face of your knuckles/fist to press the dough down evenly across the tin and into the corners. The recipe has two tbsp of olive oil in it, so there’s no need at all to grease the tin, at least with this recipe.Once the dough is flat and even the tin should be just under half full. Leave the lid to one side and cover the top with cling film and let it rise - I always just leave it at whatever temperature the room is, usually 20C - for about 25-30 mins. Keep a good eye on it and don’t let it hit the top of the tin; at best you’ll get a thick top crust, at worst it’ll force its way out through the gaps. When the dough is about 1 cm short of the top at its highest point (no more!), slide on the lid and put it in the middle of the preheated oven, directly on the shelf. In my oven it takes a very predictable 35 mins; you can check with a food thermometer by putting the probe into the middle. Once it hits 93C its done. It should tip out easily. Put it on a rack and leave it to cool for half an hour before hitting the bread knife if you can stand it, five minutes if you cant. 840g of dough will be about 810g out of the oven, and about 780g when its cooled.I leave the rolls to rise longer so they’re a little less dense, usually till the breads been out for 15 mins, then put them on a baking tray and cook for 12 - 15 mins.You can tweak the density by adding more or less dough to the tin to get the consistency you like; some people open the top for the last 5 minutes for a crisper top crust. The results from mine are excellent, thin crusted, dense, moist, tasty and make excellent sandwiches. Because of the density, its also more filling than it looks - its about a third of the volume for the same weight as a supermarket standard 800g loaf. The bread keeps exceptionally well compared to standard breadmaker loaves; I use 5g of flour improver which helps, but generally the loaf will last a week in the unlikely event it doesn’t get eaten before that.It’s easy to clean the tin. With my recipe and no greasing the tin, a good wipe with a damp cloth is enough, and the manufacturers recommend it’s placed upside down in the warm oven to dry out any leftover moisture in the folds of the metal, which avoids rust patches.The price made me prevaricate a bit and at first sight seems a bit stiff, but having used it I’m very pleased I bought it; its used for every loaf and produces the texture of bread I like best. It’s solidly built which helps produce an evenly baked loaf, and the non stick makes for easy cleanup.I also debated between the nine inch and 13 inch tins. Since the Panasonic is limited to a max of 600g of flour, the 13 inch would be a stretch to fill unless you want appreciably less dense bread. The bread is also more filling than the size appears, but if you do it by hand or have a higher capacity bread maker and have a large family, it may be a better option to consider.
Trustpilot
3 days ago
2 weeks ago