🚀 Upgrade your Mac’s heartbeat with Transcend JetDrive 855 — speed, security, and style in one sleek package!
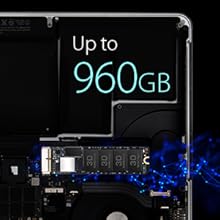
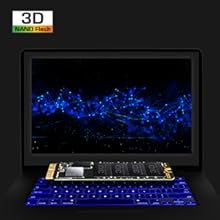
The Transcend 960GB JetDrive 855 SSD is a high-performance NVMe solid-state drive designed exclusively for MacBook Air (11" & 13", Mid 2013–2017) and MacBook Pro Retina (13" & 15", Late 2013–Mid 2015). Delivering up to 1600 MB/s read and 1400 MB/s write speeds, it offers exceptional speed for demanding tasks like video editing. Its advanced data protection features safeguard your files, while the tool-free installation and rugged enclosure make it a durable, user-friendly upgrade that seamlessly enhances Mac performance.


| Brand | Transcend |
| Product Dimensions | 11.99 x 3.15 x 1.83 cm; 88 g |
| Item model number | TS960GJDM855 |
| Manufacturer | Transcend |
| Series | TS960GJDM855 |
| Colour | various |
| Form Factor | Portable |
| Hard Drive Size | 960 GB |
| Hard Disk Description | Solid State Hard Drive |
| Hard Drive Interface | NVMe |
| Wattage | 6 |
| Hardware Platform | Mac |
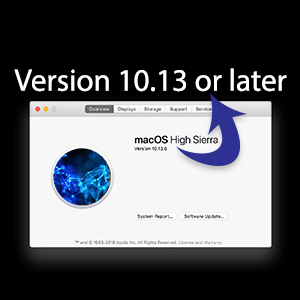
| Supported Software | Mac OS X 10.13 High Sierra |
| Are Batteries Included | No |
| Lithium Battery Weight | 88 g |
| Item Weight | 88 g |
| Guaranteed software updates until | unknown |
L**S
Easy to install and get working
This was easy to install and get working. - I have read a lot of these reviews on here, and I will be honest; You need to be somewhat technical to install this. - When replacing an SSD they don't just magically start working, they ship blank with no data.Both P5 and T5 screw drivers worked fine. I used the P5 to open my MBAir (First time since it left the Apple Factory four years a go!). Used the T5 to remove the screw on the SSD. Ever so slightly lift the SSD half an inch if that or else you will break the connector. Install new transcend drive. Screw new drive in. Screw base back on, done. Put old SSD inside transcend enclosure, use T5 to screw the drive and seal the enclosure. As far as the external is concentred, you can plug this in to another working Mac and view / copy any data you wish.Now you're new Transcend internal SSD. I have a MacBook Air Early 2014. Everyone saying, backup, clone, create bootable USB... The Mac has built in Web Recovery. CMD alt R. Power the Mac on holding these until you see the globe, let go. Once loaded. Go to utilities> disk utility. You will see the new Transcend drive. By default you will only see the volumes. Click on View>Show All Devices. Select the internal Transcend SSD (The device above the volume named "Transcend".) You will know if you have selected the volume instead of the root level of the SSD because you won't have the options I mention next. Select erase.Name: Whatever you like.Format: Up to you but MacOS Extended (Journaled) Mojave will change the volume to APFS anyway so no need to worry about that.Scheme: GUID (You have to set it to this or else anything like Mojave won't install).Click erase.Done.Now you can close disk utility and go back to the main menu of Web Recovery and select Reinstall MacOS. Just follow all on screen prompts and you will have a brand new machine set up within 30 minutes and your external that you can plug in and use.Cloning, restoring etc. Once you have done the above without "reinstall MacOS" there shouldn't run in to any problems.Having a new SSD you should preferably do clean installs and restore what is required. - You need to install 10.13 or newer.I will reply back here after time on performance, use, how long it lasts etc.
M**R
Simple to install. MacBook Air (2014) runs like new.
This is easy to install;Plug new drive into thunderbolt portOpen disk UtilitySelect the new driveClick eraseFormat new drive as APFSSelect GUID partitionDownload Carbon Copy Clone (it quicker than time machine)Run Carbon Copy CloneClone old hard drive onto new hard driveTurn off MacTurn on Mac whilst holding the alt keyBoot Mac from external drive to check it worksIf it worksRemove back of MacUnplug battery from the rest of the computerUnscrew old hddRemove old hddInsert new hddScrew it inReattach batteryScrew on back of MacBoot up for the first time takes slightly longer, don’t panic.
R**N
Good quality and quick install
Was very straight forward installaion have been using everyday for last 4 months and no issues
A**R
Great product and reasonably easy to install!
It took a couple of attempts to install, but probably due to my lack of experience. But it was really easy to do and increased my MB Air from 125gb up to 960gb! Phenomenal!!
M**D
Amazon replaced the first one after 10 months.. Great customer service Amazon
After some strange software update issues the first fish drive failed. Thank goodness for TIME MACHINE. On this replacement device I was able to recreate the MAC as it was a few days before, only lost files a couple of files that were easy to recreate. Occasionally electronics fail, that's life, Amazon were very helpful and stepped up to the plate on this replacing without issues, 960GB this has extended the life of my 512GB 2014 MACBOOK PRO as I needed more disc space for virtual machines. Shame things are not as easy on the newer USB-C based MACBOOKs
P**H
Made upgrading my Mac Mini late 2014 from 256 to 500GB easy.
Using this upgrade kit with Carbon Clone Copier Software (not included) made upgrading the SSD in my MacMini (late 2014) easy. The end to end process takes about an hour and a half. I bought it with the enclosure which simplifies the clone process and means you can use the old 256GB in the enclosure for plug in storage. The enclosure has the old squarish thunderbolt connections so you would be limited to certain older apple models. There are loads of videos online to explain the process of physically swapping out the drive and in the case of an SSD in the Mac Mini late 2014 model, its easy. The kit even has the required screwdrivers. Check that the existing drive in the Mac Mini is an SSD because they were sold with SSD's, HDD's, and fusion drives. All can be upgraded but you may need additional parts if say upgrading a HDD model with an SSD. In this case I believe and new cable connection is required. The information is out there and Google is your best friend. Little pricey but this is Apple.
G**K
Up and running pretty quickly
Used to upgrade an early 2015 13” Macbook pro. Transcend instructions are wrong in the box, but theres an easy way to get going if, like me, you're upgrading your old ssd and just want to keep everything as it was but change the disks out.Always a good idea to make a backup first if you can.Connect the new 855 disk via thunderbolt. Boot the macbook into recovery mode (press and hold Cmd+R when you hear the chime on boot)In recovery mode goto disk utility - select the new disk, click “restore”, choose to restore from your existing internal drive, choose start. When complete swap the SSDs over and you're good :)Probably took just over 30 mins for me and an original 240gb drive.Performance pic attached, pretty happy so far. Just waiting to check all is good after a week or so the. Will repurpose the old disk!
Trustpilot
1 week ago
5 days ago
1 day ago
2 days ago


![NinjaBatt Battery A1466 A1496 Compatible with Apple MacBook Air 13 Inch [2010 2011 2012 2013 2014 2015 2016 2017 Years] A1369 A1405 A1377 - High Performance [7200mAh/55Wh/7.6V]](https://images-eu.ssl-images-amazon.com/images/I/71Wx2rVsaYL._AC_UL116_SR116,116_.jpg)