✨ Transform your space with style and function!
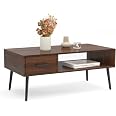
The Walker Edison Saxon Modern Glass Shelf TV Stand is a stylish and functional piece designed for TVs up to 58 inches. Crafted from engineered wood with a dark walnut finish, it features adjustable shelves, ample storage, and effective cable management, making it the perfect addition to any modern living room.


| Item Weight | 65 Pounds |
| Size | 52 Inch |
| Item Dimensions D x W x H | 16"D x 52"W x 24"H |
| Door Style | Slab |
| Item Shape | Rectangular |
| Finish Types | Engineered Wood |
| Style Name | 52 Inch |
| Color | Dark Walnut |
| Frame Material Type | Engineered Wood |
| Back Material Type | unspecified |
| Top Material Type | Engineered Wood |
| Material Type | Wood, Glass, Metal |
| Required Assembly | Yes |
| Mount Type | Freestanding |
| Base Type | Legs |
| Is Customizable? | No |
| Lock Type | Cam And Bolt Lock |
| Is Electric | No |
| Number of Levels | 2 |
| Number of Doors | 2 |
| Number Of Shelves | 2 |
| Number of Pieces | 1 |
| Additional Features | Storage |
| Mounting Type | Floor Mount |
| Weight Capacity Maximum | 250 Pounds |
T**Y
Instructions for perfectly level and even cabinet doors, great value
This is a professional looking product 10x higher quality than ikea for the same price. I’m happy with my purchase and trust this seller as their matching coffee table looks amazing and has held up in perfect condition for years.That being said, if you’re a perfectionist like me and can’t stand uneven cabinet doors or unintentional asymmetry, follow these helpful tips to ensure everything is perfectly even and professional looking.1. For step 9, the base of each side of the magnetic stopper that holds the cabinet door shut needs to be exactly 1 inch away from the edge of the front of the cabinet to be perfectly level.2. If you do not tighten the screws all the way during step 9 for the magnetic door stopper, you will need a short Philips head screw driver to tighten the screws as a final step. 6” or 7” long screwdrivers should work.3. For both steps that you attach the metal hinge piece to the cabinet door as shown in my picture labeled step 9, the end of the flat side (middle of the hinge) needs to be between 3/32nd of an inch or 1/8th of an inch away from the back edge of the actual cabinet door. The instruction manual doesn’t give a close up and if you line the end of the hinge up with the edge of the cabinet door and screw it in, it will scrape against the body of the cabinet whenever you open or shut the cabinet door.4. For step 14 (attaching cabinet doors to the body), ignore the instructions and complete the 2nd step prior to the first step. Trust me, it’s much easier.These are all the tips and tricks I wish I had while assembling and mine would have looked professionally made (it’s very close, I need to make a few tightens after buying a shorter screw driver). All in all, for the price this thing looks amazing and I anticipate it lasting for years. I’ve had the matching glass acorn coffee table for a few years from this company a few years ago and it’s still in excellent shape and matches the TV stand perfectly.Especially if you have a 50” or bigger TV, I highly recommend buying this TV stand as the height is ergonomic too. Lastly, this seller is also very responsive and willing to help with any questions which I appreciated.
D**E
Pleasantly surprised by the quality for the price
We love the look of Mid-Century Modern design, and felt these cabinets fit in well with our other furniture. After finding them on Overstock, I searched Amazon and they offered the same cabinets (under a different name) at a lower price, so I ordered 2 cabinets here. They arrived in about 4-5 days. Packed very well, so nothing was damaged. The shipped boxes are HEAVY, because no part of these cabinets are flimsy, which is good. You just may want/need someone to assist you with bringing the box into the house.I built the first one myself, all except for getting the door on. I think the door part is a 2 person job (one person needs to hold the door in position while the other handles screwing it on). Note on the door, you can't switch which side it's on. Just wanted to mentioned because my husband asked me about that while we were putting together the second cabinet. I mean, I guess you *could* change the side if you wanted to drill all new holes on the other side, but the pre-drilled holes for everything are only on the left for the door.For the price (I paid $120 per cabinet, I think the price may be a tad lower now) I was pretty much expecting Ikea or China quality, but nope. I was really impressed, while putting it together, by how solid and well made it actually is. All the screw holes are where they should be. No missing parts. Instructions are clear and easy to understand.I've seen this cabinet description mention it being a TV stand. I'm not using it in that way, but should mention that it does comes with some additional hardware to secure it to a wall. I didn't do this, but it's in there if you might need it.The cabinets do hold a decent amount stuff. If you're on the fence wondering about how sturdy this cabinet might be, it is a solid piece of furniture that looks more expensive than it is. I really love the cabinets and am glad I ordered them. I ordered the Dark Walnut, but I believe it also comes in a gray finish.
E**Y
Lovely, but frustrating to assemble
Pros+ Assembly was straight-forward and relatively quick, and as long as you have enough space to maneuver the console around is a single person job+ Spare parts!+ Looks great, and feels pretty sturdy+ Fifth leg in the center will prevent the sag that particle board tends to get when loaded+ The clips you install after putting the top make the back inserts feel a lot sturdier+ Well packed - a lot of the contents were foam and padding to protect the contentsCons- None of the screw holes were piloted - if you don't have hefty enough screw driver to start them, you're going to have a bad time.- The instructions should be treated as a guide rather than the explicit order you should follow - as is, you're going to be fighting some tight spaces.Tips:+ Attach the door before mounting the walls. There's not really enough room if you do it after the walls and top are attached+ Put the feet on after attaching the walls - four of the six bolts you need to drive in are close to the feet and it'd have been much simpler to attach them without having to reseat the wrench constantly+ If you are gentle, it'd significantly speed up assembly of this to use a low-speed power driver - it'd have certainly made the 20 something screws easier to install, and if you have a long enough hex key for the bolts, it'd make this a breeze.I went slow and it took about 90 minutes to assemble, most of which was me cursing the screws while installing the hinges. I ended up needing three screwdrivers - one larger phillips for the hinge screws, a smaller phillips to start the clip screws, and a slotted driver to finish them because my particular phillips was skipping and might have stripped the screws. Your mileage may vary - this was an issue with the tools available to me.
C**E
Classy
This is great looking, a perfect size and functionality, and was easy to assemble. Looks stunning in our house.
Trustpilot
2 weeks ago
3 days ago