Desertcart purchases this item on your behalf and handles shipping, customs, and support to Greece.
✨ Fix chips & cracks like a pro—fast, flawless, and fade-proof! 🔥
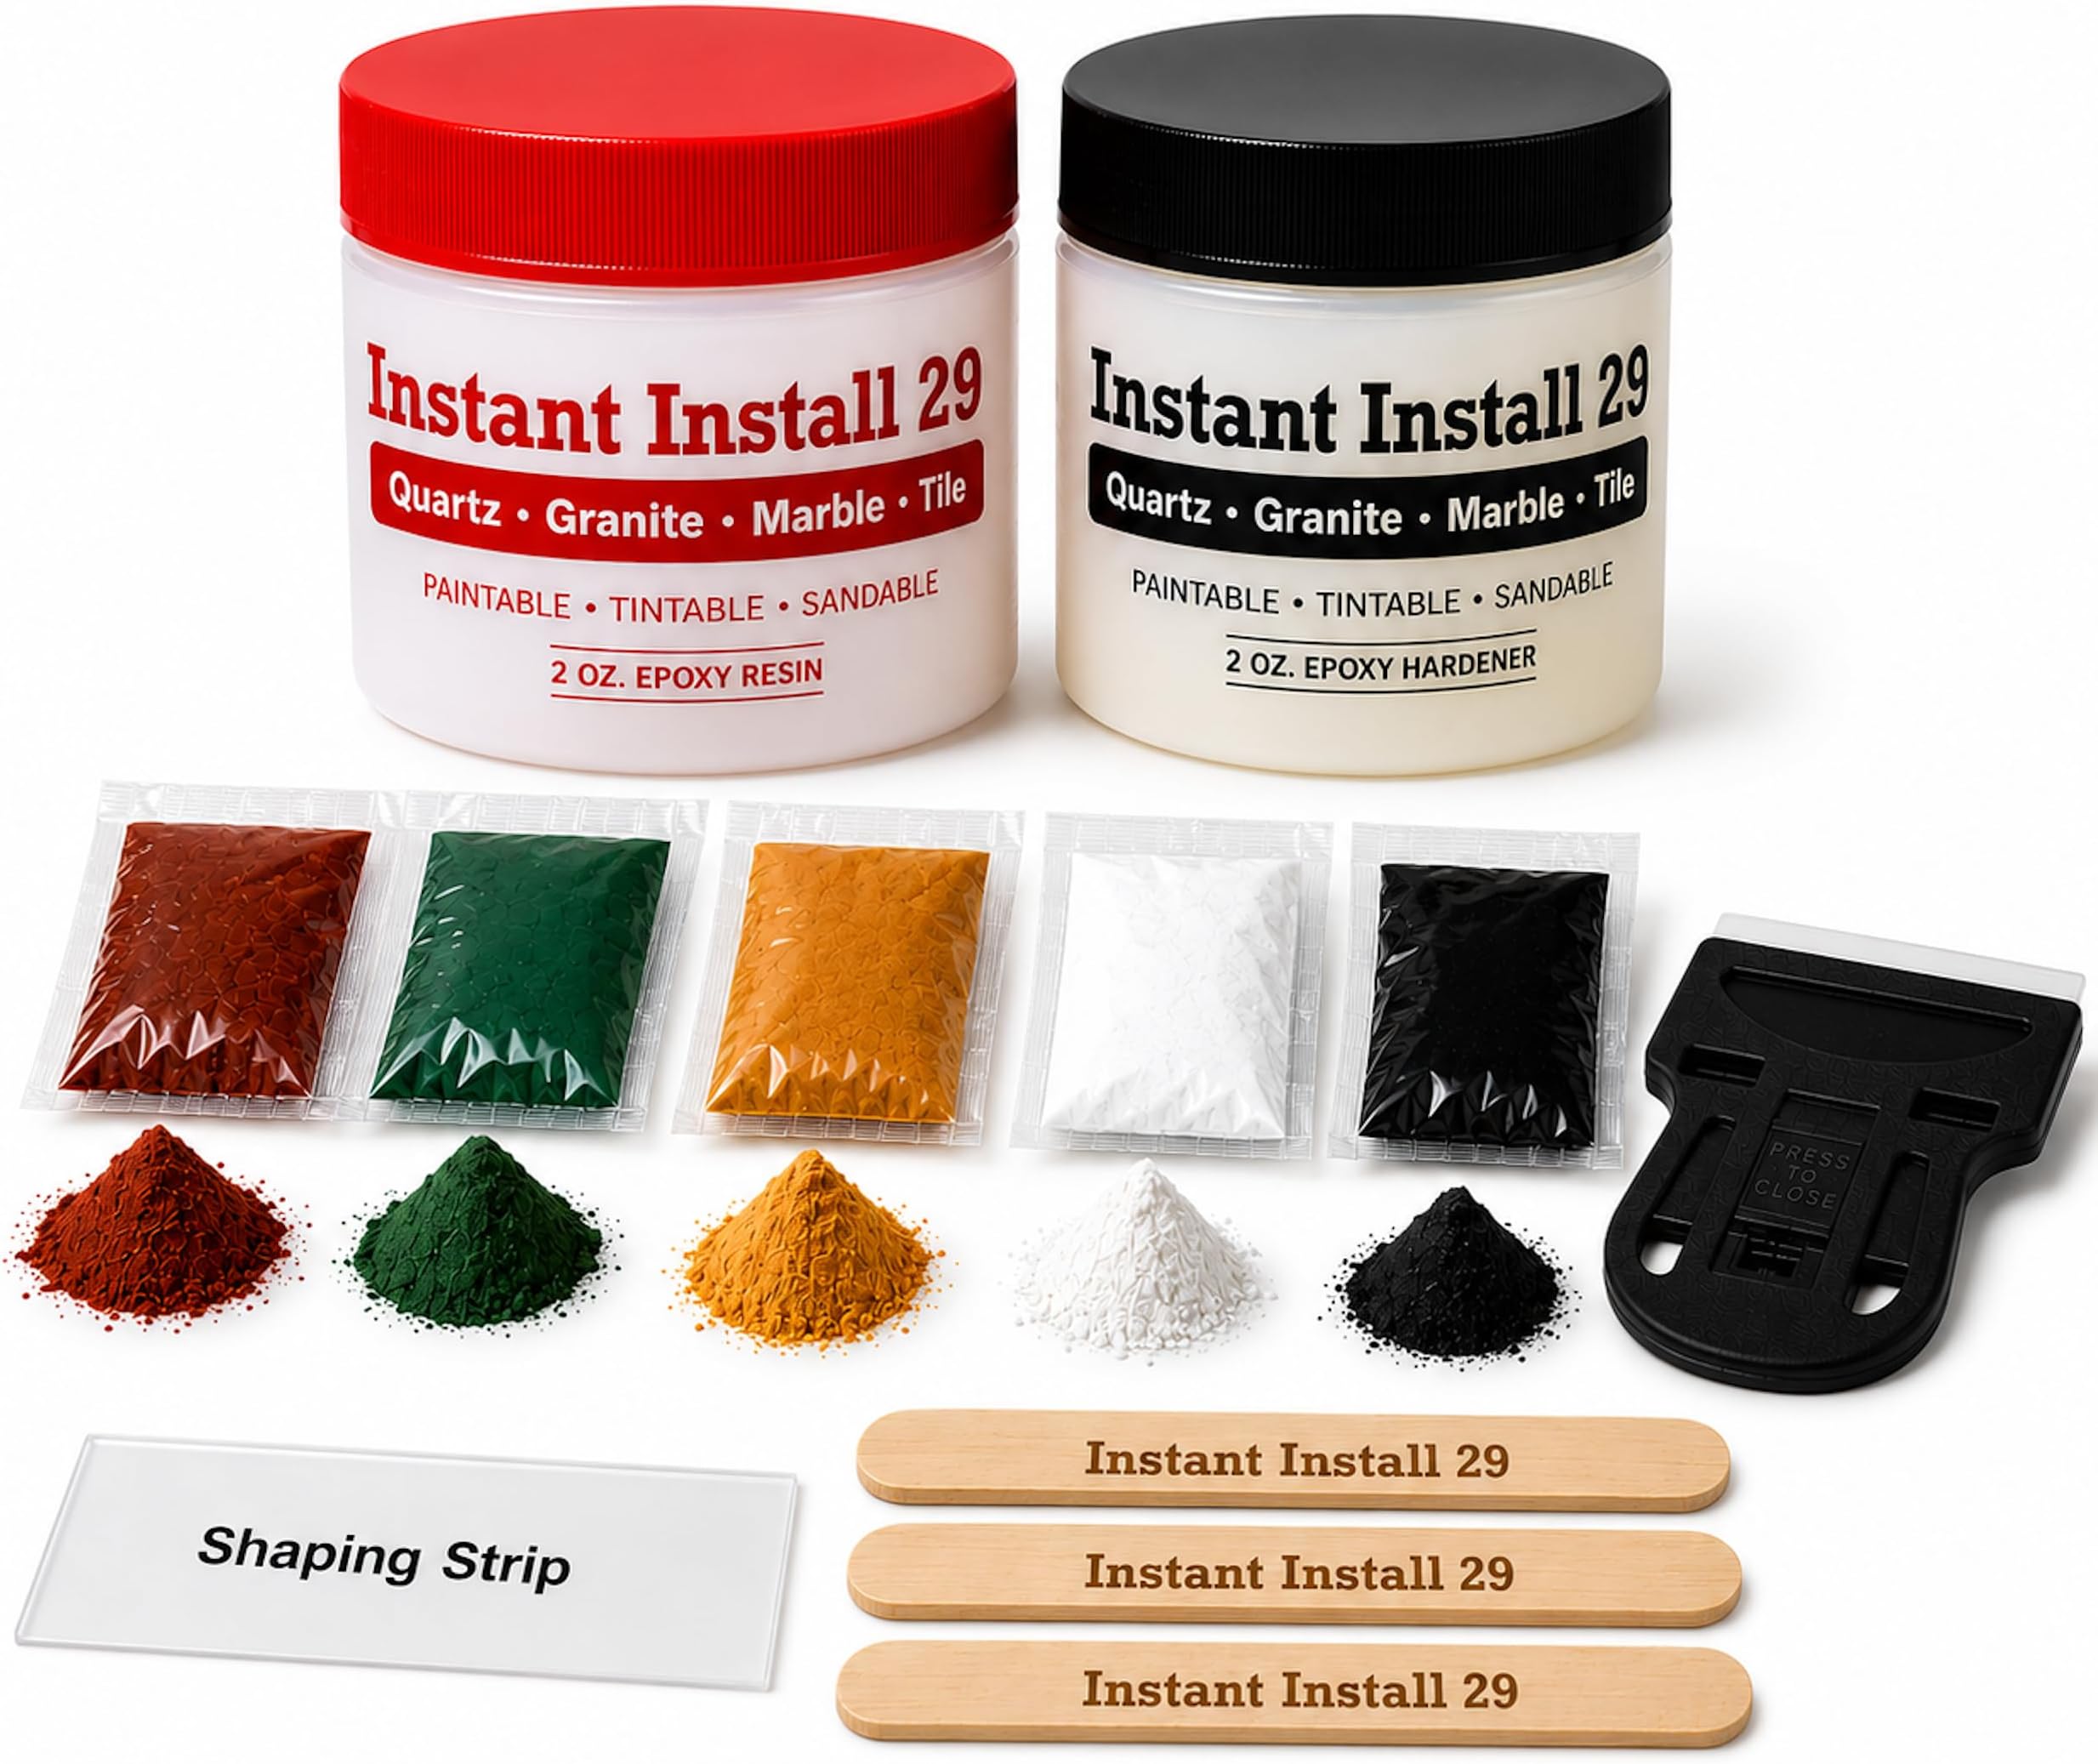
The II29 Complete 4 oz. Stone Kit is a professional-grade epoxy resin repair system designed for all types of countertops including granite, marble, quartz, and wood. Featuring a rapid 29-minute cure time, EZ-Tint pigments for precise color matching, and a super strong bond, it enables quick, mess-free, and durable repairs without sanding or taping. Ideal for DIYers seeking flawless, long-lasting countertop restoration with minimal effort.


| ASIN | B0D9PJSNWX |
| Best Sellers Rank | #4,884 in Industrial & Scientific ( See Top 100 in Industrial & Scientific ) #11 in Tile Epoxy Adhesives |
| Brand | Epox-Sci |
| Brand Name | Epox-Sci |
| Color | Translucent |
| Container Type | Bottle |
| Customer Reviews | 4.3 out of 5 stars 2,080 Reviews |
| Global Trade Identification Number | 00198715540024 |
| Included Components | Resin; Hardener; EZ-Tint Pigments; Shaping Strip; Mixing Sticks; Razor |
| Item Package Quantity | 1 |
| Item Volume | 4 fluid ounces |
| Manufacturer | Epox-Sci Inc. |
| Material | Epoxy Resin , Resin |
| Material Type | Epoxy Resin, Resin |
| Model | Instant Install 29 - 4 Ounce Complete |
| Package Information | Bottle |
| Part Number | FBA_112920k_Complete_4oz_10g_5-Pack |
| Unit Count | 4 Ounce |
| Volume | 4 fluid ounces |
C**W
This stuff works
I'm surprised there are so many negative reviews - this stuff is insanely good. There were two giant chunks of countertop broken when I bought my house. The previous owner was a terrible DIYer, and used silicone to glue them back in. They were near the sink, and eventually lost their adhesion and worked their way loose. Now, I am also a DIYer, and have never even attempted anything like this before, but I at least do my due diligence enough to have found this product (and to know not to use silicone to repair granite!). You can see the before and after in my pics, and the after came out way better than even I could have hoped. Even in person it's barely noticeable, you have to really, really look. And part of the repair included building up a missing chunk, so you know this is pretty incredible stuff. Here are my tips.. Buy a bunch of small samples to test your countertop color, I just searched "Mica Powder for Epoxy Resin" and a ton of options came up. This set of 24 had the color "Black Sea" that matched my green countertop almost perfectly: https://www.amazon.com/gp/product/B0759DH4ZG. I bought a few others and just returned the ones that didn't look right in person - it's sometimes hard to tell from a screen. The nice thing is that these little packs go a long way - you really don't need a lot of pigment at all to get your color. I still have about 95% of the color packet left over after my repair. Use more than one color; I marbled mine with a black dye that I had on hand. Clean your working area thoroughly, I used TSP, and test fit the pieces before you install them. Seem obvious, but still needs to be said. Test test test. I can't stress this one enough. It will help you get color and the mixture right, and give you more confidence working with it. Because it hardens so quickly, it really doesn't add on much time to do a few tests to get your color and consistency right. And it will give you a feel for your timing. I used my Echo to set a 1 minute timer to mix, a 5 minute working time, and then another 5 minute second-half working timer as a sort of warning to myself - and I could feel it start to get harder towards the end to the point where it becomes unworkable. Then just clean up the excess, mask it up with Frog tape, and leave it for the remaining time. Don't let it over-dry! I did that the first time and it got too hard - it flaked off with the razor instead of easily peeling off, and it pulled out the repair from my crevices. I found just following their directions exactly produced the best results (go figure). And don't be afraid to mess up. I tested it out a few times on some smaller less noticeable areas of my sink and found the color wasn't right, or the repair had other issues. I worked those out in the smaller places before tackling the big repair. I ended up pulling some of those out, it's pretty forgiving stuff until it really cures. Also, it seems to work better on deeper cracks where it has something to bite into. Go slow and steady with the razor when you're done, and if you mess it up, it's fine. You can just rebuild. I had to rebuild the small missing gap a few times before I finally got it to where I was satisfied. I know it seems like all this testing takes forever, but trust me it doesn't. I was done in an hour or so, and couldn't be happier. The end result far exceeded any expectations I had going into this, but I followed the directions exactly, did my research, experimented, and took my time on the final repair. If I can do it, literally anyone can. This stuff works.
W**Y
Worked very well!
I had a chip on the edge of my black granite countertop. I was very apprehensive about using the product, but to my surprise it was not difficult, and the result was amazing! Color matching was easy, cleanup was easy. It helped that I watched some videos online. When it first dried, I thought it was going to stay "rubbery" but the next morning the filler had hardened, and I was able to lightly sand it to match the original finish. No one but I would ever know the chip was there. I am extremely pleased with the result. This saved me a couple hundred dollars from having the granite people out to repair it.
A**R
Almost everything I’d hoped for.
Product was very thick and a little tough to mix, which was kind of nice because we were using this to repair a seam in a reused granite countertop after updating our kitchen. It was thick enough that it didn’t drip through the seam and instead had to be pushed into. During removal of our granite, we had chipped a large piece off at the seam (shown in pictures). We were very happy with how this product filled both the seam and allowed us to reattach the chipped piece of granite. However, we did also have a small hairline crack of which we applied the product and did not get the intended result there. Once dried, we scraped with a razor and all of the product came out of the hairline crack. Overall, I’m happy with the larger seam and countertop repair so I’m giving the product 4 stars. Please check out the pictures to see how it turned out. Some observations: it hardens pretty fast. The longer you wait, the tougher it might be to scrape off. Make sure you’re using a new razor. And if you’re using this on countertops, consider trimming with painters tape. For our larger seam, this made the scraping process so much easier.
L**H
Excellent 2 part Epoxy for Stone, Ceramic , porcelain and stone counter tops repairs
I purchased this epoxy product back in April 2022 and again in Dec 2022. Worked great both times. Highly recommend! The first repair was to "clear" fill a crack in a marble floor where the slab under neath cracked. Next job was to filled travertine holes to keep dirt from accumulating. Note the cracks and holes must be completely free of dirt, oil, wax and water. The clear epoxy picks up the color of the marble and travertine and is almost invisible, matching the stone filler used by the factory. The Dec Job was to fill small chips 1/8" to 1/4" in a ceramic tile. The tile was a beige with brown/gray streaks. Since the chipped holes reveled the red/dark brow tile, the color needed to be matched. ordered the EZ-Tint 4 Pack color power pack recommended by the seller to mix with the epoxy. Unfortunately, I could not find a combination with these four color tints to match the tile. I went against the sellers recommendation no to use liquid tints. I bought a liquid tint specifically for epoxy gel coats ( Fasco Epoxies-Beige Pigment for Epoxy Resin, Gelcoat, Paint - 4 oz). To that I added Brown and Black EZ-Tint 4 Pack color power to get the shade I wanted. The critical thinag I learned by experimentation is the liquid color must be mixed into the "RED" Instant 29 material before mixing in the "Black" Instant 29 or the epoxy does not harden. Use only a small amount og liquid colorant to not screw up the epoxy. Note: any moisture, even high humidity prevents or inhibits epoxy from curing properly. I like to clean with MEK. Besides the razor for scraping excess, MEK can remove thin epoxy film in the first hour or two. Always work with small batches. Starts to gum/harden in about 15 minutes at 70F. Do not use gummy epoxy-it wont adhere and smooth properly. If you screw up use MEK to remove the epoxy before it cures. By the way MEK fumes are nasty. I suspect that those buyers who rated the product as poor may not have properly prepared the surface (i.e sand the underlying gel coat or fiberglass on their boat) or had too high of a moisture content on the part or in the air. While the manufacturer did not specify a minimum working temperature, I suggest you have the part you are repairing and air temperature above 60F. A lower temperature may not cause the necessary chemical reaction to harden the epoxy. Follow the instructions for best results.
J**N
Works as promised!
Recently I found several chips where you come out of the shower/threshold and a friend found this for me and said let’s try this versus replacing a whole piece of granite. It worked amazingly well and has held up like a champ. You have to move fast as it dries fairly quickly and you can mix multiple color options as well. It is really amazing epoxy. You won’t be disappointed. I was expecting the worst but received the best!
H**E
FAIL. Not for shower and not for tavernine
Tavertine stone in my shower holes appeared after the manufactured "fill ins" fall off. Stone starts to fall apart bit by bit if you don't use a sealer often. I thought this was good to try, but nope! I've worked with several epoxy consistencies. This "knife grade" is not any better than the regular 2 part clear epoxy mix. If you need to experiment with a little, home improvement stores sell them in a package with 2 syringes. 1) The epoxy drops, leaks, weeps, drools... if you have big holes or gaps to fill (~1/2 in. Circumference or more), you'll have to sit there and keep moving it back in place with a putty knife until it sets. Unless you can rip the tiles off your walls and have set level flat on the floor😆. Eventually it set enough to fill the hole, but you have to really set it at the exact 20 second window to do this. From mixing 30ml of the 2 parts, it took somewhere within 1.5-3 minutes. 2) after the 20 second moldability period is over, the rest of the product is worthless. It is already set in the container you have it mixed in. 3) sand surface before applying. You will most likely need to sand the epoxy after it dries. It will not be flush when applying on a wall or ceiling. 4) not for high moisture environments. Although I had sealed my travertine lightly before the epoxy and well after, the epoxy falls off after a few weeks of shower use. If your epoxy layer is about 1 cm or thinner, it will eventually bubble up and fall off. Peels off like a vinyl sheet against a wall. The deeper holes or thicker areas of epoxy fall off after a month. Grout was more efficient in my case.
M**N
Useful stone-repair product
My home has terrazzo floors that for 20+ years were covered with carpet that was in place when I bought the home. I decided to go back to the terrazzo and up the carpet came. I was extremely careful removing the tack strips so as not to damage the surface. However, to my dismay, I found a number of large and deep (1" X 1/2" or so) chunks missing in the doorways. All I can imagine is that at some earlier time someone had pulled out threshold nails and really done some serious damage. Next step? Call a couple of terrazzo repair/refinishing companies to get quotes. Following step? Bathe my face in cool water after reading the quotes. Both companies wanted upwards of $500 for the repairs. Further, they would not guarantee the color match. Third step? Google on terrazzo DIY. I found very little of use. The most amusing recommendation was to fill the holes with concrete and paint faux terrazzo stones on the surface with acrylic paint. Yeah, like that was going to work right in a doorway. I found several stone repair kits online but all were intended for marble or granite with minor chips, scratches, gouges, and open seams. They weren't cheap and the amount of material they included was so small that I'd have to have bought a dozen or so of them. Then I located this "29 Minute Epoxy." It was available as the bulk product or in a little kit containing a few tongue blades, some vinyl gloves, and some razor blades. Those cheap little items greatly increased the price and I had them at home, anyway, so I just bought the jars of resin and hardener. In one afternoon, I repaired all the holes. I must say that the repairs are not invisible if one goes looking for them but they are 99% improved compared to where I began. Here's my advice if you want to try this: First, clean the holes very, very thoroughly. They are likely to be black with accumulated dirt and grime. Use hot, soapy water and a toothbrush. You may need to use a dental pick or something of that sort to get out the tenacious bits, then back to the toothbrush. When you have removed all the dirt that will come out, swab the inside of the hole with undiluted household bleach. This will decolorize stains that are organic in nature. Dry the holes thoroughly with a heat gun or a hair dryer. This will leave you with holes that are the color of the concrete (or epoxy, if yours is a newer floor) with bits of the color chips visible. This cleaning process is the most tedious and time-consuming part of the job. Second, Put on disposable gloves and mix the resin and hardener in equal parts in a small paper cup. I used plastic spoons to remove the material from the jars. Be careful to use two spoons and don't get them mixed up. Mix the two parts VERY thoroughly. Unmixed bits will not harden but will leave you with a sticky mess. Fill the holes, leaving a slight excess so that the mass of the epoxy is a bit above the surface. Resist the temptation to use a putty knife or some such to level it off. Now go read a book or watch a football game for half an hour. When you return, the epoxy will be hard. It is clear and you will be able to see the concrete and stone bits through the mass of material. Last step, using a single-edge razor blade held perpendicular to the surface, SCRAPE the epoxy down until it is flush with the surface. Do not try to save time by attempting to shave or plane it off with the blade. Just patiently scrape until you have a flush, perfectly smooth finish. You're done. If you finish your floor to a high polish, you will want to buff the surface of the patch with some very fine steel wool before applying the floor finish. If you do not go for the mirrored floor look, then look across the patch so that light reflects off the floor and buff with steel wool until the surface of the patch matches the surface of the floor. Let me repeat, this will not be a perfect repair. You'll be surprised, however, at how well the concrete showing through the transparent epoxy fools the eye. In my case, it cost me less than one tenth the price of the not-guaranteed professional repair. This is a quality product, easy to use and does just what the manufacturer claims. Highly recommended. Next
M**Y
The seller should inspect their inventory and discard dried-out epoxy resin.
When first opening the black colored epoxy component lid it appeared the product had prematurely dried. Although the black lid was tight and the two-part epoxy package was shrink-wrapped, the epoxy had dried out at approximately 20% of the material near the top of the container. Fortunately, I was able to puncture through the cured material to access the unharmed product below. On the other hand, the epoxy material in the red lid container had not dried out. The product worked great but I was unable to use 20% of the material purchased, and it was quite expensive.
Trustpilot
2 weeks ago
4 days ago