Desertcart purchases this item on your behalf and handles shipping, customs, and support to Greece.
🌟 Build Bold, Cool Quietly, and Glow Brighter!
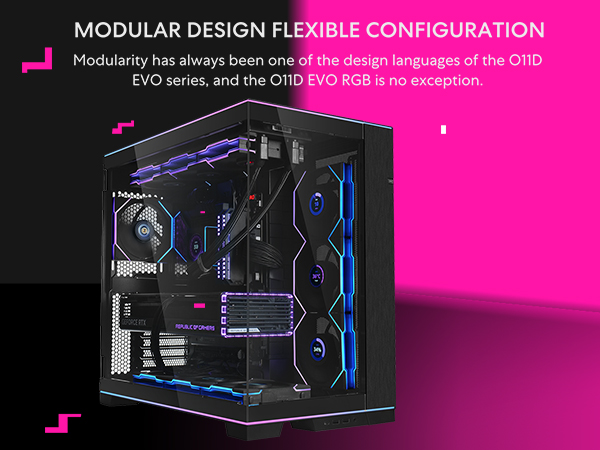
The Lian Li O11D EVO RGB is a premium E-ATX dual chamber gaming case featuring expansive 455.7mm GPU clearance, dual L-shaped ARGB lighting strips, and support for up to a 420mm radiator. Its reversible chassis and adjustable motherboard height offer versatile build options, while advanced cable management tools and tempered glass panels deliver a sleek, clean, and visually stunning setup. Designed for enthusiasts who demand both performance and style, this case ensures superior airflow, silent operation, and a jaw-dropping showcase for your components.


| ASIN | B0CRKVN35N |
| Antenna Location | Gaming |
| Best Sellers Rank | #16 in Computer Cases |
| Brand | Lian Li |
| Case Type | Mid Tower |
| Color | Black |
| Compatible Devices | Extended ATX motherboards |
| Cooling Method | Air |
| Customer Reviews | 4.7 out of 5 stars 426 Reviews |
| Enclosure Material | Tempered Glass |
| Fan Size | 140 Millimeters |
| Hard Disk Form Factor | 3.5 Inches |
| Internal Bays Quantity | 2 |
| Item Dimensions D x W x H | 18.82"D x 18.55"W x 11.42"H |
| Item Weight | 32.63 Pounds |
| Manufacturer | LIAN LI |
| Material | Tempered Glass |
| Mfr Part Number | O11DERGBX.US |
| Model Name | O11D EVO RGB |
| Model Number | O11DERGBX.US |
| Motherboard Compatability | Extended ATX |
| Number of Fans | 2 |
| Other Special Features of the Product | RGB Lighting |
| Power Supply Mounting Type | Rear Mount |
| Recommended Uses For Product | Gaming |
| Supported Motherboard | Extended ATX |
| Total Expansion Slots Quantity | 7 |
| Total USB 2.0 Ports | 2 |
| Total USB 3.0 Ports | 2 |
| Total Usb Ports | 4 |
| UPC | 840353045071 |
| Warranty Description | 1 year |
J**S
Easy to build in; amazing airflow and surprisingly durable
This case made building my PC honestly enjoyable. Ease of installation is top-tier; plenty of room to work with, even for a large E-ATX board. Cable management channels and tie points are super well thought out, so everything stays clean. It supports a ton of fans — I’m running 9 total (Fan capacity is excellent) and still have space for a thick radiator. With all that airflow, cooling has been outstanding. My temps dropped compared to my last case even under full load. The tempered glass panels make the setup look gorgeous, and despite my doubts, they’re surprisingly scratch-resistant. I’ve moved it around a couple times already and no marks so far. Ease of cleaning is also a win. The dust filters come off easily and the internal layout doesn’t trap debris in weird corners. For power supply, there’s lots of space in the bottom chamber and even with a large 850W PSU, everything fits without stress. Highly recommend this if you're into clean builds and airflow-focused setups; it’s just a really well-engineered case all around.
F**S
Just get the O11 that speaks to you! You'll love it as I do!
This case is, by far, one of the best cases I've ever had the pleasure of building a system with. Its dual chamber design makes an easy job of cable management and creating a supremely clean build. It has ample airflow options, ample mounting options for virtually everything and it is STUNNING to see in person filled with RGB fans and gizmos! One thing that surprised me is the fan noise. It's basically silent. Just to test, I set every fan and the pump to 100% and it's... silent. It does a great job at silencing the fans. I currently have all 120mm fans, but I will be swapping out the bottom intake fans to the 140mm size at some point for the additional airflow they can provide at slower RPMs, but even if you use all 120mm fans like I did, you just won't hear them. The built-in RGB light strips on the top and bottom of the O11D-Evo look exceptional if you're going for that Flashy, Ritzy build, too! My only question is... Why couldn't we have had this case 25 years ago? THIS is the future of PC cases. Whether you're someone that wants to build a clean, modern, blacked out look with no lights or you're someone that wants all the flash you can possibly cram into a PC case... This is what you're looking for. Do be aware, however, that there are *ZERO* external bays. You won't be putting an internal CD/DVD/Blu-Ray drive or anything else that requires an external 3.5" or 5.25" bay. This case just doesn't have it... But let's all be honest here, who uses those these days? I've been building PCs since the late 1980's and in the past 10 years, I haven't had the need of an external drive bay for ANYTHING. Get this case. Or ANY of the Lian Li O11 cases. You won't be dissatisfied. You will, however, be absolutely amazed by the time you build your system! The options for mounting fans and radiators for water cooling is ample and the wide open view of your internals, especially loaded with RGB "things" is just jaw dropping! These are beautiful cases and an absolute JOY to build with!
T**.
amazing case great space, cable management, and airflow
I recently purchased the Lian Li O11D EVO RGB (ASIN B0CRKVN35N), and overall, it’s an impressive case with a lot to offer — spacious, clean, well-designed, and excellent for airflow. However, there is one major fitment issue that buyers should know about, especially if you plan on installing a 2.5″ SSD behind the motherboard tray. The Good Let’s start with the positives, because there are many. The space inside the case is outstanding. The dual-chamber layout gives you plenty of room to work comfortably, mount radiators, and route cables without feeling cramped. I installed a large GPU and a 360 mm AIO with zero problems, and there’s still room for future upgrades. Cable management is one of the strongest aspects of this case. Lian Li clearly put a lot of thought into the backside compartment. There are channels, Velcro straps, tie-down points, and wide routing gaps that make it extremely easy to build cleanly. Even with a fully modular PSU and multiple accessories, I ended up with a surprisingly tidy backside. Airflow, as expected from the O11 line, is excellent. With support for large radiators and plenty of fan mounting locations, I had no trouble achieving a cool and quiet setup. The tempered-glass front and side panels look premium without suffocating airflow, thanks to the well-designed ventilation paths. Everything about the design feels modern and intentional. The Issue: Back Panel Does Not Sit Right With SSD Installed Now for the problem — and unfortunately, it’s a pretty frustrating one. When mounting a 2.5″ SSD behind the motherboard tray, the case includes rubber stoppers that must be attached directly to the SSD using screws. These stoppers are meant to act as cushions so the back panel can rest against them without stressing the drive. However, once these rubber stoppers are installed, the back panel’s top nubs — the latch points that are supposed to hook into the frame — cannot fully engage. The SSD plus the rubber stoppers push the panel outward just enough that the top corners refuse to seat properly. You can press the panel in, but the nubs won’t catch, leaving the panel slightly proud and preventing it from locking flush like it should. This isn’t a minor cosmetic issue — if the panel can’t latch, it can’t fully secure. I spent a good amount of time repositioning cables and rechecking the SSD mounting, but the clearance issue seems unavoidable. Without the SSD, the panel fits perfectly. With the SSD and rubber stoppers installed (as designed), it simply doesn’t. Final Thoughts This is an amazing case overall: fantastic space, great airflow, premium materials, and some of the best cable management you’ll find at this price point. But the back panel does not sit right when the SSD is installed with the screw-mounted rubber stoppers, and the top panel nubs cannot latch into the frame, which is disappointing for an otherwise premium chassis.
L**C
Stunning, versatile chassis for serious builders
I recently upgraded to the Lian Li O11D EVO RGB in white, and it’s been an absolute dream to build in and live with. 💡 Aesthetics & Build Quality The EVO’s sleek tempered glass front and side panels—complete with addressable RGB lighting—make it look phenomenal, especially when paired with daisy-chained RGB fans. It really lets your components shine without feeling overdone. 🔧 Build Flexibility & Features This case is incredibly modular. I used the reconfigurable bracket system to build dual workstations in one case (gaming + home office), and it was a snap. The included 90-degree GPU riser, vertical PSU mount, and removable SSD trays make layout options endless. Cable routing is clean and effortless; even in E-ATX mode, it looks neat on day one. 🔥 Cooling & Airflow Between the front-facing mesh, top and bottom ventilation, and room for up to 10 fans or multiple rads, airflow is outstanding. I’ve been running a 360 mm top and 360 mm side radiator setup with zero thermal issues—even with a high-core-count CPU and overclocked GPU. 🔇 Noise The included fan controller helps keep everything running quietly, and the solid build minimizes vibration. I’m getting optimal airflow and great noise control simultaneously. 👎 Minor Quibbles • It’s on the larger side—make sure you have the desk space for it. • Pricier than some mid-towers, but absolutely worth it if you value build quality and expandability. ⸻ Final Verdict: The Lian Li O11D EVO RGB E‑ATX is a top-tier, future-proof case that delivers gorgeous looks, extreme flexibility, excellent cooling, and solid value for premium builders. If you want a case that performs beautifully while looking like a showpiece, this one’s a winner.
G**H
Good Case
Everyone knows it's a good case. Actually, most people know this as one of the best cases available especially for the price range. I can confirm this is an impressive case and would only suggest a few improvements or things to be aware of before buying. The mesh system in the panels will hinder airflow a significant amount. You will need high static pressure fans for the metal mesh areas, such as the side and top. I currently have thermalright argb infinity mirror fans installed and the airflow of the fans themselves is great, but the metal mesh greatly reduces the airflow. Get high static pressure fans. Some Pros: Extreme amounts of configurations. Beautiful argb light strips unique to this model. Comes with awesome accessories case for screws and such, can store all your pc screws, rubber mounts, etc neatly. Comes with graphics card sag support, unfortunately my card is too short for it, sigh. Some Cons: Metal mesh highly reduces airflow, high static pressure fans required for those areas or just deal with it like I did because I want the fans I have and that's that. Cable management is ok, though is reduced because of the side fan intakes. Doesn't come with any fans, which isn't a big deal as people obviously like buying different fans, though it will make the case eventually cost upwards of $250 and a lot higher depending. Summary: I recommend this case. Actually, I give this case an extremely high recommendation. I've never paid so much for a case and I have 0 regrets, kthx. Because of this case, I now have rgb vomit everywhere and it looks pretty cool, I wasn't even planning on so much rgb vomit, but here we are.
J**L
Awesome Case
I love this case. I upgraded to this case from a 5000D. The biggest asset is being able to convert it to a left hand display. Although I wish it was a bit more intuitive and a real left hand display instead of the invert. All in all I still love it my case has stayed extremely cool with my positive air pressure. There is a ton of space inside of the case and wire management is a breeze. I rarely here my fans spin up and it has done an excellent job making the space more RGB immersive
A**X
Amazing Case
This is a great case. It feels sturdy and refined. It’s massive and offers a lot of space for large graphics cards or extra storage. The LEDs look amazing. The case feels ergonomic, enabling future part changes and great options for cable management. The one downside is that its size and weight may limit its usage on smaller desks. Because it is so bulky, it may be cumbersome to move frequently, like if you are in a dorm.
C**P
Good case, "options" very limited with 140mm or >25mm thick fans
Background: I have 3 sets of 140mm fans. The top radiator set come with the LF 3 ARGB AIO for cpu, and are 27MM thick. The others are your standard 25MM thick fans. I have a 420MM LF3 RGB aio. The following is following these specifications. 1) There are not screw holes at the top/bottom of the side panel (which was completely avoidable with a better design), which essentially forces you into either attaching a radiator, or you guessed it, a "UNI" fan where the set of fans connect as one whole. Was this a design choice to push you towards installing LL interlocking fans - I had to wonder. 1.1) Because you are semi-forced to using a chonky uni-fan, you essentially need to install the side fans/radiator before the top or bottom fans. This is because there isn't enough space to get them in afterwards, especially with a 420MM radiator up top. 1.2) You *can not* take the side mounting bracket out, mount your 3x 140mm fans, and put it back in. At least I couldn't. It seemed like there wasn't enough clearance. So this eliminated the ability to use all but one panel position, where the fans are pushed forward through half the rubber grommet-line. This wasn't a big deal considering that probably gives better air flow anyways - having an air pocket behind the fans, but considering the case is marketed on being so modifiable, it really only had the one option. 2) If installing a 420MM radiator on top in a push configuration (at least), you are *forced* to use these included hanging brackets. That's because there's not enough room for the radiator to be flush with the top panel - and for whatever reason, the top panel even elevates above from where it is mounted by two screws to the case. So you are essentially forced into using the bottom motherboard configuration (more on this later for the bottom fan install) because even without using a push-pull configuration, with these brackets you're getting push-pull space eaten up. 2.1) I'm unsure if you could attach a push-pull 3x140mm fan directly to the top panel. Since my extra fans are 27mm thick, I didn't have the right size radiator screws. (I have since ordered some but I'm returning the case). Even if it does work, you'd have to hold the radiator up to the top panel and hope the fans don't come out of alignment while hap-hazardly screwing in radiator screws through the top panel, through the fans, to the radiator. Seems like some innovation here might have been nice to be able to mount to the panel and just drop it in. 2.2) The bigger issue I had was that even though I used the lower MB configuration, getting a 420mm radiator into the top panel was smashing my CPU power cables. I had to use an uncomfortable amount of force, causing a sharp ben in those cables. This may have been made even worse because I mounted the LL Edge PSU to the top position in the back chamber, which eats up the bottom half of the top cable gromets. So, the CPU cables were squeezed into the case, up, and then over the PSU in a double-L shaped bend. 2.3) There is barely *any* space to get up and behind the 420mm radiator and gain access to the grommets in terms of getting cables through (like your RGB 3 pin from your AIO, or your pwm/3pin from your exhaust fan). So really, you have to install your exhaust fan and your AIO. I would have liked to be able to send the cables through there, but had to opt for the side gromets unless I pulled out the AIO radiator, and fed them through first. 3) The bottom 3x140mm fans... They/youtube videos show you examples of 3x120's getting mounted to it and the panel easily sliding back into place. That's not the experience I had with 3x140's. Especially with my MB already mounted. Mind you, I didn't even use thick fans on my bottom intake, just the standard 25mm. 3.1) Installing the 25mm thin fan standard to the bottom panel covers up most of the available gromet in the bottom MB configuration. The panel with the fans mounted on it would not slide into position. My MB has a 6pin gray power socket on the bottom that the fans were running into, even after I pulled out the cables coming from the bottom gromet, which were also pushing against the 140mm fans uncomfortably. I had to slightly bend the motherboard up, and use a slightly uncomfortable amount of force to get the back corner (that sits under the hd audio socket) such that the panel foot wouldn't slide into the free space underneath. This took me an hour to problem solve. I can't believe how little room there was to get the slimmest thickness of fan in there, and how little space that left for cables to get through the gromets, even if the MB was pre-installed in the lower position. It may have been impossible to install thicker fans(which I DID want to test to see if there was any impact on performance) but gave up on after that experience. 4) The back panel. Top mounting my same brand LL Edge PSU at the bottom came into contact with the default cable management/ (LL hub holder?) in the back of the case. So, I installed it where the HDD/SD drives were in the top configuration. This covers up half the gromets in the top of the case on one side, making it difficult to get the PSU and other cables through, especially if you have top fans or heaven forbid, my radiator configuration up top. 4.1) I really don't love the cable management brackets in this case. I've only done one other build but just having small spaces on it where you can feed flexible cable holders is the way it was done better. 4.2) I didn't need the back of the MB cut out using an AMD cpu. I don't know anything about intel cpus or why this is done, but I'm guessing it's for them. I have a magnetic PWM/RGB hub that I wanted to mount, and this basically pushed me into moving my PSU up top so I could use the space below for the hub to latch on to, limiting my options. 5) I like that the buttons are towards the top of the tower, but I'm confused why the input is along the bottom. Is the expectation that you have the case up on a desk? I don't have space for that, so gaining access to the front panel input is me trying to not slide face-first off my rolling feet chair to reach down and plug things in. This is not a great option for a case-on-the-floor or on a roller on the floor configuration. But if you pay a bunch of extra money and do a bunch of extra effort, maybe you can move the IO to the top side of the case? And again I feel like this is a money grab. It should just be up there by default IMO. If you have the buttons up top, you might as well have the input up there, as well because you're admitting that *that* is where things are accessible by having the buttons there. Instead of trying to make people buy an augment for the case, why not just make the default configuration better / standard, and make the augment option for this weird use-case, and be respectful to your consumers? It's disappointing in that it over-sells itself in terms of flexibility and ease of installation and modularity. If you want to use 140mm fans and a 420mm radiator, your options are pretty much just 1 option and there's only 1 good order to install the various elements in the case. I don't think it would have been nearly as difficult if I were installing pure 120's and a 360mm radiator, and a more-standard PSU. But their PSU is same-company so you'd think they'd create things that are friendly with their existing products - idk. Despite this, over all it's a really good case and it gets the job done with slightly above average airflow performance. Not the best or worse. It looks nice and at least the power button is somewhere I can easily access it, and it *can* fit 3 sets of 140MM fans. But there have to be better cases to do what I wanted to do with it. I probably should have just gone with the one I was looking at instead of this for my use-case, but was convinced by a friend I didn't need that much space - well guess what - I kinda did. This was my second build and despite knowing what I was doing, generally, it took at least 50% more time trying to figure out things that shouldn't have been that difficult. What's the value of being able to pull panels in and out if it doesn't even make the process easier. What's the value of being able to move the "front" input around the bottom of the case if the case sits on the floor? Why in the instructions isn't there a differentiation between the top panel 420mm mounting brackets that tell you one needs to go on one side so that you can "slide" it into the top of the case? Final note with the instructions. It seems you saved paper putting key, short notes in every common language on every page next to a picture, usually. But it's really confusing to navigate things that way, looking for tiny legible text next to already-small pictures. It would have been better for the consumer if you had the same information in 3 different quick install instructions. I ended up having to google things to see larger images and information about what the included screws even were, clearly.
B**I
Harika
Müthiş bir ürün. Full lianli kasa yaptım keyifle kullanıyorum.
E**O
enamorado de este gabinete
excelente calidad de materiales, clasico de la marca
A**K
Perfect case
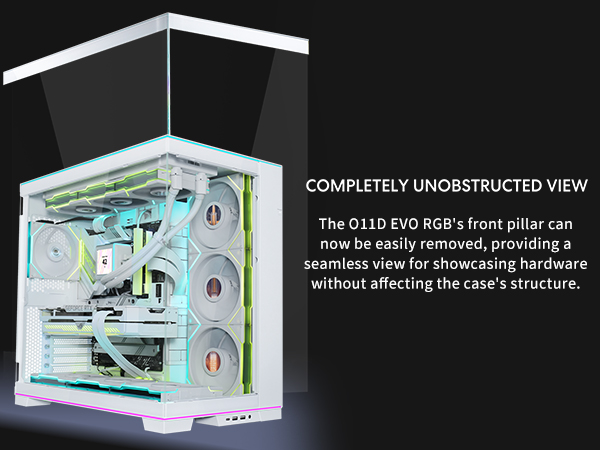
Great looking case. Love the removable support to open up the view. Switched from the older pc011d to this. Has more room and the multiple configurations are amazing. One of my favorite cases I’ve built in yet.
A**5
ممتاز
ممتاز بعد استخدام 6 شهور افضل كيس هو الان شكل
C**A
Perfect size
Perfect size for all 9 fans plus liquid cooler! Great case especially if you go with RBG components, definitely recommend!
Trustpilot
1 month ago
2 weeks ago