


Desertcart purchases this item on your behalf and handles shipping, customs, and support to Greece.
❄️🔥 Elevate your space with silent, smart climate control that works as hard as you do!
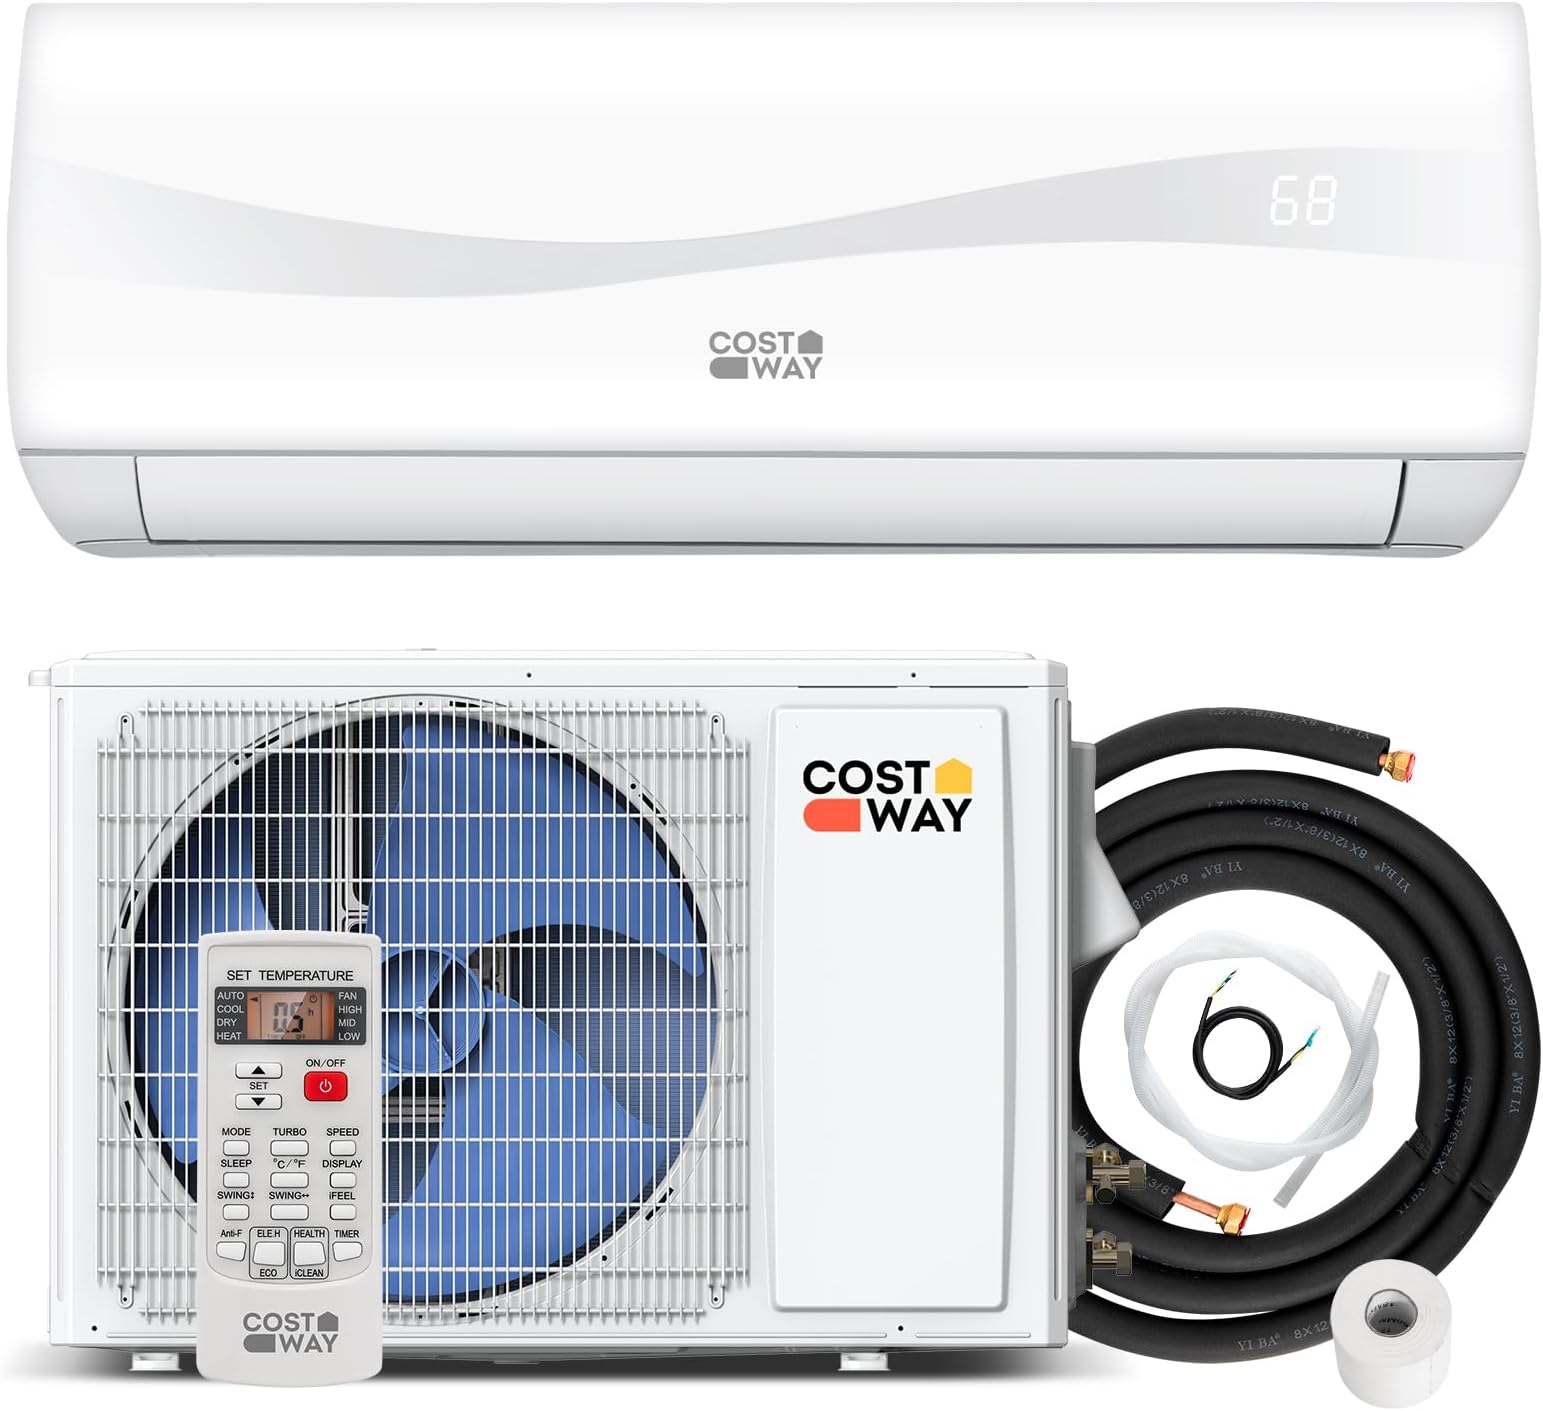
The COSTWAY 24000BTU Mini Split Air Conditioner & Heater is a high-efficiency, AHRI-certified ductless system designed for spaces up to 1500 sq. ft. Featuring a powerful rotary scroll compressor with inverter technology, it delivers quiet (23 dB) and customizable year-round comfort through 5 modes and 4 fan speeds. Its energy-saving design boasts an 18.5 SEER2 rating, self-cleaning function, and washable filter, backed by an industry-leading warranty (8 years compressor, 5 years parts). Perfect for professionals seeking reliable, sleek, and eco-conscious climate control.


| ASIN | B0B536R88B |
| Additional Features | Energy Efficient, Auto Clean, Dehumidifier, Dust Filter, Fast Cooling, Heating And Cooling Function, Inverter Compressor, 4 Way Swing, ECO mode, iFEEL, and turbo function |
| Air Conditioner Application | Residential and Small Commercial |
| Air Flow Efficiency | 0.13 cubic_feet_per_minute_per_watt |
| Annual Energy Consumption | 1970 watts |
| Best Sellers Rank | #28,136 in Home & Kitchen ( See Top 100 in Home & Kitchen ) #6 in Split-System Air Conditioners |
| Brand | COSTWAY |
| Brand Name | COSTWAY |
| Capacity | 2 tons |
| Color | White |
| Compressor Type | rotary_scroll |
| Control Method | Remote |
| Controller Type | Remote Control |
| Cooling Power | 24000 british thermal units |
| Core Material | Aluminium Alloy |
| Customer Reviews | 4.4 out of 5 stars 1,643 Reviews |
| EU Spare Part Availability Duration | 8 years |
| Filter Type | washable filter |
| Floor Area | 1250 square_feet |
| Form Factor | Wall-Mounted |
| Heating Capacity | 24000 BTU |
| Included Components | 1 x Outdoor Unit/ Indoor /8ft Power Line/13ft Copper Connection Pipe - Air Pipe/13ft Copper Connection Pipe - Liquid Pipe /6.5ft Drain Hose /15ft Communication Wires/1 x Remote Control/Tape/Putty/ Wall Sleeve/ User Guide |
| Installation Type | Split System |
| Inverter Type | Has Inverter |
| Item Dimensions D x W x H | 9"D x 44.5"W x 13"H |
| Item Weight | 68 pounds |
| Manufacturer | COSTWAY |
| Model Name | Mini split |
| Model Number | 10153-CYJV |
| Noise | 23 db |
| Number Of Circuits | 1 |
| Number of Heating Elements | 1 |
| Number of Power Levels | 9 |
| Number of Tubes | 2 |
| Operating Mode | Cooling |
| Outdoor Unit Compatibility | Requires New Outdoor Unit |
| Power Source | Corded Electric |
| Product Dimensions | 9"D x 44.5"W x 13"H |
| Refrigerant | R-32 |
| Seasonal Energy Efficiency Ratio (SEER) | 18.5 |
| Special Feature | Energy Efficient, Auto Clean, Dehumidifier, Dust Filter, Fast Cooling, Heating And Cooling Function, Inverter Compressor, 4 Way Swing, ECO mode, iFEEL, and turbo function Special Feature Energy Efficient, Auto Clean, Dehumidifier, Dust Filter, Fast Cooling, Heating And Cooling Function, Inverter Compressor, 4 Way Swing, ECO mode, iFEEL, and turbo function See more |
| Start Year | 2016 |
| Start year | 2016 |
| Voltage | 208 volts_of_alternating_current |
| Warranty Description | 2 years Warranty for compressor and 5 years for parts |
| Warranty Type | Limited |
| Wattage | 1200 watts |
| Window Opening Maximum Height | 13 inches |
| Window Opening Maximum Width | 44.5 inches |
| Window Opening Minimum Height | 9 inches |
| Window Opening Minimum Width | 44.5 inches |
P**N
Absolutely awesome!
This thing is awesome. Unbelievably quiet, I had to walk right up to it to verify it was running. I got it installed in the spring and we had some chilly days yet. The heating function worked great. This will take a nice load off my propane usage. Better yet, we're rolling through our second big heatwave. This unit cools the cabin down quickly and keeps it cool. It has also been very humid and this has pulled the humidity out of the cabin no problem. Cool and dry, it's perfect. Installation is not hard but the manual isn't real clear in some areas. I'd watch some YouTube videos or find someone who has done a mini split before to make sure you get it done right. It wasn't hard though. 5 stars easily.
P**S
Impressive performance and reasonably priced; very quiet and efficient
After I finished installing and running it, I must say that I'm very satisfied with the purchase and the quality and results achieved from this item. Using only 120 volts the system runs nearly silently, while the amount of air discharged by the vent is very significant. It took watching a few different videos to fully comprehend the task at hand, but I took my time and went step by step, making one significant exception that I thought could be helpful in colder months, so I routed the condensate drain line on the inside of our garage, and at the bottom I coupled it with some CPVC parts and ran it through the exterior wall so the drain is outside. I did this because in my experience, drain lines can freeze up solid in very cold temps, and shut down a system.....it's happened to me more than once. This way the drain is only really exposed just a few inches outside the fully insulated exterior wall, and should be able to resist freezing.......we'll see how that works out. I used a solid stainless steel support bracket which was tricky to install, since the side to side dimension is inflexible and related to the width between the legs of the outside unit with a very small margin of error allowed. It worked out fine and I was able to give it 10 inches of air space in the back to the wall, enough for proper efficiency of the unit, and also to provide a hidden "alcove" for the coil of lineset that I left intact as it came from the factory. It looks fine, especially since I ordered a "cover kit" for the exterior line set for a neater appearance. I also ordered a sleeve through the wall which I cut to length and caulked in place prior to passing the line set and communication wire through. (As I mentioned, I did not include the drain hose in that bundle) The most apprehensive part was the installation of a new 20 amp circuit at the panel box, which was quite easy after I digested the videos online that clearly depict a safe method of doing that. Using 12-2 copper wire, I fed the circuit partly through the wall, then out and down the inner wall surface before exiting outside to a non-fused quick-connect box that I picked up at Home Depot. The final challenge was to acquire a vacuum pump and manifold gauge set for just over $100.00 to fully evacuate the low pressure side to vent any moisture or unwanted gases, prior to firing up the system. It allowed for a one hour leak-check after shutting the valve at the manifold and turning off the pump after it was given 25 minutes to do it's thing. I feel that I learned quite a bit about some tools and techniques that I was unfamiliar with, but was willing to digest and understand through careful selection of "how-to" videos readily available online. Installed yesterday, it runs great and I love the way it silently moves the air flow up and down as well as from side to side with motorized vanes in the blower compartment. Finally, I can work in my fully insulated garage in comfort year round. I hope the heating is adequate, but in the last year, I found a single small space heater was sufficient to raise the temperature in my garage by enough degrees to make it warm enough to work in comfortably, so if the Split unit isn't very good at heating, as I suspect it will be, I can easily supplement the warming by a simple space heater to easily make it comfortable in winter. I would add that build quality was very good, and was surprised by the amount of pressure released from the smaller high pressure copper line tube when I readied it for connecting with the longer line set to take the line down the exterior to the condenser unit. That indicated that the interior unit's plumbing was air tight from manufacture to my installation, which shows the build quality of that piece. Similarly, the charged condenser was also airtight and with simply using hand wrenching without torque-indicator tools, the system proved easy to connect and insure proper leak free system. I would say that the only possible addition to the system that I would recommend would be to have a simple "on-board" control pad at the inside unit as a failsafe if the remote failed to work properly. But the remote works perfectly so far, so maybe that would just be a waste of resources and just raise the price. For clarity, my unit offered 12,000 BTU's and runs on a 120 Volt 20 Amp circuit. I spent about 595.00 on the Split A/C unit (incl. shipping), and 36.00 on the triangular stainless support bracket, 33.00 on the line cover kit, 23.00 on the thru wall sleeve kit, 10.00 on a 2.5" hole saw, 54.00 for the manifold gauge set, 55.00 on the vacuum pump, for a total of 806.00 (not incl sales tax)......I wasn't thrilled that shipping for the Costway unit was 99.00, but I guess it's a fairly large and somewhat heavy item to ship. (came in two pieces over 2 days apart) So, that's the story, and I'm 'stickin' to it', as they say.
S**S
The customer service is top notch.
I bought the 18,000 BTU (220V) mini split for my shop. The shop is 1,000 square feet, has insulated walls, but no drywall or insulation on the ceiling. It is open to the attic, so I don’t have the most efficient insulation in the shop. That being said, this unit works very well and keeps my shop comfortable on even the hottest days. It routinely gets into the high 90’s where I live and this little unit seems to be up to the task of cooling my shop. It is so quiet that I can’t hear it running from the other side of the shop. It’s quiet, but it also puts out a lot of air flow. The build quality is better than expected and so is the performance. I was able to DIY this project having very little experience with home HVAC systems. First was the electrical. I located the units as close as I could to the breaker panel in my shop so I didn’t have to run a lot of wires. I used 14/3 romex and installed a disconnect box outside that feeds power to the outside unit. Here is the disconnect box I used. It was about $25- https://www.amazon.com/dp/B000H5YAD6?ref=ppx_yo2ov_dt_b_fed_asin_title Mounting the inside unit is easy with the included cardboard template for marking the holes/drilling. The bracket for hanging the inside unit is included, but you do not get a bracket for the outside unit so if you want to hang it on a wall you will need to buy a bracket or make one yourself. I used this bracket that cost about $35- https://www.amazon.com/dp/B07B77C8T6?ref=ppx_yo2ov_dt_b_fed_asin_title&th=1 You will need a holesaw to make a pass-through in the wall for the refrigerant and between unit electrical wires, as well as the drain. I did my drain separately for a number of reasons that aren’t important here. Once both units are mounted you have to run the wiring and the refrigerant pipes between the two units. Be careful when bending the larger copper refrigerant line because it will kink fairly easily when you are not being careful. I ended up removing the insulation and using a bender that would normally be used for bending steel electrical conduit. I already had that and you might not need it if you are patient and work slow. Bends in the larger copper tubing need about at least 6’-7” radius to avoid kinking. Once you are happy with the large line, the smaller line will easily conform to the same shape because it is less prone to kinking on bends of the same radius. Probably the most intimidating aspect of the install was the need to evacuate the air from the system after completing all of the plumbing. I thought I could rent a vacuum pump and gauge set from Autozone, but I wasn’t able to make that work because the fittings are incorrect. Not finding anything that would work for rent locally, I just bought a vacuum pump and gauges from Amazon for about $120 - https://www.amazon.com/dp/B079JJSFQW?ref=ppx_yo2ov_dt_b_fed_asin_title&th=1 With the correct vacuum pump and gauges, I was able to easily apply a vacuum for 15 minutes until it was completely evacuated. Then I buttoned everything up, flipped on the breaker and hit the power button on the included remote control. The unit hummed to life and started blowing cold air in seconds. I did have a small issue with one of the plastic components that was included in the system. I called the support telephone number on a Sunday afternoon and was able to speak to someone right away. Even being hard of hearing, I had no trouble understanding the nice lady with a faint accent. She asked for my order number and told me they would be in touch within 24 hours. Later that day I got an email from them asking me for a photo of the problem. I sent the picture and then the next day they emailed me again saying that the part is on the way to my address and it should be there in 12-15 days. The part actually arrived in 6 days and everything is fixed and operating smoothly. I don’t give out 5 star reviews unless I feel the company really deserves 5 stars. In this case, the customer service after the sale was so good, they earned more than 5 stars. Great company, and they stand behind their products.
E**D
HVAC mini split
I am a licensed hvac contractor in NC, this unit is excellent, pulled a 1 hour vacuum an over kill, opened ports and it has been running for 3 months cooling my 16x16 shop warehouse. I would compare this to a much higher end unit like Mitsubishi in performance. I do not know the long term of it, but I can say out of the box installed perfect, runs very little time keeping my unit cool. 73 degrees f at 100 degrees outside, that’s a 27 degree drop in temperature, awesome. I did heat los heat gain calculations and 9000 Btus was right size. This unit is out performing my expectations of a 20 degree drop in temperatures. Excellent unit!
S**S
Cuts the bill in half.
This thing does great. It has been a little over a year since I got this. It has kept me beyond comfortable. Went through a couple of snow storms and it held its own. We stayed warm all winter. Summer came and it has froze us out to the point we have to turn it up on the temp. Best of all it has cut my electric bill in half compared to window units and wall heaters, and has done a far better job. Only problems are a slight helicopter noise it produces on heat mode and it is to quiet inside to tell if it isrunning.
R**E
Price reduction after I ordered it.
Easy to assemble. Working great already cooled off the little Art studio in 1 hour on a 105 degree day. Only complaint I have is I paid $559. less than a week ago and now it's down to $499. Very quiet.
D**E
Happy so far and it’s cold!!
Delivered in great time, and both boxes came same day. Arrived in great condition too. Install for a first time installation was daunting but lots of good videos out there. Instructions for operating the remote control are minimal, at best. Yeah it’s easy to just turn it on and get chillin’, but don’t you wanna know what the rest of the options are?? Oh and it doesn’t tell you how to switch from C° to F°! Had to google that too and it was, for me, pressing Heat & Cool simultaneously for 5 secs. Again, not in the manual. For the price it’s a deal! You need to be a DIY’er to install this. It’s not as easy as the MrCool units, but then again, it’s also a thousand bucks cheaper! TIPS: 1) Doing a “back right” install will be easier because the short lines that come off the back will pop right thru the hole you’ll drill thru your wall. That makes connecting the long lines to them much easier because you’ll do that on the outside. If you go “back left” you’ll have to connect the 13’ lines together in the home and then feed it all together, all while holding the wall unit over your head, thru the hole in the wall. 2) If you do the “back left” option you can and should move the condensation hose from the original location on the back right to the back left. There is a little black plug you can pull out on the back left, remove the hose clamp and hose from the back right, swap it to where the plug was, then plug the original hole. This was NOT mentioned anywhere in the instructions. I had to google it and found it is indeed possible. This leaves much more room in the back of the unit to route the refrigerant lines. 3) You will need an HVAC vacuum pump, manifold gauges, and manifold line adapters because the ones you get are typically for automotive or older HVAC fittings. 4) Probably the most annoying thing was I used their template exactly, and the marking for where to drill the big hole in your wall was literally 1/4” too far… so a picky owner will be bothered that you can see the edge of the hole after the unit is placed on the wall. If I were to install another one, I’d cut the hole 1/4” towards center.
F**C
Very quiet and powerful!
It's a great unit. I was extremely surprised by how silent it runs. Remote is quick to adjust temperature and nice they include batteries for remote. I had plenty of lineset and wire for my area I wanted it. This is installed in my enclosed trailer shop build running off a pure sine wave inverter and lithium batteries. Luckily I have a friend with all the hvac tools so install was a breeze. We had to cut the lineset by about 2-3.5 feet and reflare the ends to make it fit the way we wanted which was easy. Vaccum and nitrogen test went great. We had a small nitrogen leak but realized we over tightened the ends. Loosened them up and all good. We had to go through some metal plate and that cut up the insulation so I had to buy some more and reinsulate but that was easy. The fan clicks off for a while periodically when temp is reached but the inside unit is still pumping cool air. It made my shop a wonderful place to be even in 85 degree outside weather. The only reason I knocked off a star is the remote information is lacking. I still don't understand what the auto mode does. You can't set a temp in auto and can't use the temperature sensor on the remote in that mode. So I have just left it in cool but then you cant adjust fan speed in that mode which is odd. I may have to call company and ask because it makes no sense. But it does cool and I turned it on heat one night and I was sweating profusely after a few minutes. So that works well! I wish I would've bought a wifi unit but this does work very well. Well worth the price!
A**R
Very pleased with this unit. Super quiet.
Had to contact Cost Way support team a couple of times due to electrical issue on our newly installed unit. After several attempts and because the unit would still not power on Cost Way suggested we contact a local company to resolve the issue and offered a partial refund to cover for the repair. There was a small wire that was damaged and after being repaired I am pleased to say that our unit works like a dream. Cost Way support was fast and efficient with their response and I would recommend this company to provide your AC needs.
S**E
Great product!
Excellent quality for the price. Working great after a year and a half.
G**U
Prévoir un outil pour plier le tuyau 1/2
Facile à installer et très bon rendement 🫶 j'adore
B**K
Simple Install ,works perfect and quiet
So I had a split installed in our living room by an Hvac pro at a cost of $400 so when i watched them it looked simple so a year later we wanted an a/c in our bedroom so i ordered a costway First it was a great price, 2- i would try the install myself and 3- twice the warranty from our first unit from another company...Well we received the units ,unpacked and assembled with the help of my wife .... it was simple to install ,we even bought an a/c manifold set and a vac pump from Amazon . So after 2 hours of work the unit was up and running ..now to note i can do house wiring so that was no problem and the vac and set up again no problem so all in all ...simple set up and works perfect ...the hardest part was drilling the hole which took 10 min. other than that straight forward . we are now going to put one in my work shop and our guest cabin . even buying the tools it was still cheaper than hiring an Hvac company ...Thanks Costway
C**.
GOOD PRODUCT. GOOD PRICE!
Unit arrived on time and in good condition. I am a refrigeration technician so the installation was a breeze and the instructions were easy to understand and follow. I did find a large difference between room temp and feel temp. I contacted Cosway and they sent me a new temperature sensor. This did not solve the problem. They sent me $60.00 and an apology. I've learned to adjust the setpoint to 4 deg. F above what temp we want. We are quite happy.
Trustpilot
2 weeks ago
3 weeks ago