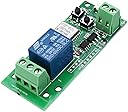
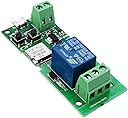
🔧 Transform Your Space with Smart Control!
The REES52 WiFi Wireless Smart Switch Relay Module is a versatile device designed for smart home automation. Weighing just 20g and compatible with both 5V and 12V systems, it allows users to control various appliances remotely via the eWeLink app. With seamless integration with popular voice assistants like Alexa and Google Home, this module supports customizable modes and easy installation, making it an essential addition for any modern home.
| Asin | B07L4RW367 |
| Date First Available | 3 May 2021 |
| Department | unisex adult |
| Is Discontinued By Manufacturer | No |
| Item Model Number | 1 Channel Smart Switch Relay Module |
| Manufacturer | REES52 |
| Product Dimensions | 12.7 x 10.16 x 7.62 cm; 20 g |
User
Perfect solution for Motorized Gates
Superb item. Perfectly working with motorised gate. Inching feature allows it to be working just like push switch. Connect to NO (Normal open) port and it works exactly as it should be. Ideal solution for motorozed gates with remote. App functions very well and you can control your devices remotely. Set up is very easy. A minor drawback is that it works with only 2.4ghz wifi. But overall fantastic item. Exceeded my expectations! Highly recommended for controlling electric devices remotely.
User
Useless product
Not buy this. Usless product
User
Works well for Gate motor
I also use this for gate motor. The gate motor was controlled from inside the house using a doorbell switch. Connected this device to the same wires from doorbell switch so both doorbell switch and this device work (redundancy in case this device fails). Wires are connected to the middle connector and NO (Normally Open) connector on this device.For someone who needs this ready to go, it works using the ewelink app.I used the sonoff plugin in Home Assistant and it worked but for some reason the local only mode was not connecting to device and only cloud connection worked. I decided to flash Tasmota as I am skeptical with using cloud for these devices (Tuya, Sonoff, etc)It was my first time flashing a device and it took a lot of time but I was able to follow Issue#453 on Tasmota github to get a general idea. There were some minor differences with the board shown in amazon image and what was received. The one received was more refined and pinouts are hidden. But the board I received did not have exact instructions on the Github issue but I followed the Github issue to get general idea and did this which worked:1. The rx and tx (3V) need to be connected to the chip directly (see the chip pinout diagram in the last post at mentioned Github issue. Try reversing rx tx if it fails. I don’t remember what worked)2. The button that is used to switch on/off/reset needs to be pressed and held. No need to press the other button that is used to control the inching feature.3. Flash needs to be started on laptop and the micro usb attached to the device needs to be connected with power4. All the above 3 steps needs to be done at same time which is challenging so may involve 2-3 more people to helpAfter Tasmota is flashed:The configuration is 1 Channel (12). On the console the command “SetOption13 1” also needs to be run.Now this device is connected to HA throughmqtt. HA exposes this device over Homekit. Any cloud connection is through Homekit hub (icloud servers). Works well. It has been 1 day, let’s hope it will last. If it breaks, will order another one.
User
Good product
Good product
User
Automatic gait smart switch
It meets my expectations. My Auto gait i converted to smart switch by using this. For installation take help of you tube video
Trustpilot
1 month ago
1 month ago