


🍕 Elevate your backyard BBQ to pizza perfection—because your grill deserves a glow-up!
The onlyfire Stainless Steel Pizza Ring Kit converts your 22-inch kettle grill into a professional-grade pizza oven. Featuring a durable stainless steel ring, a 15-inch ceramic pizza stone, and an aluminum peel, it achieves and maintains temperatures over 700°F using charcoal or hardwood fuel. Designed for precision heat control and easy pizza monitoring, this kit delivers authentic wood-fired flavor and restaurant-quality crusts right at home.


| ASIN | B01H1AFD94 |
| Batteries Included? | No |
| Batteries Required? | No |
| Best Sellers Rank | #53,920 in Patio, Lawn & Garden ( See Top 100 in Patio, Lawn & Garden ) #46 in Pizza Grilling Stones |
| Brand Name | onlyfire |
| Color | Silver |
| Customer Reviews | 4.6 4.6 out of 5 stars (694) |
| Date First Available | June 14, 2016 |
| Fuel type | Wood |
| Installation Type | Peel |
| Is Discontinued By Manufacturer | No |
| Item Weight | 13.29 pounds |
| Item model number | 6023-SS1 |
| Material Type | Ceramic, Stainless Steel |
| Model Info | 6023-SS1 |
| Oven Cooking Mode | Conduction |
| Package Dimensions | 23.62 x 23.5 x 6.93 inches |
| Part Number | 6023-SS1 |
M**S
Must Have
Great accessory for the Weber 22 1/2 inch kettle grill. Works great and gets super hot using a chimney of charcoal and mesquite chunks at the back. Heats well over 700 degrees. The Weber thermometer goes up like a tachometer but use the included thermometer to see the high heat. Made over 20 personal sized pizzas and they came out great with cheese bubbling and perfect crust. We used pizza dough from a bag that you mix and precook in the oven first then add your toppings. Tried pizza before on the Weber but this thing works next level.
C**C
With the OnlyFire kit, we have surpassed Pizza Parlor quality pizza...
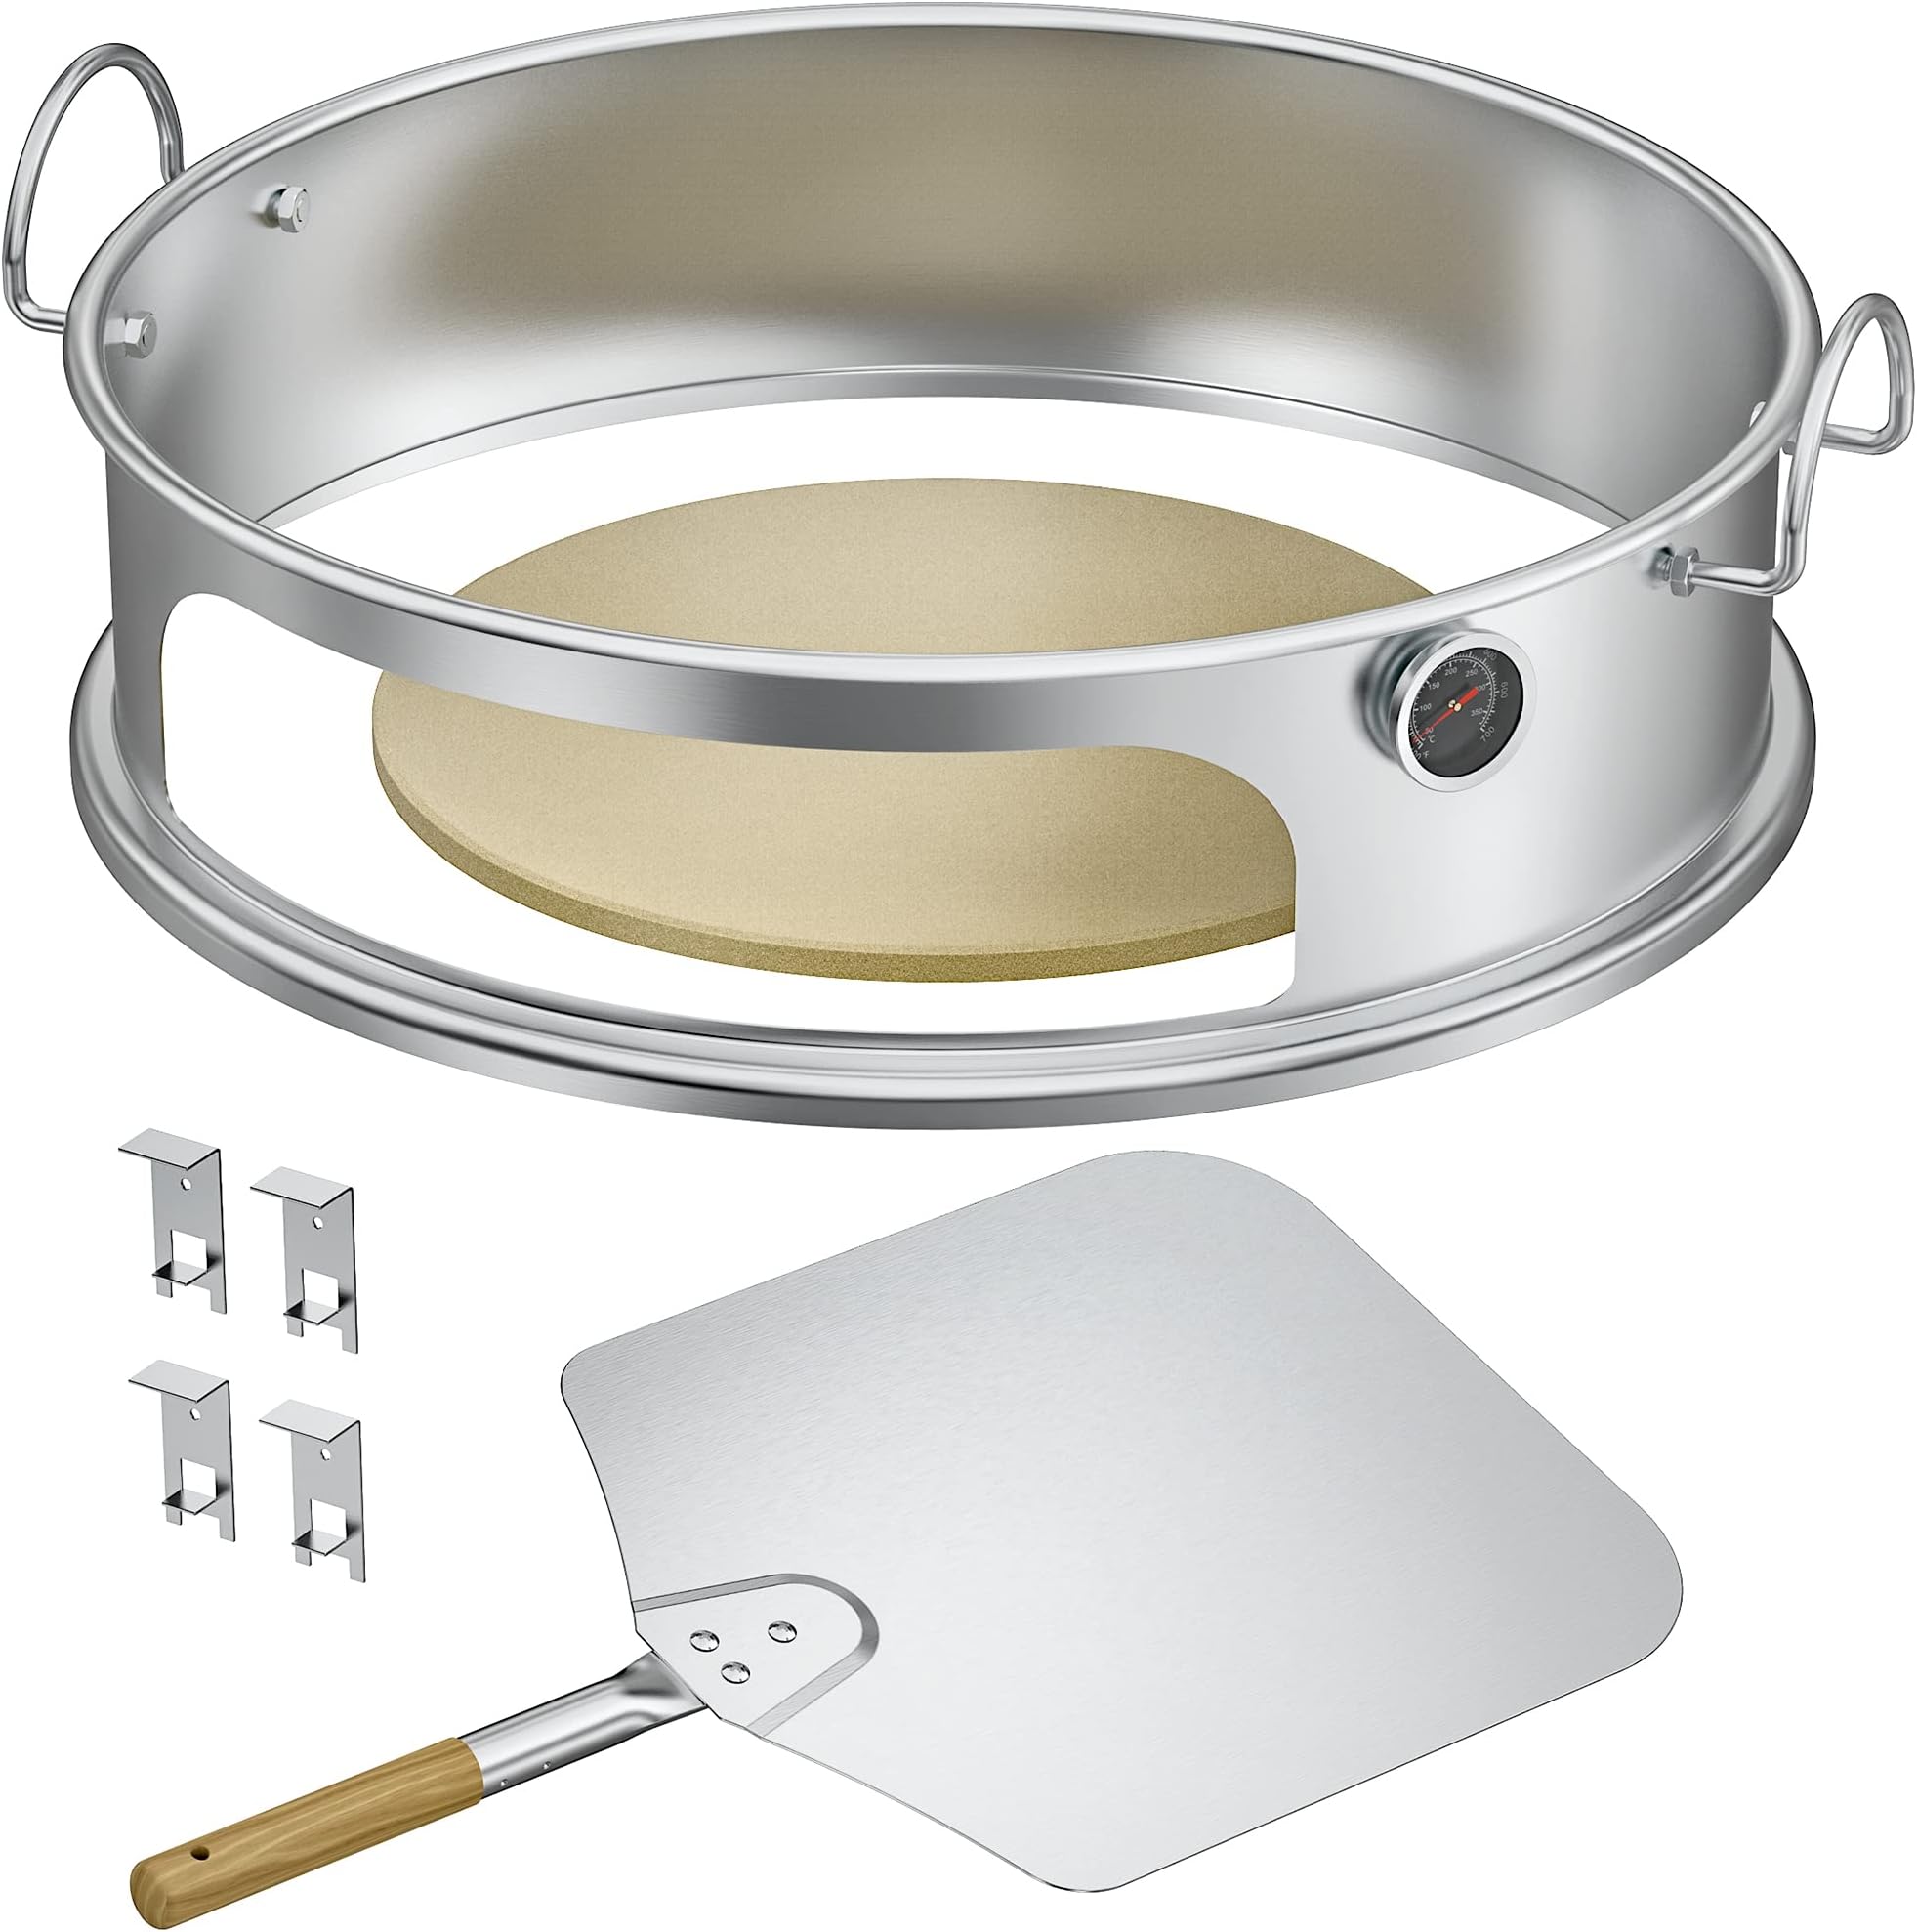
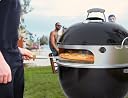
We have been making pizza on Friday nights for about 15 years. During our Northern California summers, when the temperature pegs above 100 degrees, we don't like to turn on the oven. This year we decided to try making our pizza on the BBQ to keep the house cooler and ordered the Onlyfire kit to turn our Webber grill into a pizza oven. For the past 3 or 4 years, we have used cast iron to cook our pizza rather than a pizza stone. Incorporating the OnlyFire Pizza ring with our 12 inch "Lodge pre-seasoned cast iron skillet with dual assist handles" has been a game changer. It has taken some experimentation to get it right, but last night was the best pizza crust I have had in my life, and I have consumed far more pizza than any three people should admit to eating. A healthy sized lump of butter in the bottom of the cast iron skillet and the high temperature produced in the OnlyFire pizza oven results in a thick, slightly crispy on the outside, and flaky on the inside crust, that in my opinion is as close to perfection as is possible to this universe. The downside of the OnlyFire is the thermometer on the ring only reads up to 700 degrees, and I'm sure I'm reaching temperatures closer to 900 degrees. This poses a problem figuring out how long to keep the pan on the grill. Trial and error has determined that 3 to 3 1/2 minutes seems to be the magic number, but there is also some guess work involved based on the color of the crust. I need to get an infrared thermometer to start getting some hard data on temperature and cook times. The thing to remember is it is imperative to remove the pizza from the cast iron immediately after taking it off the grill, or it continues to cook the crust and the bottom ends up charred. If you like great pizza, get the OnlyFire Pizza Ring and the 12 inch Lodge cast iron skillet, and with a little practice, you too will be in pizza heaven. On a side note, charcoal alone will not reach the temperature needed for the perfect crust. I cover the bottom grate with charcoal and add pieces of wood that are about 2 1/2 to three inches long and about 2 to 3 inches in diameter. This combination produces the heat necessary to crisp up the crust and singe the hair off my arms as I put the pizza in and take it out. Happy pizza making!
S**Y
WE LOVE IT!
My husband and I LOVE PIZZA! And this was a really great buy for our grill! Wasn’t really perfectly packed, but everything was in great shape. Was easy to assemble and fits well (not perfect), but well enough. It resists heavy flames and looks well made. Shame that it doesn’t have cleaning instructions/recomendations for the stone.
V**R
Good product and worth the money.
After My First use, the pizza Kit Worked very Well and met my expectations. I didn’t want to spend $600+ on something I might not use much more than a few times a year and this allowed me to Make better use of my Weber grill. Some reviews stated that they had problems Getting the stone hot Enough. I did not have any problem. I used some wood as well As Charcoal. I was able to get the stone heated to well Over 500°. Next time I’ll have the fire positioned in the back Of the grill so that I can have hot and cool zones. I found best to remove the grill cover at times to reposition the pizza, But maybe after more use, I’ll be more skilled at moving my pizzas with the peel through the small slit. Be prepared to use the grill vents to adjust the temperature, but be patient as the stone will maintain its temperature. Very Good product for the money.
D**X
Well worth it, now for the learning
Used once so far. There is a learning curve to using this and the Weber grill to get a great pizza. I missed the sweet spot for time and temperature but it was still a good pizza. It cooks faster at higher temperature than a home oven. It tastes so much better though. Well worth the money. If I had a pizza oven, this would probably not replace it but since I don't, this gets me close at a small fraction of the cost and space.
A**Y
Great for outdoors
Fits Webber nicely easy to use
L**D
Quality material!
Top Quality product, strong and very easy to set up!
M**E
Almost, but not quite
I really hoped this would be the solution for wood-fired pizza without building a pizza oven. It's a decent concept but has some problems: the mouth is too large and too much heat escapes. It's impossible to keep the Webber at a high enough temp for long. When it is, the stone is too thin and the crust will burn. The clips would probably work better on a new grill but don't sit well and are insecure on my old grill. The peel is ok and the shroud is sturdy but there's not enough thermal mass to stay hot. You can make a couple pizzas but to make more you'll constantly add wood and temp will vary a lot
M**D
The assembly itself is very easy. Making perfect pizzas, however, comes with a bit of a learning curve. After putting into practice tips taken from various YouTube videos, I was able to master the cook. The key to success begins with using quality lump charcoal and wood chunks that burn clean and hot (I use a combo of oak and hickory.) You want the temperature to reach 700F and keep it there. Allow the pizza stone to heat up gradually for at least 45-60 mins before you start cooking on it. Using an infrared thermometer is highly recommended because the supplied thermometer can't read the temperature of the stone. Monitor the pizzas closely. They cook super fast and will need to be turned a couple of times for even cooking. Finally, if making your own dough, plan ahead. It takes time to get it just right. The seemingly extra work will be worth it in the end. Otherwise, buy fresh dough from a local bakery and proof it properly. The dough alone can make or break the end product.
A**R
Great toy! I was hoping because all the reviews were good it would live up to my expectations and it did. The pizza turned out great with a wonderful brown, crispy, smoky taste. The bottom was done perfectly and we had great bubbles in our dough. I read the other reviews/comments before using so we positioned the stone forward so flames could come up the back and it worked perfectly. We did one spin each on the pizzas to make them golden brown all the way around. Pizzas took about 5 min each to cook. The insert appears to be well made and is not flimsy at all. The thermometer is very helpful and it all fits together very well. Next time we will add more wood as we only got the heat up to about 600 degrees and on pizza #4 it dropped but that is just trial and error.
C**R
Good product, our first pizza was a success. Good quality for the price. The only negative point I would say, is that it is not possible to have the version to install a rotisserie kit but without the rotisserie kit. I would have bought it, but I already have my rotisserie kit, so I don't want to pay for it.
S**B
There is definetly a learning curve to using this. My first day went like this: Pizza 1: Burnt the bottom Pizza 2: Slightly chared the bottom Pizza 3: Perfection Pizza 4: Slightly less than perfect Pizzas 25+ more or less perfect After many trials, adjusts and errors, this is what I found works best for my 22" Weber Kettle Grill. 1. Do not place the stone in the centre of your grill, place it to the left or right. If you have a grate that has a hatch to add more charcoal or wood, ensure its accessible and not covered by the stone. If you are cooking many pizzas for a large family or party, this will allow you to keep adding wood or charcoal to maintain heat as needed. 2. Do not place the coals directly under the stone. Some are fine and encouraged, but too many will just char the bottom of your pizza before the cheese even melts. As mentioned above, I keep all the coals on the right side with stone on the left. Arguably, you could put the wood at the back and stone at the front, but you will have to rotate the pizza more often for even cooking and a lot more challenging to add more wood or charcoal. 3. I try to maintain a temperatute of 750f although it rises and dips as the wood burns and I work my way through 4-6 personal pizzas. Really, anything above 600f works well, at 500f it becomes painstakingly slow to cook, still works but yields more oven like results. The lesson, don't beat yourself up or fuss too much over people dictating temperatures. 750f will cook a pizza in about 3.5min to golden with mozzarella just starting to bubble and turn color. 4. Wood does burn longer, achieves hotter AND maintains the temperature. Use wood if available and you plan to cook many or be prepared to add charcoal every 5-10 minutes as the temperatures begin to dip. PRODUCT WISE... ASSEMBLY Add the 2 handles and tighten the 4 nuts. Insert the thermometer and screw on the wing nut and you're more or less done. The support "chips" go on the existing grate holders inside the grill and raise the grate and stone so its level with the opening. This way you slide the pizza peel straight in. It fit perfectly on my 22" Weber Kettle, presumably it was designed and tested to fit Webers as its also used in their product images. STONE Its fairly thin compared to some other ones I've used. It serves its purpose but time will be the judge of quality. Important to note, DO NOT WASH WITH SOAP AND WATER!!! Buy a quality razer to scrap the stone. I use the same as on my smooth top stove. The stone is pourous and will absorb the soap. SIDE NOTE If you have the Weber Kettle cover as well, I am happy to report mine fits the Grill with the Pizza attachment on and I can still velcro the cover to the bottom grate. Awesome bonus for storage as I dont know where else I would put it.
D**N
Last year I seen the other kits available but thought that at that price I'm going to build a kit myself. I had already collected most of the needed material but when I seen this kit available, for the price, I felt it was not worth the time for me to build my own and got this instead. It was a good choice for me. I've made Pizzas 3 times with it already. The First and third times were 100% success. Only the second time I had trouble getting the upper side cooked properly but figured out that it was the pizza stone was set too far back into the BBQ and blocking much of the heat from the flames to cover the top of the BBQ. If I had one little complaint it's that the edges of the spacer are not rolled and makes for sharp edges. But there is minimal handling and for the price I understand. I did a bit of research on YT and reviews of how to setup the charcoal and the wood chunks before hand and this helped me make my first try very successful. On our third occasion, I brought my setup to a friends pool party. He has a Big Green Egg but we were going to cook 16 pizzas, so I brought my setup to help speed up the process. This time, I made sure to place the pizza stone closer to the front opening. Not directly at the opening but making sure to leave enough space at the back to let the flames roll up nicely to the top of the BBQ. My Weber and this kit cooked the pizzas faster and with better results than the BGE. My buddy and I are both very BBQ savy, and have cooked, Turkeys, Brisket, Ribs, and many other elaborate items. So we are used to adjusting and fiddling, but both agreed, that the Weber and the Pizza Oven kit did the better job. I've included pictures of my Very first attempt.
Trustpilot
1 week ago
1 week ago