


🔩 Elevate your cabinetry with silent precision and rock-solid reliability!
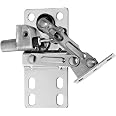
Rev-A-Shelf LD-0220-50SC is a pair of metal soft-close pivot hinges featuring a 50-degree opening angle and reinforced stiffening ribs to eliminate side play. Measuring 1" W x 2-5/8" D x 3-7/8" H, these zinc-finished, face-mount hinges provide smooth, quiet operation and enhanced cabinet stability, backed by a limited lifetime warranty.
| Material | Metal |
| Brand | Rev-A-Shelf |
| Product Dimensions | 4.8"L x 4.5"W |
| Finish Type | Unfinished |
| Mounting Type | Face Mount |
| Unit Count | 1.0 Count |
| Manufacturer | Rev-A-Shelf |
| UPC | 090713017969 785577790171 |
| Part Number | FBA_LD-0220-50SC |
| Item Weight | 8 ounces |
| Item model number | LD-0220-50SC-40 |
| Is Discontinued By Manufacturer | No |
| Color | Zinc |
| Style | Soft Close |
| Finish | Unfinished |
| Item Package Quantity | 1 |
| Number Of Pieces | 1 |
| Included Components | Included: (1) Left hinge, (1) right hinge, and screw pack |
| Batteries Included? | No |
| Batteries Required? | No |
| Warranty Description | Limited lifetime warranty. |
Z**K
Excellent product - tricky install
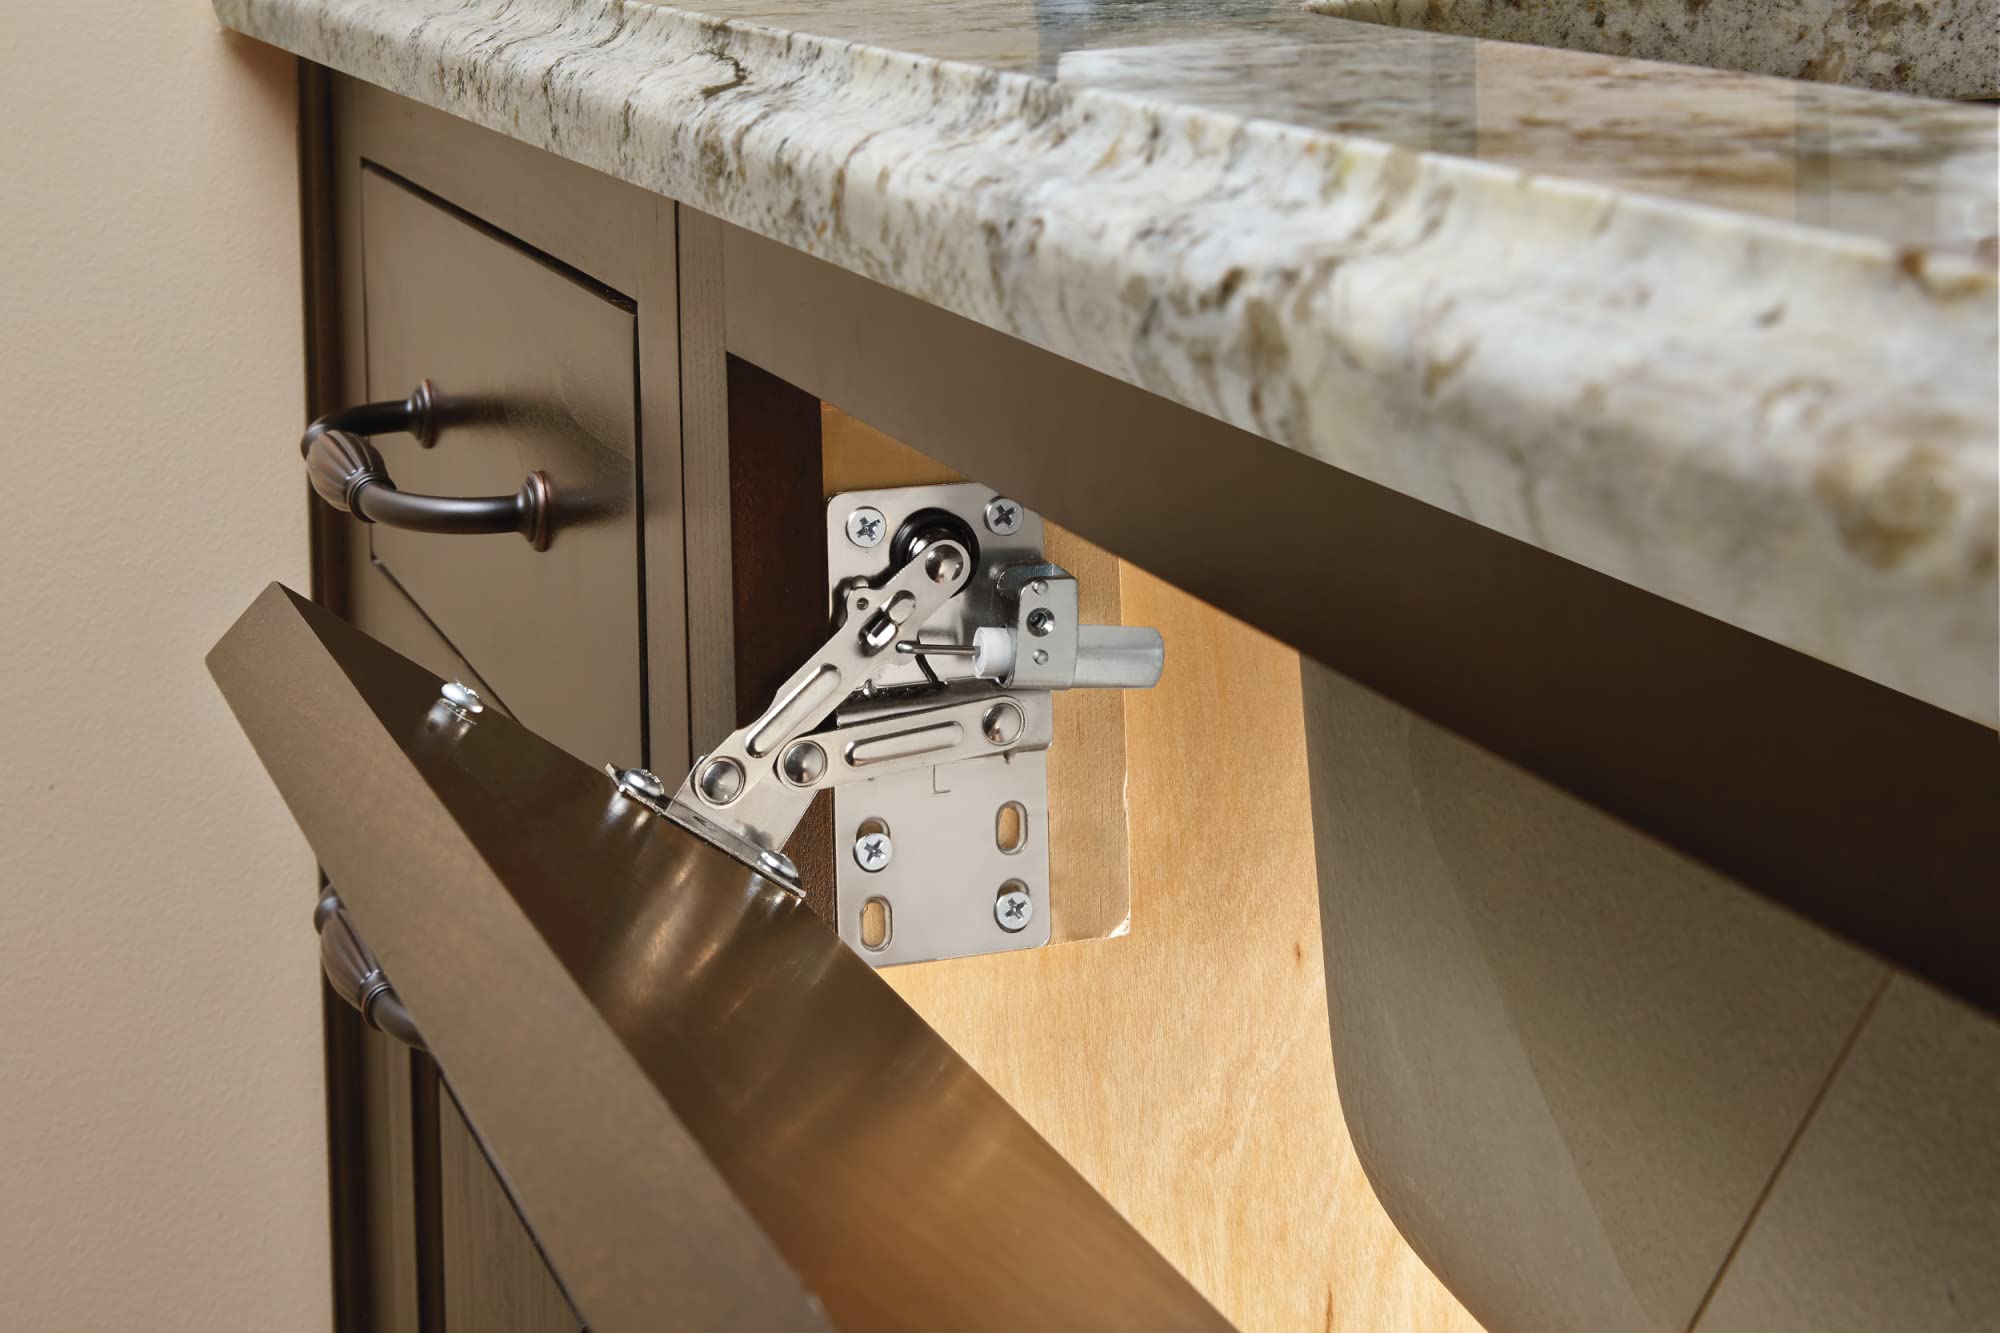
Felt compelled to write review as this product is abundantly better than the set I bought from Menards.With that said, let me first say the instructions included with these were nearly useless, and were quickly discarded. Before my review, here's my written installation tutorial:------------------INSTALLATION:Hardware eventually attaches to both the drawer front and the face frame (assuming you have a face frame cabinet); the order in which they are installed does not matter. These instructions will mostly be for attaching to the frame first.1) with drawer front panel still installed (or aligned to desired location), use pencil to lightly mark the perimeter on the front of the face frame. [If installing hardware on the drawer front first, from the inside of the cabinet, trace the interior perimeter of the face frame onto the back of the drawer front panel.] Now remove drawer front panel.2) take the two pieces of tilt hardware, and denote which one is L and which one is R. Take one and place it on the appropriate side of the face frame. Align it so that the bottom is resting on the face frame, and the front is flush with the front of the face frame. With a pencil, trace the locations of two mounting holes (you can use any two) onto the frame. NOTE: I recommend not using holes that are ~too~ close to the top or bottom edges of the face frame, as this will make drilling difficult/inaccurate. Repeat the same process for the other side.3) Drill (with 3/32 drill bit) the two holes into the face frame. Attach hardware with screws into these holes (I believe instructions called for the provided flathead screws; though I discarded and used my own hardware). Repeat for other side. A 90° drill/driver attachment is useful for this step4) once hardware is mounted to the face frame, place drawer front panel against the face frame in the desired location (using your previously traced perimeter). From the inside of the cabinet (I did it by feel as I'm not the most flexible) mark the mounting hole locations from the hardware onto the drawer front panel. Remove panel and ~carefully~ drill (3/32 bit) the mounting holes. BE SURE NOT TO DRILL ALL THE WAY THROUGH PANEL (drill bit stop collar is helpful here).5) install drawer front panel to the hardware. This can be tricky, but can be done either from the inside of the cabinet with the hardware 'closed,' or from the outside of the cabinet with the hardware 'open' though the angle may present challenges. Tip: do not fully tighten screws until all four are in place.6) test function. You may have to slightly loosen the screws and nudge the panel over to get it to close flush or evenly.-----------------------------Review:Great product, as stated previously. However, installation can obviously present some challenges due to the tight angles and fairly tight installation tolerances. Lack of helpful instructions can further exacerbate these challenges for many other buyers.Functionally, these are incredibly smooth and close with the right amount of force. Compared to the previous set (different brand) that I had installed, these are night-and-day difference in terms of smoothness. Also for the fact that the previous set SLAMMED shut to the point where it would make a good impromptu nutcracker. I still rate this product as 5-stars due to the great functionality, though engineering improvements to ease installation would be a good place for the manufacturer to focus in the future.
D**C
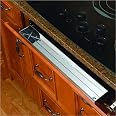
Makes the tip-out drawer fronts a pleasure to use!
Totally outstanding product, clearly thought through from beginning to end. Even my carpenter commented on the quality of the build and how gently (but tightly) the soft-close feature works. These brackets allow the drawer front to tip out pretty far, which is great for me -- it's about 5" from the top of the drawer when tilted out to the face of the cabinet, which feel really roomy. Nicely done, Rev-A-Shelf!!
E**X
For Many, Replacement of Scissor-Type Hinges Will Be Very Easy
First, the hinges function very well and allow for a simple nudge to close versus holding the pull throughout its closure to prevent it from snapping close and spilling the tray's contents. While these hinges are not critical in people's lives, they are a nice touch, and they motivate household members--especially children--to actually use the tip-out drawer and tray.Regarding installation, one should immediately compare these hinges to their scissor-hinges already in place. For me, every exterior dimension was the same except for the presence of the soft-close piston which was irrelevant, and most importantly, the size and location of the two mounting plates--to the frame and the back of the drawer panel--were the same size and location. Of the four utilized mounting holes on each hinge--two facing the interior frame and two facing the back of the drawer--three matched exactly. Only the lower mounting hole of the plate to be attached to the back of the panel did not match, and consequently, a new mounting hole only in the back of the drawer panel needed to be created.As a result, all I needed to do was:1. With the drawer fully opened, I used a cordless screwdriver to back out the two screws attached to the frame for each hinge2. After removing the drawer completely, and with the drawer flipped and exposing the old hinges while placed on the kitchen island, I used masking tape to locate the exterior edges of the mounting plate and hinge assembly3. I removed the old hinges and placed the new hinges on the backside of the drawer panel at the exact location of the old as dictated by the masking tape and mounting holes of the plate. I then used a marker to mark the new location of the lower mounting hole and then drilled a 1/8" pilot hole.4. After screwing in and attaching the mounting plate of each hinge to the back of the drawer, I pulled to open each hinge fully to its lock position, placed the drawer and hinges in the frame opening, and screwed in the mounting plate of each hinge to the frame using the existing mounting holes. The hinges worked perfectly, and the drawer was positioned in the exact same location as before.Comparing dimensions and mounting hole locations of old versus new hinges is worthwhile and may allow for easy replacement as above. Early DIYers can accomplish this, and they should not be afraid to dive in. Good luck!
Trustpilot
1 month ago
1 month ago