Cook in Style! 🍽️ Elevate your culinary game with Bruntmor's all-in-one cookware.
The Bruntmor 2-in-1 Enamel Cast Iron Dutch Oven is a versatile 7-quart cookware solution that combines a braising pan and skillet lid, ensuring even heat distribution and durability. With an oven-safe capacity of up to 500°F and a smooth enamel coating, it’s designed for both performance and style, making it a must-have for any modern kitchen.


M**E
Great for baking large sourdough loafs
I've been using this for a couple of years now and love the versatility. Bought it as I wanted a larger dutch oven for baking larger sourdough bread loaves, but love the double duty it does as a casserole dish in the oven, or using both the top as a frying pan and bottom for a stew pot. After 2 years of use, no cracks, chips, and anything. Cleans up super easy, and if something does still show a bit after washing, use a bit of liguid Barkeeps Friend to finish the clean up. Still looks almost new, inside and out.
D**.
Very Nice
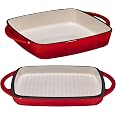
Looks great. Got the 7 qt in red. Looks really good. Nice heavy cast Iron with an enamel coating so it doesn't scratch the glass cooktop or rust. I'm cooking a loaf of bread in it now as I write this review using the lid as the base and the pot as the cover. At $65 it was a little more than I wanted to spend but I thought that the 7 qt would be a little more versatile than the 5 qt.
K**N
Bigger than expected, sturdy, perfect!
Much bigger considering the price. Sturdy, with a high quality enamel finish. I’ve used the top part to make pancakes and it’s just like an enameled cast iron skillet. I’ve used both pieces together to boil quinoa and it turned out perfect! Next, I’ll try baking a loaf of sourdough bread in it… yum!It’s the perfect size. Not too heavy, but can still make a dish for 4 people, at least. Great for decluttering or for small spaces. I live in a tiny house and love the 4-in-1 aspect of this Dutch oven. In my opinion, not having the handle on the top makes it much more usable; but I will be buying rubber grips for the side handles since they get very hot. When I put it upside down in the oven for bread I’ll probably have to put it on top of a small tray to make moving it easier so I don’t get burned. When I put it right side up in the oven for baked beans, lasagna, or casserole I’ll just use my regular oven mitts and won’t have to worry about getting burnt.It’s nonstick, but that’s because it’s enamel and isn’t supposed to be. Pro tip: only use wooden utensils with this piece to extend its life!
F**C
Successful Camp Cooking
This arrived as expected out of the package. It was pre-cured and with only minor flaws, if any, that would have no effect on performance. I cured it again myself using vegetable shortening (oils tend to leave a sticky residue) applied with a dry paper towel. I then placed both the pot and the lid side-by-side on the center oven rack upside-down on 450 degrees for about 10 minutes. A sheet pan was place below them to catch any drips. After 10 minutes, I flipped the pot and the lid upright on the center oven rack for another 15 - 20 minutes. Now it was double-cured.I brought it camping a few weeks later. The first day was rainy so I broke out the gas stove for lunch while we were setting up camp. Inverting the lid on the stove, I cooked up a couple of juicy 1/2 pound burgers for us that hit the spot. However, you can't get two 1/2 pound burgers on the inverted lid at once though you could probably get three 1/4 pounders.The next day I sauteed up some beef chuck over a campfire in just a table spoon of vegetable oil that I had cut up into large chunks. They got nice and brown and then removed from the pan. In went fresh diced tomatoes, red onion, whole clove garlic. The liquid that came from the onions and tomatoes assisted helped de-glaze the beef bits from the pan. I let the onions carmelize a bit then added some cocktail onions from a jar along with about half it's liquid. This was followed by some large chunks of carrot, onion, parsnips, gold potatoes, a quart of beef stock, and my own blend of herbs and spices. I dropped the lid on tight them placed 3 or 4 coals on the lid then just walked away a couple of hours. When I returned, I added about 20 oz. of cold water after giving it a little stir. It was placed back over the coals with a few more on top of the lid for another 45 minutes or so. Now it was time to thicken this up with about 1/4 cup of corn starch in about a cup and a half of cold water. After giving that a stir, I added a half a bag of frozen peas and put the lid on off the fire for another 20 or so minutes. The meet was plastic fork tender. The carrots, potatoes, and parsnips were all soft but not too soft. This beef stew was a hit around the camp and it wasn't long before the dutch oven pot was empty.Clean up was pretty easy. The lid came clean with a dry paper towel. The pot needed a rinse in some cool water with a light and a wipe with a non-abrasive cloth or sponge. After drying it over the fire, it was given a thin coat of vegetable shortening.So, after a successful camping trip, I'd say this dutch oven is a winner. It was put to used as both pot and pan and it did what good cast iron is supposed to do.
Trustpilot
3 days ago
1 day ago