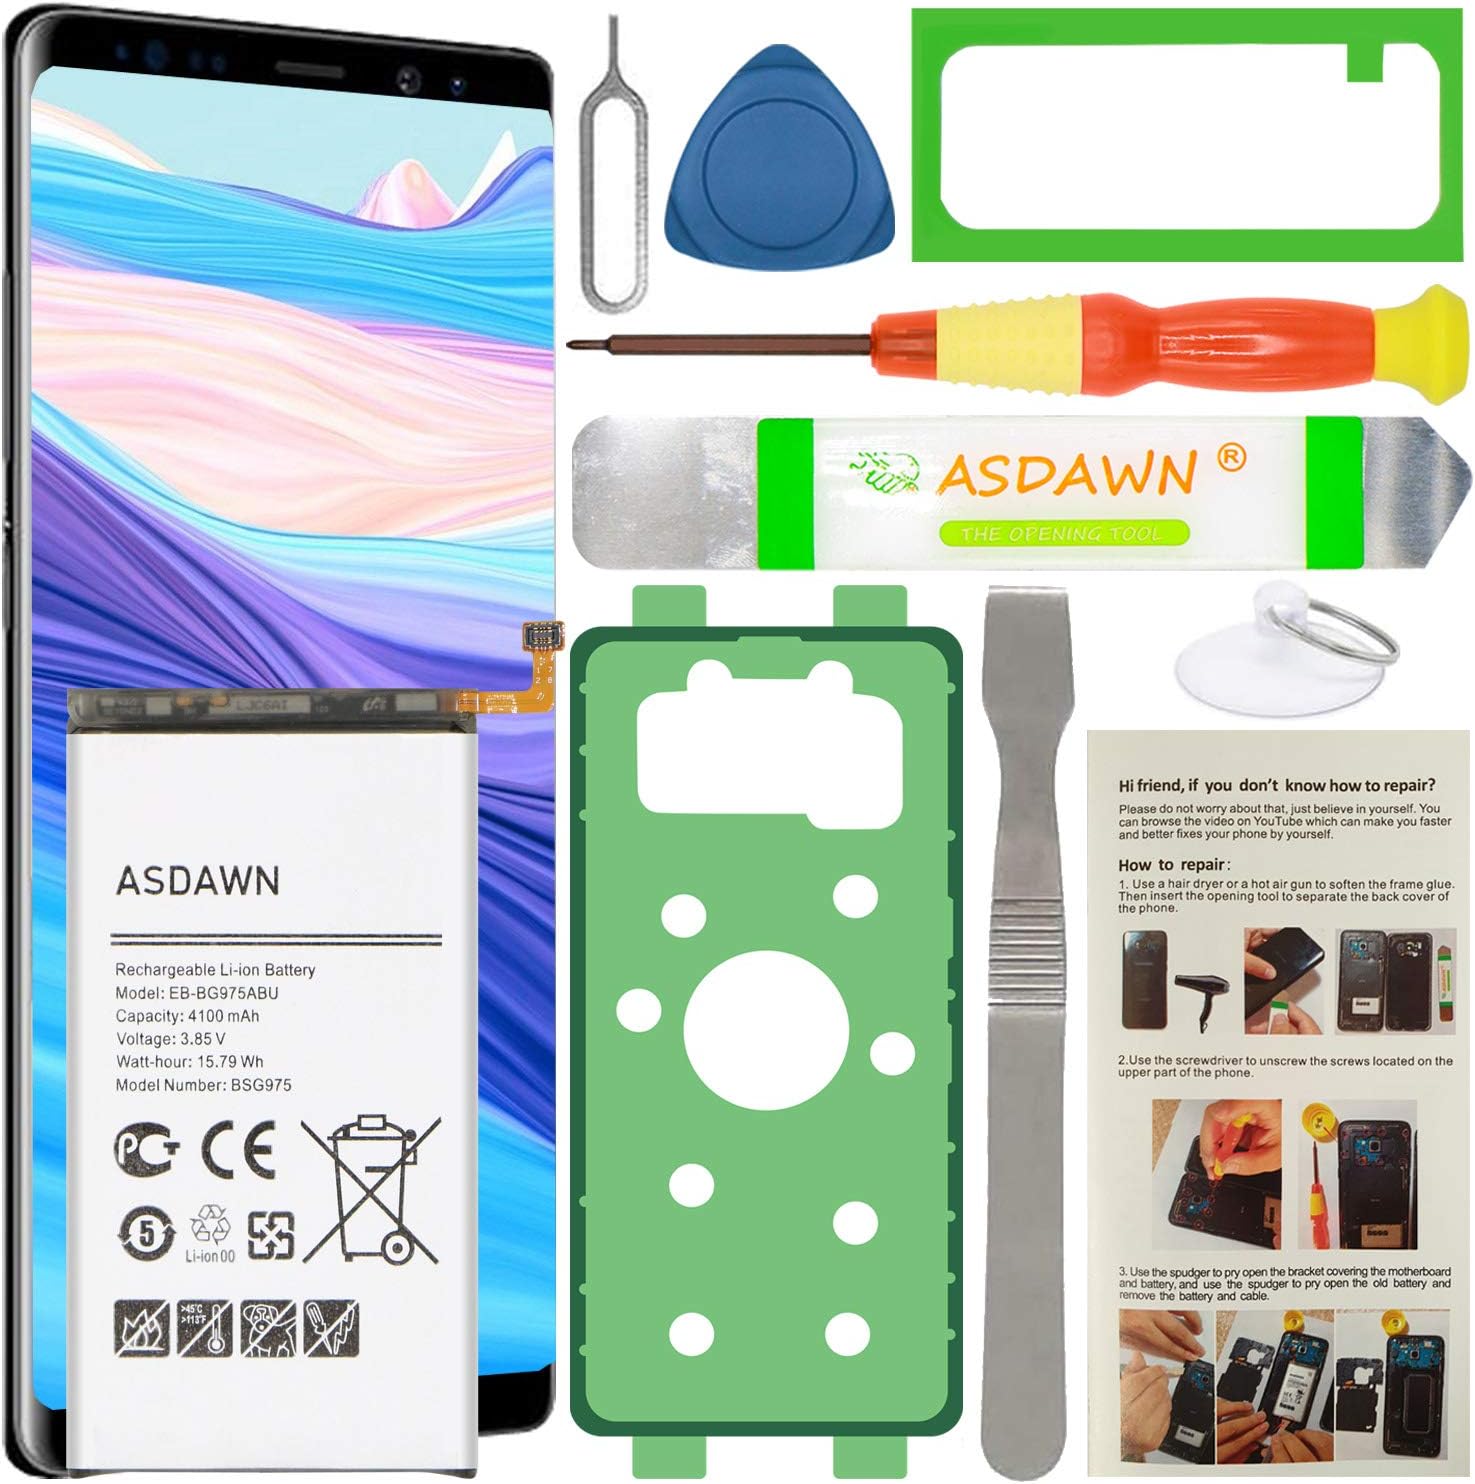

🔋 Power up your Galaxy S10+ and never miss a moment!
The ASDAWN Samsung Galaxy S10 Plus Battery Replacement offers a high-capacity 4100mAh Li-ion cell engineered for up to 48 hours of use. Featuring advanced safety protections and strict quality controls, this battery ensures efficient, reliable charging and long-lasting performance. Compatible exclusively with Galaxy S10+ models, it includes a full installation kit and expert support, empowering users to restore their phone’s battery life with confidence.


| ASIN | B08SV1KMSV |
| Antenna Location | Phone |
| Battery Capacity | 15.75 Milliamp Hours |
| Battery Cell Composition | Lithium Ion |
| Battery Cell Type | Lithium Ion |
| Battery Weight | 50 Grams |
| Best Sellers Rank | #185,539 in Cell Phones & Accessories ( See Top 100 in Cell Phones & Accessories ) #1,933 in Cell Phone Replacement Batteries |
| Brand | ASDAWN |
| Compatible Phone Models | Samsung Galaxy S10 Plus SM-G975 |
| Customer Reviews | 4.1 out of 5 stars 144 Reviews |
| Manufacturer | ASDAWN |
| Model Name | g975,galaxy,galaxy s10 |
| Model Number | EB-BG975ABU |
| Number of Batteries | 1 Lithium Ion batteries required. (included) |
| Recommended Uses For Product | Phone |
| Reusability | Rechargeable |
| UPC | 783903983419 |
| Unit Count | 1.0 Count |
| Voltage | 3.85 Volts |
M**B
So far, so good. Good battery life, easy to install
I had a Galaxy S10+ where the old battery swelled up so much, it actually did the hard work for me of removing the back plate from the phone and was thoughtful enough to detach the battery itself from the phone innards. How considerate. So when I got this replacement battery kit, disassembly of the old one was a breeze. I did not use the included screwdriver and used my own, but I suppose it would have worked in a pinch. As it happened, the old battery bit the dust while I was on vacation but I chose to wait 'til I got home to repair. If I wanted though, I could have had this shipped to where I was and used the included tools to replace it (although I don't know how I would have heated up the back plate if needed... maybe a hotel hair dryer?). The hardest part of the whole process was really because I wanted to make sure I removed all of the old adhesive residue. Some careful use of alcohol and cotton swaps took care of most of it but when it came to getting the residue off the back plate, the good old "scrape it with a fingernail" proved to be the best technique. Getting the new battery installed was easy, and once I tested it to make sure it worked as expected, I applied the adhesive to the battery, got that tucked in, and then put the adhesive on the back plate, got that sandwiched onto the phone just right, and I let it sit that way overnight with rubber bands to hold it all tight and give the adhesive the best chance to cure. I know it won't really be as waterproof as factory (or maybe not even that water resistant) but I'm pretty careful about that anyway... I started using phones when water resistance was just a crazy idea and I've always treated my phones as "don't let 'em get wet" beyond a stray raindrop. I suppose if I get worried about it, I'll remove the back plate again and apply the appropriate seal... but who am I kidding, it's a 4 year old phone at this point and if something happens, well, it was fun while it lasted.
T**M
Easy to install once you get the phone apart - be careful taking the back off!
Repaired a Galaxy S10+ using this kit that had an original bad (bulging) battery. Everything you need is included in the kit (if you are careful - see below). It's been installed for over a month so far and everything still seems good. A word of caution however. It was not the kit's fault, but my own. The back of the Samsung S10+ is made of black glass (mine was black, there may be other colors). Taking the back off is the challenging part and I ended up cracking the back so I had to order another glass back from Amazon. Once the new back arrived all was well and the phone works great. One last note: The battery cable connector is very small and obviously goes into a small socket. It took me two tries to make sure I had it seated correctly. At first the phone would power up but not take a charge. Once I reseated the connector all was well. If I was going to do this again I would probably just order a new back as well as this kit to save time. As stated above, getting the back off without damage was a challenge.
P**R
Not Like New
I had watched videos on non-brandname cell phone batteries, so I went into this purchase pessimistic and skeptical...but for the price and the comparative reviews, I took a chance. I shouldn't have. The Battery: The battery had a 2014 date on the wrapping label around the battery...didn't think much of it...surely they were not selling me a 9 year old battery? Not thinking, I didn't take a picture of it, so maybe it was a copyright or trademark date of some sort...? But the battery performance leads me to believe the former over the later. I performed the 5 drain-to-zero-charge-to-100 "training cycles", then I set the same settings I had on my previous battery. This new battery performs the same to worse than that old battery. As new, the original battery could last me a day and a half before needing a charge. At its end, it was needing a charge every 10-12 hours. This new battery also needs a charge every 12 hours or so. I went through the pains of replacing a battery to get no better results. The Replacement Kit: SIM Card remover...ok, the metal "Opening Tool" bent when trying to use it, the screw driver worked well, the spudger (prying tool) worked ok, the suction cup wouldn't really stay stuck, the battery adhesive great but covered the entire backside of battery unlike ad picture which shows it framing the battery (I cut it into a frame), the case adhesive was adequate, the plastic credit card (not shown in the ad picture but definitely a savior for removal) was perfectly thin enough to dislodge the back case glue, and last and certainly least, the guitar pick prying tool was ABSOLUTELY WORTHLESS. It was too thick to slide along the case edge and when trying to slide around the corners of my S10+, it cracked the back case glass. I immediately tossed it and finished every thing with the plastic credit card, which was complete spent after the replacement process was done. The Removal (lessons learned if you still choose to take the risk on this battery): Medium heat from a heat gun and the plastic credit card is the safest method to remove the back. As I said, the guitar pick is to thick and risks damaging the back. It will take a few repetitions of heating and sliding the plastic credit card deeper and deeper into the back case seal all the way around. Patience is the key here. Videos showed two options to remove the battery. I originally tried the heat gun and plastic credit card method, but the angle to get under the battery was too steep and the glue to strong for the plastic credit card. I ended up using a solvent, but no the 90% Isopropyl Alcohol in the videos. I used 100% acetone. It worked remarkably well and fast, but be sure to drip small drips only into the battery well. Acetone evaporates fast as well, so there is not a well full of liquid after removal. If you are a gambler...get this battery (maybe you get lucky and get a newer battery). If not, MAYBE, brandname is better...I have lost faith in DIY battery replacement. Seems cell companies have built into their economic model, planned obsolescence of the battery to keep the monetary purchasing stream flowing... :-(
L**N
Happy with the battery performance. Same as OE.
I was very impressed with the battery that came with this kit. It holds a good charge just like the OE battery did. Installation wasn't too difficult but I'd suggest you google a you tube video on the repair. That being said, I do have a warning. The video I viewed to help suggested using alcohol to help loosen the glue, which I did. I assembled everything and tested the charging before using the adhesive to glue everything back together. (Highly recommend the B-7000 glue). The phone was working great when I went to bed, I woke up to my alarm going off but when I picked up my phone to turn it off there was no display. Screen was completely black. I assumed the alcohol had got into the screen and ruined it. I waited a couple days and still no display. I went to the ATT store and ordered a Galaxy s22+, which I didn't like as much as the s10 plus, and it was to be delivered to my home 3 days later. The day before it was to be delivered, my alarm started going off, so I reached for my phone to re-boot it (that's the only way to shut it off), and the display was on! I guess there must be a moisture sensor that was triggered and once it detected the moisture was gone, it let the display start working again. That was several weeks ago and the phone is working fine. My wife is using the s22+ now.
Y**1
Battery works as intended. Tools are garbage.
The battery is great, but the tools are garbage; 4 stars since I had to provide my own tools. Based on the description, this battery has the closest specs to the OEM battery in the Galaxy S10+. There were no reviews on this particular battery model when I purchased it, so I based my purchase off of other batteries from the seller. The instructions are clear and the adhesive is really good. I am not a huge fan of the tools provided, but it seems like every DIY store grabs the same garbage toolbag to give away in their kits. I would not use the provided metal pry tools to remove the backing or the battery. Use your own screwdriver to remove the screws unless you want them stripped. I followed the charging instructions just to be safe I waited about a week or so before applying the adhesive and posting a review just to make sure the battery was still functional no defects were found. Overall, I have not seen any irregularities in the battery and my phone lasts just as long as I remember.
R**A
Best to use your own tools
Took me less than 10 mins, used my own HQ PH0 screw driver to takeout & reinstall all 19 screws. I wouldn't count on the screw driver the kit comes with, even with 6.00 reading glasses I couldn't see that it was a philips head. I used my larger PH0 philips screw driver that fit perfectly, the kit has a PH000, that would have been to small, by the way my own a PH000 & I can easily tell it has a philips tip without needing to wear any reading glasses. Remember do not over torque the screws, they're only hold tiny bits of plastic. You could use Purple (the weakest) liquid locknut if you have it, but it's not necessary unless when you opened your phone & the screws were already falling out lose. My battery swelled & popped off the back panel, so I didn't need to take my S10+ back cover off, & the battery released from the phone without the need of a solvent, & I am sure it saved me from taking more then double the time to do this battery replacement. If your battery is also swelled be super careful not to damage it, it could burst into flames, & when you're done, do not leave it inside your home, & do not keep any swelled battery in your house. If you can, let your battery drain to zero before working with your phone. Before you glue the back cover back on, plug your phone into a charger to test if it is seeing the battery by seeing the charging message & tone. After I reinstalled my S10+ I couldn't tell that it was opened.
J**.
CAUTION with installation and use of isopropyl alcohol
This is a nice kit. As another reviewer pointed out, I removed the label to find a Samsung battery from 2020. (It is now 2022). The instructions were good, there are videos online too. But, here is what happened to me. I followed the instructions including the use of alcohol to help soften the adhesive under the battery. I used an eye dropper. I completed the installation, placed it on the charger, and all was great. It fired right up. However, I cam back an hour later to find the phone screen dead. I could still hear response sounds but no display. Then later, it was all dead. The battery had a good charge. I looked up online with a query of "S10+ dead after battery change". I found a number of other folks with the same issue. Apparently, the alcohol can dissolve some of the adhesive and it can find its way into the electronics. I had now killed my phone. I tried heating it and letting it air out. I waited 24 hours and with no results and ended up buying a renewed phone on Amazon. Meanwhile, after 48 hours, my old phone came back to life. Now I have 2 phones as the one I bought did not have free returns. If I did it again, I would try not to use alcohol to soften the battery adhesive. I would slowly work it out a little at a time.
K**.
I received new old stock
I have purchased this kit twice. The first one was two years ago. It worked perfectly for two years until the battery started to swell like my original battery did after two years. I purchased the same kit again because the first one worked so well. I have no complaints about the kit itself. It has everything needed to remove and reinstall the batteries. Since my battery had swollen to the point it had popped the back cover the hardest part was removing the old battery from its adhesive and aligning the new case adhesive for the back cover. The problem with the latest kit: the battery in the new kit has a date that is close to the date that was on the battery that I installed from the first kit I purchased two years ago. I had hoped this would not be a problem but this is not the case. I noticed that the battery was not holding a charge as well as the battery I had replaced it with. I recently was going through the diagnostics in the phone and checked battery status shows "Battery Life - Bad". It is beyond the return date so I'm just going to use it until it goes completely bad or swells whichever comes first. I realize that my phone is well over 4 years old but at the price we have to pay for these things I plan on getting my moneys worth before buying a new one. ;-)
Trustpilot
2 weeks ago
2 months ago