Desertcart purchases this item on your behalf and handles shipping, customs, and support to Greece.
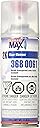
✨ SprayMax 2K: The ultimate gloss upgrade your ride deserves!
SprayMax 2K Glamour High Gloss Clear Coat is a professional-grade, 11.8 oz aerosol clear coat delivering a deep, mirror-like finish with exceptional UV, scratch, and gasoline resistance. Its advanced 2-component polyurethane formula ensures durable protection and fast curing—dust dry in 20 minutes and fully cured within 24 hours. Featuring a precision fan nozzle for smooth, even application without extra equipment, it’s perfect for automotive refinishing and custom projects requiring a long-lasting, high-gloss topcoat.

| ASIN | B0082LJMC6 |
| Age Range Description | Adult |
| Best Sellers Rank | #243 in Automotive ( See Top 100 in Automotive ) #1 in Automotive Clear Coats |
| Brand | SprayMax |
| Brand Name | SprayMax |
| Color | Single |
| Color Code | FFFFFF |
| Container Type | aerosol can |
| Coverage | 4-4.8 sq. meters/liter |
| Customer Reviews | 4.6 out of 5 stars 18,257 Reviews |
| Dry Time In Hours | 4 |
| Finish Type | Gloss |
| Full Cure Time | 24 hours |
| Global Trade Identification Number | 00879910000178 |
| Included Components | Item |
| Indoor Outdoor Usage | Outdoor |
| Is Waterproof | True |
| Item Form | Aerosol |
| Item Volume | 32.37 cubic inches |
| Item Weight | 16 ounces |
| Manufacturer | USC |
| Model Name | SprayMax 3680061 2K Glamour Clear Coat, 11.8 oz, High Gloss |
| Model Number | 3680061 |
| Paint Type | Oil |
| Part Number | 3680061 |
| Size | 11.8 Ounce (Pack of 1) |
| Special Feature | Long lasting |
| Special Features | Long lasting |
| Specific Uses For Product | Interior/Exterior |
| Surface Recommendation | Variety |
| UPC | 879910000178 |
| Unit Count | 11.8 Ounce |
| Warranty Description | No warranty |
| Water Resistance Level | Waterproof |
J**L
Fussy renter loves this clear coat
My rented apartment is small and cramped, so I only do car painting on weekends. That's why I bought this clear coat – it's hassle-free. After getting started, I first tested it on a scrapped license plate. It sprayed smoothly, and the finish looked clean. What I'm happiest about is how quickly it dries; I can finish the edges the next day, saving a lot of time. 😊🚗
J**R
Professional-Grade SprayMax 2K Glamour Clear Coat Delives Mirror Shine 🚗
This 11.8 oz SprayMax 2K Glamour high gloss clear coat produces a stunning mirror finish on my car touch-up paintwork. The two-component aerosol design is easy to activate and spray right from the can without a paint gun. It flows out smoothly with minimal orange peel, and once cured, the coating is tough against scratches, gasoline spills and UV rays to prevent fading. I applied multiple thin coats, and the gloss stayed consistent on vertical panels with no sagging. After full cure, I was able to wet sand and polish it for an even deeper shine. Perfect for small collision repairs, motorcycle parts and custom paint jobs. The professional quality saves me the cost of a body shop for minor fixes. If you want salon-level clear coat results for DIY auto painting, this spray is fantastic.
D**N
Professional Gloss, Perfect For My Motorcycle Touch-Up Project
I used this SprayMax 2K clear coat to finish the repainted fairing on my motorcycle. It sprays smoothly and lays down a beautiful deep, high-gloss finish once fully cured. The coating is tough, resisting scratches, gasoline spills and UV rays so it won’t yellow quickly. I followed the instructions carefully, and the result rivals a shop paint job. It’s convenient for DIY work without needing a full spray gun setup. This 11.8oz can is great for small to medium repairs, I’m really satisfied with the professional outcome.
S**O
A glossy finish for my old side cover
I used the can outside, wore a proper respirator, and followed the activation and shake directions closely. The spray laid down evenly once I got the distance right. I did a few light passes rather than trying to cover everything at once. It gave the cover a clear, glossy look, and the finish feels smoother than the tired surface I started with. The first coat showed a little orange peel in one spot, but a second careful pass helped it blend in.
D**S
Auto clear coat that saved my project
Always a little nervous with 2K sprays, but this SprayMax clear has been great in my small home studio. I bought it to finish a custom guitar body for a client, since I don’t have space for a full compressor setup. The thing that really sold me is how smooth it lays down. I do three medium coats about 10 minutes apart and it levels out nicely, almost no orange peel on the flat areas. I wet sand and polish the next weekend and it looks like I used a proper gun setup. The gloss holds up under my bright desk lights and the color stays rich. My favorite moment was seeing that guitar on stage under LEDs and the finish still looked deep and clean 😄
C**S
Can't Necessarily Follow Directions on Can, Depending....
I hope some other newbie like me will learn from my mistakes. But first: Pros: If you do it right, it comes out great and is easy Nice glossy sheen, no polishing or compounding needed Cons: Directions on can might not apply to your conditions (explained below) Learning curve involved When can gets low (but still feels like it has product) it might spit dry-spray First, the directions on the can say it is ideal to spray around 68d F, with 50% or less humidity. It then states to stay about 10" back and go slow. But it doesn't say if you are NOT spraying in 68d this doesn't apply, and you might need to get close and go fast, if it's warmer. My garage was 80d and "staying 10" back and going slow" was the exact WRONG thing to do. It resulted in "dry-spray" which means the paint starts to atomize and doesn't collect into a solid sheet on the panel, but dries in individual droplets. The result is extreme orange peel and a matte finish, instead of a glossy finish. 9hrs later I wet-sanded the clear flat, which caused some burn-through into the color paint, which then needed touching up. When I cleared the panel again, was sure to do it early in the morning when it was 69F in the garage... Well at that temp the paint stays fluid longer, so it went on like nice solid sheet, but ran and sagged after a few seconds, as now I was too close or went TOO slow for the temperature I was spraying in! ... 9hrs later wet-sanded the runs and sags until the panel was flat again. And finally I had it figured out.... cleared it in the afternoon when it was hot, but got close - about 4" - and moved fast. And THAT came out perfect. Matched the factory finish without any messing afterward. So how close you are, and how fast you move, is totally dependent on the temperature. This is "duh!" for experienced painters, but newbies usually follow what's written on the can. I wish the can would have said, "If it is not 68d but much warmer, you will need to move in closer and go faster." Also, I read many sites that said to do an initial "tack coat" (like is recommended with primer and base). You cannot 'feather' clear coat, or "apply a light tack coat." You will end up with severe orange peel. This paint has to go on in a solid sheet, where all the droplets combine or pool into one flat surface. Individual drops will each reflect the light in a different direction creating that heavy orange peel with a dull matte finish. You need a solid sheet to reflect the light evenly, to get that high gloss look. One annoyance - and maybe it was just me, but I found when the cans still had product but were low (maybe 1/4 full) I'd be in the middle of applying a second or third coat and suddenly the can would shoot aerosol with little paint for a split second, spitting dry-spray all over my previously perfect panel - which would result in me having to wait 8rs until I could wet-sand it flat and do a new coat. After that happened twice I stopped using cans once they felt like they were about 2/3rds gone. Maybe a quick spritz of a small repair area would be ok but I was clearing a fender panel in one case, and a bumper in another. Something to beware of anyway. So having done it wrong every way possible, and having to re-do it and re-buy the paint multiple times, (not to mention base when I burned through sanding the clear), I'd say that once you have the hang of using it in your particular conditions, it's great. And you might get lucky and use it right, right off the bat. But it can require 'practice' for newbies. Especially if painting a large area like a panel, vs a small area or something like a guitar. One tip I read that worked for me: After the can is activated the shelf life is about 48hrs - probably less in the heat. But if you put the left-over paint can in the fridge, it will stay a good long time (months, reportedly). I put one of my cans that was about half gone in the fridge and ordered more... when the new clear came 2 weeks later, I used the can from the fridge first by letting it warm up a couple hours in the garage. Then shook it a couple min and it was as good as a freshly activated can. And no, this isn't the can that spit. (I learned by then to not use any cans once they felt like they had about 1/4 product left.)
S**A
Glossy clear finish
I didn’t spray it in my apartment. I took the cart to a friend’s well-ventilated workshop and followed the can’s safety directions, including wearing proper respiratory protection. The spray went on smoothly once I got the hang of keeping a steady distance. I used light passes rather than trying to cover everything at once. The finish came out noticeably glossy, and the cart looked much more polished when I wheeled it back inside. A week later, I used it to carry drinks during a movie night. I was glad I’d added the clear coat when a glass left a little condensation on the top and the paint still looked fine after I wiped it up.
L**N
Clear coat that saves my day
I run a small window and door shop, and I grabbed this to finish a set of custom metal door panels a client wanted shiny. I like that I just pop the red button on the bottom, shake it hard for a few minutes, and get a smooth fan spray that actually looks close to what my paint guy does with a gun. I sprayed two wet coats out back behind the shop, let them sit, and the next morning the gloss looked deep and clean. Customer noticed right away and stopped nitpicking. That alone made me glad I tried this instead of sending the job out.
D**A
Good one
Very good quality but pricy
A**.
Professional finish for a spray Can
Very good product with professional results when properly prep before hand. Keep in mind that you can’t adjust the noozle so you’ll have to be careful with your speed and your distance. Had to do my front bumper twice when I first used the product to obtain that glossy finish.
T**Y
good product
good product , very stable finish
I**H
El mejor producto para un acabado brillante y duradero.
El envío llegó un día antes de lo estimado y el producto por si sólo es garantía aunque un poco caro por la naturaleza del mismo, ya que es normalmente vendido en E.U. Se usara en el ramo automotriz. Ya probado previamente. Muy recomendable tanto el vendedor como el producto.
M**W
The best spray can paint money can buy
This clear coat is the best clear coat for headlight restoration. It is very forgiving but DO NOT OVER APPLY AS IT WILL RUN. For best result shake the can for 2 minutes and then pop the bleeder and shake it again to mix the 2k in. (If your doing headlights you will want to do 2 to 4 coats. 5-10 minutes between each coat depending on humidity. I did it in my laundry room which is very dry I waited 10 minutes between each coat and it looks amazing. Coat number 1 is super light just enough for the paint to bond and adhere to the headlight. Coat 2 a little bit heavier For the last coat no matter if it’s 3 or 4 that one has to be the heaviest without running. This clear coat is amazing and with proper prep it makes the headlights look like new. Only one problem but you can’t blame the paint for it, the paint only lasts about 24 hours once the bleeders popped they say up to 48 hours if kept refrigerated. 24 hours is the longest I’d say the paint is good after that you’re pushing your luck. I’d say with 2-3 coats you could probably do 4-6 headlights depending on how heavy your going. Here’s the sanding steps I used it’s a lot but these sand paper steps are the best results I’ve gotten. 3M (sand paper only) P320 (50 percent faster sanding) (only needed if the factory clear is holding on, wipe with iso after each sand to see if you’ve missed anything) P600 (start here if the clear is all gone and the headlight is yellow) P800 (refine 600 grit scratches) P1000 (refine 800 grit scratches) P1500 (refine 1000 grit scratches for a super smooth surface to the touch) P2000 (refine the 1500 grit scratches for a super smooth not super orange peely finish) I 100% would recommend this product as I have now purchased it 3 or 4 times. It’s great because when you restore headlights on a vehicle it completely changes the look of the car. 5 out of 5 could not be more pleased. P.S this paint self levels and gets better looking with time (after about 12 hours your safe to touch it but I wouldn’t reinstall them until about the 24 to 36 hour mark.
Trustpilot
2 weeks ago
2 months ago