
🌟 Flip, Sit, and Celebrate!
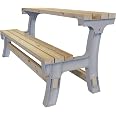
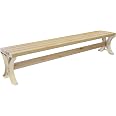
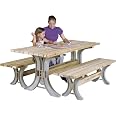
The 2X4Basics 90110 Flip Top Benchtable is a versatile outdoor solution that transforms from a bench to a table in seconds. Made from durable structural resin, it withstands all weather conditions and is easy to assemble with minimal tools. Perfect for gatherings, it can seat up to eight when combined with another bench, making it an essential addition to your patio or backyard.


| Color | Sand |
| Size | 6"D x 28.25"W x 34"H |
| Style | Flip Top Bench + Table |
| Construction | Flip Top Bench + Table |
| Frame Material | Resin |
| Height | 25.5 inches |
| Weight | 14 Pounds |
| Width | 6 inches |
| Shape | Rectangular |
| Material Type | Wood |
| Number of Items | 1 |
| Number of Pieces | 3 |
| Included Components | 2 bench end brackets, 2 pivot brackets, 2 slide locks and all of the hardware needed to assemble the product |
| Batteries Included? | No |
| Brand | Hopkins Towing Solutions |
| Manufacturer | Hopkins Manufacturing |
| Item model number | 90110ONLMI |
| Product Dimensions | 15.24 x 71.76 x 86.36 cm; 5.9 Kilograms |
| ASIN | B0015XGCN0 |
م**ى
سيئة
الطلبية ناقصه لا يوجد خشب هاذي ثاني مرة اطلبها والطلبية ناقصه للأسف
K**N
Easy to assemble and sturdy
Bought this as a project for my cadette girl scouts to assemble and turn into a buddy bench at one of our local parks! It was easy to put together and is fairly sturdy. It was the most affordable option we could find and I dont regret the purchase. Ideally we wanted a solid wood kit but this serves its purpose for us with far less cost and is a great little bench.
N**Y
Highly recommended.
We bought 2 of these benches in spring last year and have been delighted with them. We chose to stain the wood and both timber and frame have survived the winter and look as they did when first put together.We are always complimented and asked for purchase details by our guests so they can buy too.The benches took me (lady of adequate assembly ability) 30- 45 mins each to assemble.I would definitely recommend painting/varnishing your wood before putting the bench together. Our wood was obtained by a local timber merchant who cut it to our desired length. I think it can be anything from 2ft to 12ft? Anyway we chose 4ft. £20 for the lot.Benches work well as a picnic bench when we are eating outside as a family and also work well separately as benches (with a backrest) for seating when we've had garden parties.My husband is 6ft 4 and sits comfortably when the table is up in the picnic bench position.Hope this helps you in your decision making.
A**R
Good minimalist functionality in my opinion.
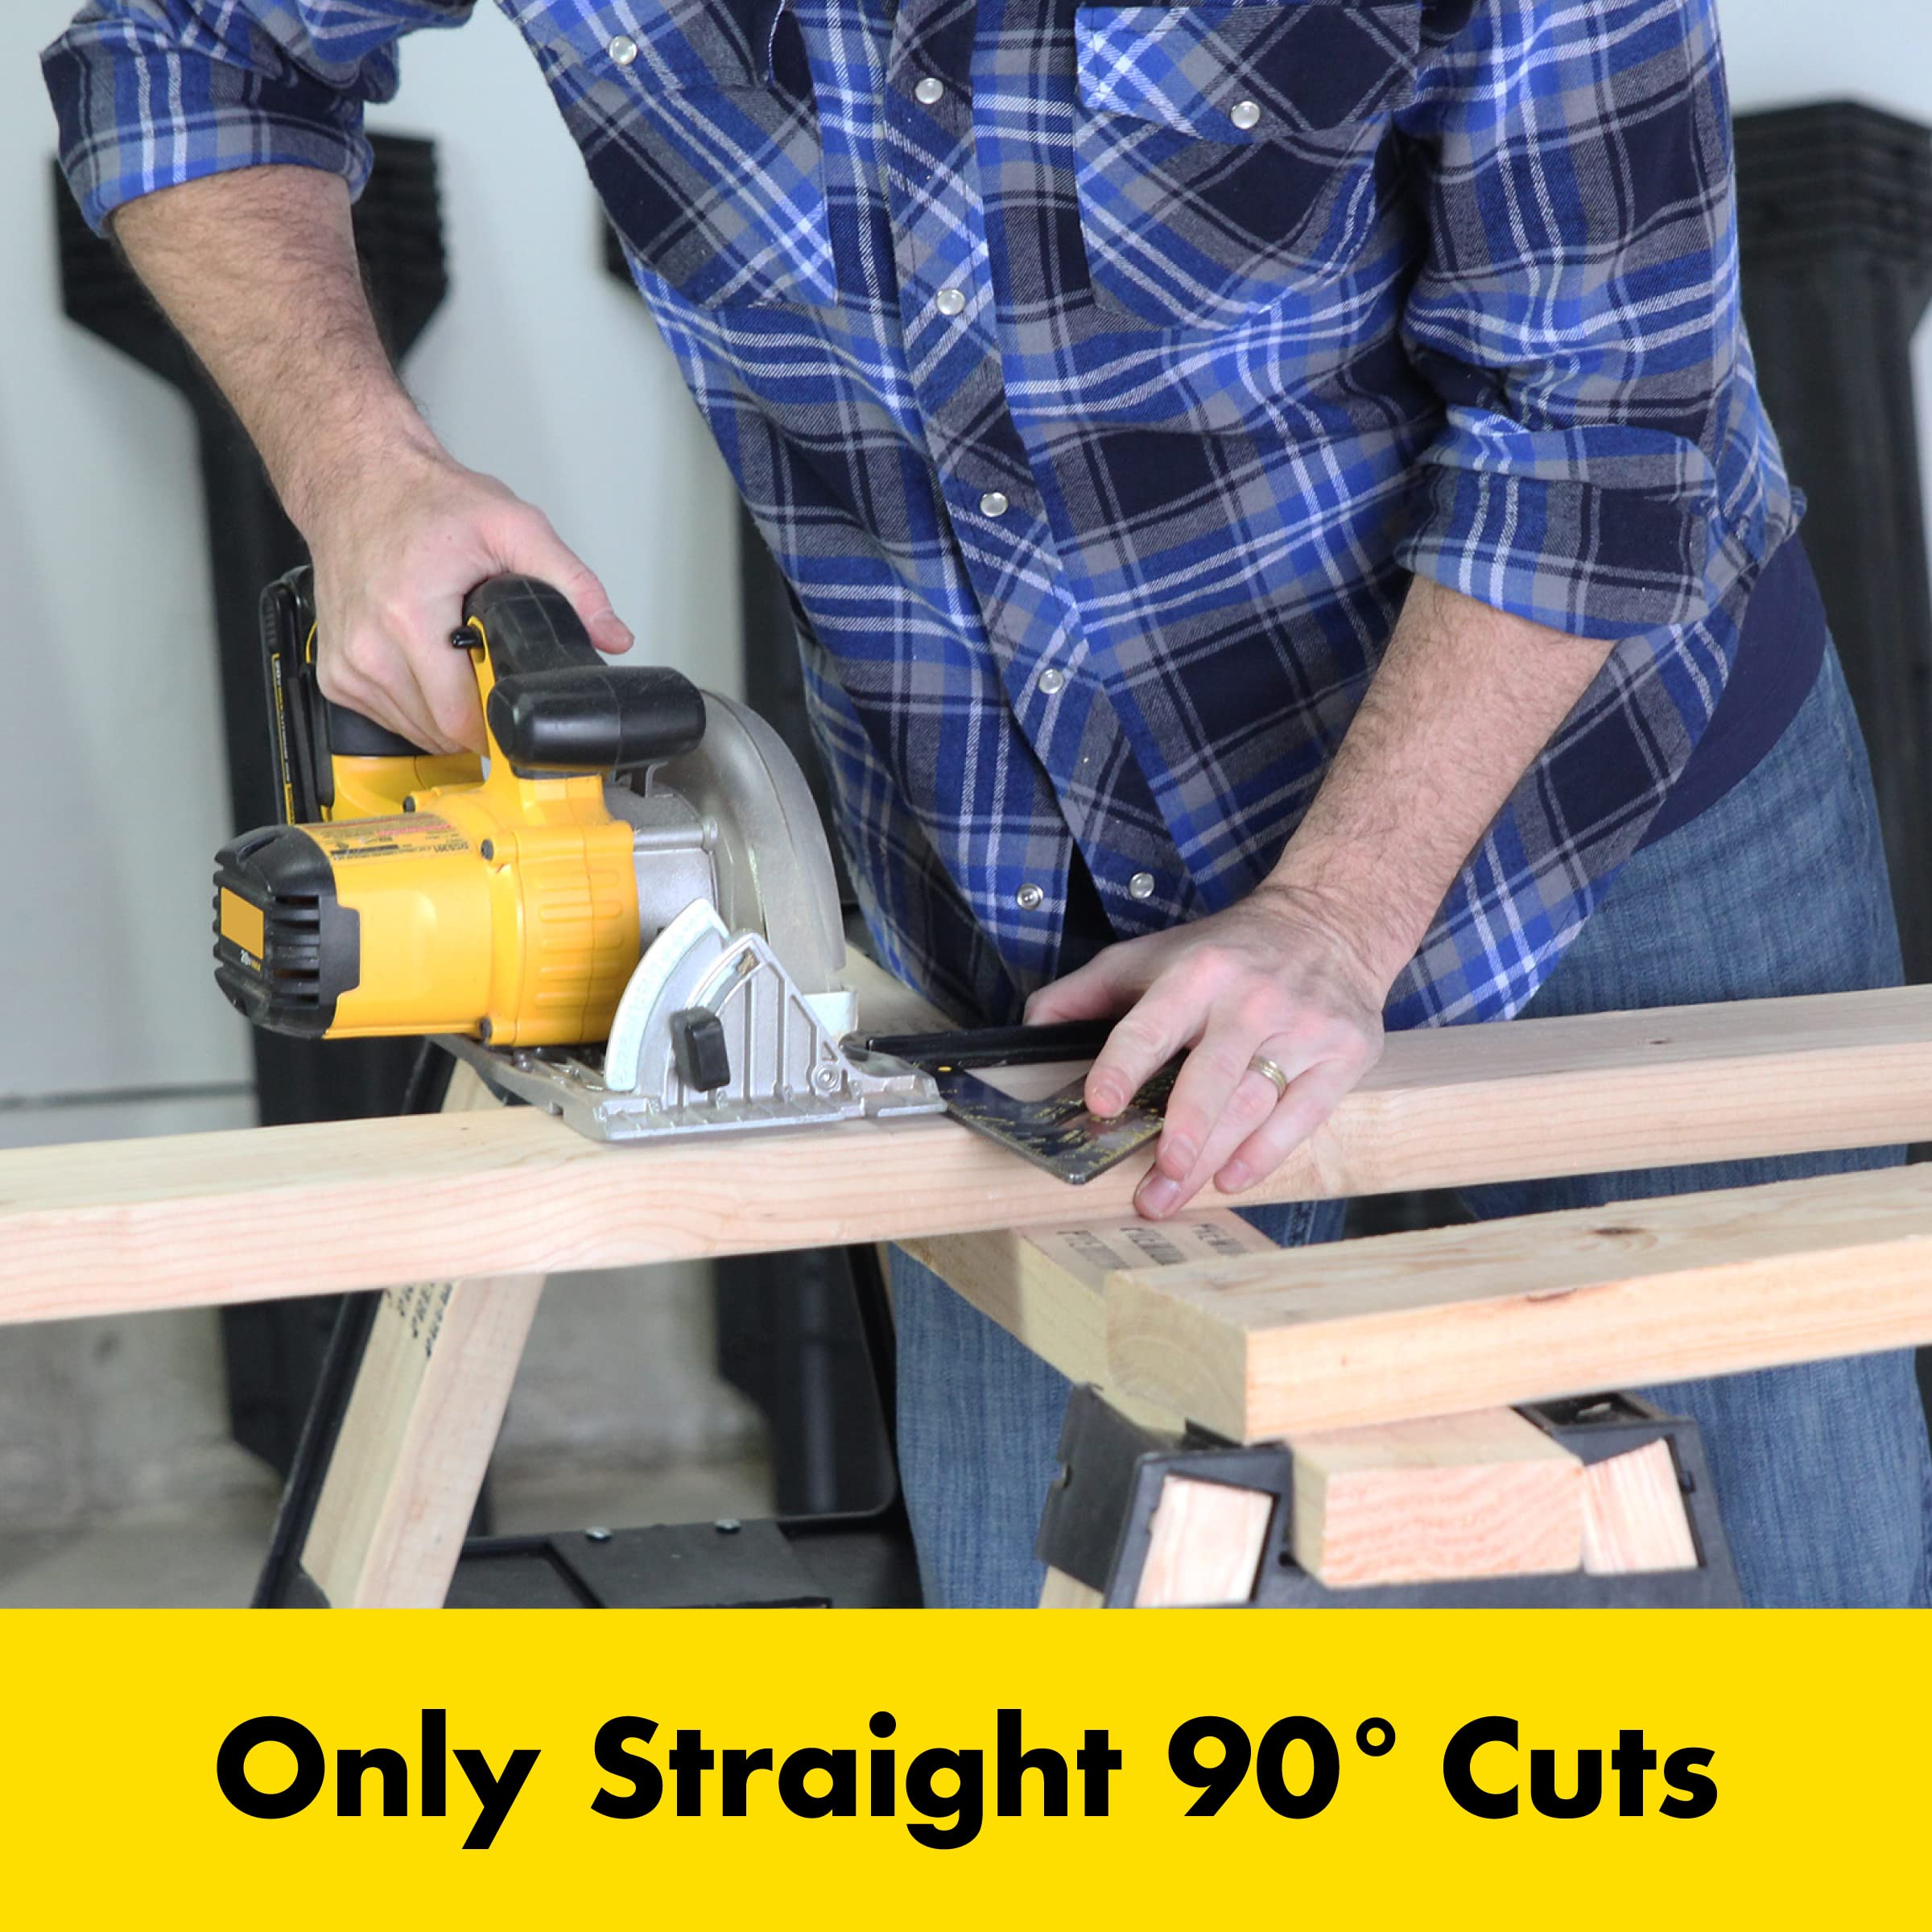
The bench itself was simple and straight forward to assemble with some prep work ahead of time. The quality of the bench really depends on the time taken to prep the boards used as the frame is self is not too complex.I fully recommend getting a flexible drill attachment to get to some of the harder to access screw holes. As others pointed out the frame can break/bend at screw holes if the drill is too strong so I recommend just lowering the torque setting on the drill motor so it would just stop screwing in before bending or breaking the frame and it worked perfectly for me. I used some scrap wood to connect the top and seat boards together before attaching to the frame. Key there is to make sure you have the width of the top boards spaced to fully cover the frame attachments. I used an extra paint stir stick cut up as spacers, 3 sticks wide on either side about did the job spacing between each boards. When attaching the table I broke from the directions and did the support board first. Then laid the 3 board seat already connected upside down on a saw horse and set the frame on that so I could pre drill holes and then just screw in the seat to the frame. As for the top I laid down towels so not scrape the finished seat and tops paint job and leaving the frame unlocked but fully assembles to get the distance between the two frames measured perfectly rather than attaching the adjustment points while not on the frame. I could set it at an angle on the upside down top and mark every hole, pre-drilled then realign frame and screwed it in.I went with 5 ft 2x4 boards. I had the hardware store cut 5 10ft boards in half as it required 9 5ft boards to build. So all I had to do was sand and round the edges of the boards to give them a softer texture when sitting on the edge. I added wood filler to fill in any knots or imperfections and then painted them with a nice semi-gloss exterior paint to protect from water and wear and tear. Took me longer to sand, add wood filler, and paint the boards than it did to assemble the whole thing.I did notice a little squeak between painted wood and the frame so I wiped down the friction points with some finishing wax to "grease" the areas and it helped some so when sitting on the bench I don't notice much noise at all.Table and Bench work well in their respective forms and easily transition between the 2 just by pulling out the 2 locks on either side. Its a fun easy project and if I ever build a second one I can have socially distant picnic tables during quarantine in 2020 and beyond.I liked the blue color so much it took me a day before I wanted to put it outside in the rain but the semi-gloss let me wipe down the table easy. Might be nice for interior as well in rooms right up against windows where you want to work at a table while looking out but then fold down to a bench when you have company inside. Good minimalist functionality in my opinion. I like products that can serve multiple functions with minimal effort transitioning or moving them.
S**B
Great choice
This works well. It's solid and substantial when built. Sanded down dry, tantalised wood and used garden paint on it. Transition from seat back to table takes seconds. A little chiselling out of some grooves, for the bottom crossbars to fit into the slots.
D**K
Awesome. Easy. Solid. Stable. Beautiful project that we will enjoy for years!
I saw some of these at my neighbor's beach house and determined they would be perfect for our deck as well. Some key point to make yours as successful of a project as ours! • Get treated wood • Cut down to specs listed • Leave about ½ inch extra (braces) • Let the wood dry out (2+ weeks) • Place the wood in a dry area • Place on small spacers (for drying) • Rotate/Flip every few days • Rotating keeps wood from bowing • Stain as dark or as light as you want • Get Outdoor Oil Based Polyurethane • I used 3 coats • Plan on re-coating annually or so • I painted mine Black (like iron) • Mine required post-touch up paint • Paint scratches off pretty easily • Paint still looks good just touch up • Use Washers on each of the C-Cuts • Washers not listed in instructions • The washers provide BEST stability • Remember cut braces slightly longer • Longer Braces more space for C-Cuts • More space C-Cut screws/WashersThis was a fun, easy, not too time consuming project. It was my FIRST TIME ever working with wood, building anything. My neighbor gave me the type of wood and type of polyurethane tips, the rest was just my ideas on how to make these more sturdy based on my observations of my Beach Neighbors bench/tables they had on their deck. This is a buy and project worth every minute! We love them and use them all the time. Cut ours down to 5 feet long.*****HIGHLY RECOMMENDED*****
Trustpilot
1 month ago
3 weeks ago