![JPUNG for iPad Air 1st Gen (Model A1474 A1475 A1476) Digitizer Glass Touch Screen Replacement, for iPad Air 1st Generation (2013 Released), with Home Button, Complete Repair Tools Kit[NO LCD]](https://m.media-amazon.com/images/I/31Qyg4+jRQS.jpg)


🔧 Upgrade your iPad Air like a pro — don’t let a cracked screen hold you back!
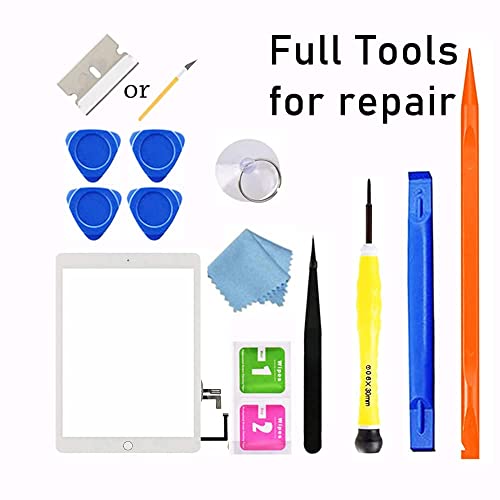
JPUNG’s iPad Air 1st Gen Digitizer Glass Replacement offers a premium, ultra-clear touch screen with 9H hardness for scratch resistance. Designed exclusively for models A1474, A1475, and A1476, this kit includes a home button, camera bracket, and a comprehensive set of repair tools, enabling confident DIY repairs that restore your device’s original touch functionality and look.
| ASIN | B07PKDQLW3 |
| Best Sellers Rank | 2,118 in Computers & Accessories ( See Top 100 in Computers & Accessories ) 1 in Computer Tablet Components & Replacement Parts |
| Colour | White |
| Customer Reviews | 4.2 4.2 out of 5 stars (5,331) |
| Date First Available | 3 Sept. 2018 |
| Item Weight | 259 g |
| Item model number | for iPad Air 1 |
| Other display features | Wireless |
| Product Dimensions | 30 x 19.5 x 1.27 cm; 259 g |
| Special features | High Definition, Scratch Resistant |
D**E
Easy to install and works perfectly
Great product, I managed to replace the screen on my dad’s iPad 10 for a fraction of the cost. Nice step by step video. Highly recommend
P**.
Perfect Replacement iPad Screen
Excellent product. Arrived on time and was well packaged and protected. Like many iPads, this is NOT an easy replacement and requires some skill and patience, so don't blame the new screen if you break it, although this seller does offer a free replacement, once only, if you damage it on installation. An impressive deal. I will buy from this seller again.
K**Y
Ipad screen
Touch sensitivity is slightly off however it had Fit my ipad perfectly the Quality and Functionality is like brand neew. Cant tell its a new screen!
T**Z
Fits and works well
Fits good on A2602, contains double-sided tape, works well
C**D
Cheap cheap
Fitted, cracked 2 days later. You get what you pay for
L**8
Perfect replacement for Ipad mini 2
I'm a DIY enthusiast and have experience opening up laptops and mobile phones. This is the first time I've worked on a tablet. It took me a good 4hrs to replace the screen. Being methodical and spending most of the time cleaning off all the old adhesive. I'm extremely attentive, so you probably don't have to be so OCD like me. It comes with all the necessary tools to open and replace the screen. The only thing that was missing was a good adhesive remover. The alcohol swabs were already dry. After reading some negative reviews, I knew I needed to do more research than simply replacing the screen. Common pitfalls: 1. Screen does not fit - The screen is the perfect size that has its own adhesive. The provided 3M tape is necessary to provide secure adhesion to the tablet. If you apply too much tape or too thick a layer, the screen won't sit flush. Importantly, you need to remove the magnets from the old screen and stick it onto the replacement screen. If they're not aligned properly, they won't fit in the slots in the frame, thus causing the screen to lift. 2. Ghost movement - When removing the LCD screen, the EMI Tape (Electromagnetic Interference Tape) needs to be partially removed. Don't remove the it fully as this black tape needs to be reused to prevent ghost movement.
M**F
Hard task - kit okay, instructions badly presented
Replacing and iPad screen is hard. Apple has put lots of glue inside and would much rather you bought another iPad rather than fix it. I've built and repaired many PCs in my time, but phones and iPads are much more fiddly. Unless you have a lot of patience, I'd suggest taking your iPad to a repair store rather than trying to fix it. The instructions that go with this product are really the best case scenario. They show the screen without any cracks and it comes off pretty easily, and the LCD just lifts up. The reality is that you are replacing the screen because it is cracked. You'll want rubber gloves and to take care with the fine sharp shards. The LCD won't just lift up because Apple has squirted glue behind it. It needs very careful lifting. There is more tape inside the iPad than shown in the videos too. To get the screen off your iPad, you need to heat the glue around the edges of the screen to around 70C. The best way to do this is with a heated mat for tablet repair. You can also use a heat gun. Chances are you won't own either, so you can use a hairdryer to do this but blows everything on your worktop in all directions. There is an important detail when removing the screen - the existing screen has the touch-id sensor in the button. If you manage to remove the screen super carefully, you can use the touch-id sensor that is attached to the origin screen. If your screen is cracked keeping the touch-id sensor in working condition is quite challenging (I failed). The replacement screen in the kit includes a non-touch-id button so you can use that as a fallback. Getting the connectors re-attached is fiddly. I can't get the connector to the main button to go back in. It was originally taped in place and it appears to just slide back in position, but it does not remain there. The cable is going to need folding to make this work. This might be okay when you are doing it for the 10th time, but it is gnarly the first time you try. Ultimately, this was worth a try, but not something I'd recommend for the average iPad owner. The written instructions are not really intelligible and the videos posted here highlight things to avoid, but it is quite hard to avoid some of those when your screen is cracked. The video also has multiple voices talking at the same time which does not help.
D**S
Great...
Great replacement, managed to install with the video provided. Works great.
J**Z
Perfecto y fácil de instalar.
J**.
Works great EZ to install, but have one waNot a licensed pro but I have replaced over 50 touch screen for tablets / iPads and cell phones for friends and friends of theirs. For the average consumer it is not hard. Use a hair dryer (if you do not have heat gun), business cards or playing cards, and watch screwdriver kit. **wear eye protection and gloves** Only warning I have is the home button finger print ID, will not work without the original finger print ID component on the home button cable. To fix the problem you will have to use tools for component replacement (Flux, soldering iron, solder, and microscope). Move the finger print ID component from the old home button cable to the new replacement screen. “Or”… If the old power button / cable are in great working condition, you can transfer them to the new replacement touch screen. You will need exacto knife and very strong glue. rning
O**E
Pretty easy. I had an iPad mini with a badly badly cracked/shattered screen. Unusable. Couldn’t track finger movement. I was quoted various prices from 150 to nearly 300 to have it repaired professionally either through OEM or third party. A refurbished model was only about a 100 bucks. So I decided to have a go if trying the repair myself for under 20 bucks. Mine probably went easier than most. My screen was so badly damaged, the glass literally just popped out. I didn’t have to fight to remove it at all. From there, just a handful of screws, and an electrical connection swap, and it was done. Start to finish less than 15 minutes. It works great. Just like new. Every movement is recorded perfectly everywhere on screen. I also had a “crunchy” home button before (it was a prize that was won, and when received, it had been purchased too long ago to be covered by warranty. The box had apparently been dropped, as there was already a small chip on screen and a small crack in LCD off to extreme side where it didn’t interfere with display or function, and home button was crunchy). The replacement glass came with new home button. So technically, this works better than when it was originally received. Also, I learned how easy it would be to swap the LCD screen out too for 40 bucks. Far easier to repair this little guy than I realized. After learning this, I’m appalled at the rip off level charging being done by OEM and aftermarket repair groups. A 15 to 17 dollar part (probably only 10 bucks when bought in bulk) and less than 20 minutes of work with a return of 200 to 300 dollar charge to end user. Disgraceful. These groups should be ashamed. Don’t get suckered. Try it yourself. It was really not that difficult. Just go slow, follow instructions, watch at least 2 different videos on it, and you can do this too.
Y**N
I replaced my iPad hours ago. The screen replacement works well with my old IPad Air gen 1 and no issues have been found.
S**N
Schnelle Lieferung. Gut verpackt mit ausreichend Montagewerkzeug und guter Anleitung Für das tauschen des Touchscreens braucht man selbstverständlich Erfahrung in der Reparatur von elektronischen Geräten, jedoch hat alles auf Anhieb hervorragend funktioniert und das Produkt macht, was es soll. Touch ID ist selbstverständlich danach nicht mehr verfügbar, da die Logik von Touch ID im Sensor selbst verbaut ist und bei diesem Zubehör Teil natürlich nicht nachgebildet werden kann. Dies trifft jedoch auf alle Zubehör Touchscreens zu und war mir vorher bekannt. Also, klare Kaufempfehlung!!
Trustpilot
1 month ago
5 days ago


