

Desertcart purchases this item on your behalf and handles shipping, customs, and support to Greece.
🔋 Stay Powered, Stay Ahead — Never Get Caught Off-Grid!
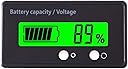
This versatile battery capacity indicator supports a broad voltage range (12V-84V) compatible with 3S-26S lithium and lead-acid batteries. Featuring a large green backlit LCD, it offers multiple display modes including voltage and battery percentage. Designed for durability, it boasts IP67 waterproof protection and reverse polarity safety. Compact and lightweight, it’s ideal for golf carts, e-bikes, boats, and more, delivering precise battery monitoring wherever you go.


| Asin | B08BX13TYY |
| Best Sellers Rank | #12,711 in Automotive (See Top 100 in Automotive) #25 in Battery Testers |
| Brand Name | DFCROMI |
| Color | Green |
| Compatible Devices | 3S-26S Lithium Batteries, Lead-acid Batteries (12V, 24V, 36V, 48V, 60V, 72V, 84V) |
| Customer Reviews | 4.1 4.1 out of 5 stars (1,564) 4.1 out of 5 stars |
| Item Dimensions | 2 x 1.1 x 0.45 inches |
| Item Weight | 18 g |
| Lower Temperature Rating | 10 °C |
| Manufacturer | teseas |
| Measurement Type | Voltmeter |
| Minimum Operating Voltage | 12 |
| Number Of Items | 1 |
| Part Number | 102batteryindication001 |
| Power Source | Battery Powered |
| Specification Met | Ip67, Reverse Polarity Protection |
| Style Name | Voltage Tester |
| Unit Count | 1 Count |
| Upc | 191868478923 |
| Upper Temperature Rating | 50 °C |
User
Easy to install
Works great and easy to install and program.Comes with easy step by step instructions
User
Best meter for EZGO Elite RXV Lithium cart
This is the perfect battery meter for a EZGO Elite RXV with the Samsung SDI lithium battery..!!!Programming it up is a snap, all you need to do is connect the meters two leads (+/-) to a 9 volt battery. To program it for the Elite lithium battery, hold down the left button while connecting it to the battery, press button until “L”appears, then press right button until 13 appears, disconnect it from the battery, it will hold its program until installed in your cart. it’s installed your good to go. Simply pick a location to mount meter, then run leads to the positive and negative terminals on the carts battery. Your done ..!
User
Read the instructions!
Works well. The wiring placement could be better to allow flat mounting. Had to drill a little to do so.As to the percentage, kinda useless. Fluctuates with speed as battery voltage changes depending on pedal position.
User
just installed
i just installed it, even with cutting the slot in the dash it was pretty simple. the programming directions were a little confusing but after re-reading it was simple to program . i did connect the hot wire to the ignition so it turns on when the key is in the on position. i do notice the gauge drops percentage when accelerating and driving ,but i'm assuming that's just uncontrollable draw on the battery. i hoping that the percent when it is initially powered. up is the battery charge level
User
Bad one
First one didn't show volts. Reorder .no refund next one was good
User
Worked well
Looks good
User
Not accurate
This seemed like a good deal….It will only indicate voltage to 51 volts max. My unit always reads 87% at full charge with charger still attached.I have #6 new Trojan 8 volt batteries in series producing 52.8 volts when metered.I would not recommend this item based on these factors.
User
Very nice battery charge indicator
I purchased this to install on my golf cart which had no indication of battery level. It works really well and I like that it has a visual charge indication as well as the actual percent of full capacity that the battery has.
User
It works fair price
Product seems to work easy insulation just make sure you install it correctly now I can monitor the seven batteries on my golf cart properly
User
100%
Slick, use it for trolling motor battery
User
Configuration is not simple, but it works fine
Works fine once you figure out how to configure it. To enter the configuration mode, the display needs to be disconnected from the power source and re-power it with the left button pressed. Company suggests to use the connector as an on/off power supply, but once installed, it could be an issue if there is no easy way to de-power the display. So, you may want to configure it before installation, using a 9V battery as a power source.When in configuration mode, you select the battery type, that basically determine the voltage of a single cell when fully charged: P (lead acid 12V), L (Lithium 3.7V) and F (LIPO 3.2V). The right button allows you to set the number of cells your battery system, for example:P01 = Lead 12V * 1 = 12VL07= Lithium 3.7V * 4 = 14.8VF07 = LIPO 3.2V * 4 = 12.8VConfiguration will be saved when the display is de-powered.The basic design flaw with this display is that it doesn't have a real on/off button, so the best is to connect the display to the battery via an on/off switch so you can configure it when installed. Also, it prevents the device to draw power when not necessary.
User
Très bon produit
J ai deux car et il en on chacun un
User
déçu
pas assez préci
Trustpilot
2 months ago
1 day ago