


🚗 Upgrade Your Comfort, Elevate Your Style!
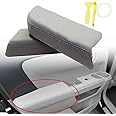
The ISSYAUTO Center Console Cover and Front Door Panel Armrest Cover Kit is designed specifically for 2009-2015 Honda Pilots, offering full protection against scratches and enhancing comfort with its soft, waterproof PU leather. Easy to install and rigorously tested for quality, this cover is the perfect gift for any car enthusiast looking to refresh their vehicle's interior.


| Manufacturer | ISSYAUTO |
| Brand | ISSYAUTO |
| Item Weight | 6.4 ounces |
| Package Dimensions | 11.6 x 8.3 x 1 inches |
| Is Discontinued By Manufacturer | No |
| Manufacturer Part Number | AZH0073-02 |
| Special Features | Console & Door Panel Cover Kit |
M**H
Easy to install, and looks, feels and fits great.
It looks like in the pictures.Fits just right.Thick, nice feeling pleather.Easy to put on. Previously I had gotten the official one, but you have to remove staples and clips and then tuck in and redo all the clips, etc. This was much easier and you can't tell the difference.That it goes on top of the original cover ends up doubling the thickness, therefore padding, which is really nice when you're resting your arm.We've really been happy with this. Good price too.
A**K
Great
It's very easy to put on and fits perfectly. It's also comfortable to wear, and the cover prevents any scratching on your body when you rest your hand or arm on it. The color is great, and the best part is that it's easy to clean or wipe off.
S**0
easy to install
This was surprisingly easy to install. The biggest issues I had (user error) was getting the wrong staple size for my staple gun.Taking my original apart and installing the new one took about an hour (w/o the home depot runs).It's been installed for almost 2 years now and its hold strong and hasn't had any bubbles or rips.
J**E
High-quality fabric but time-consuming installation
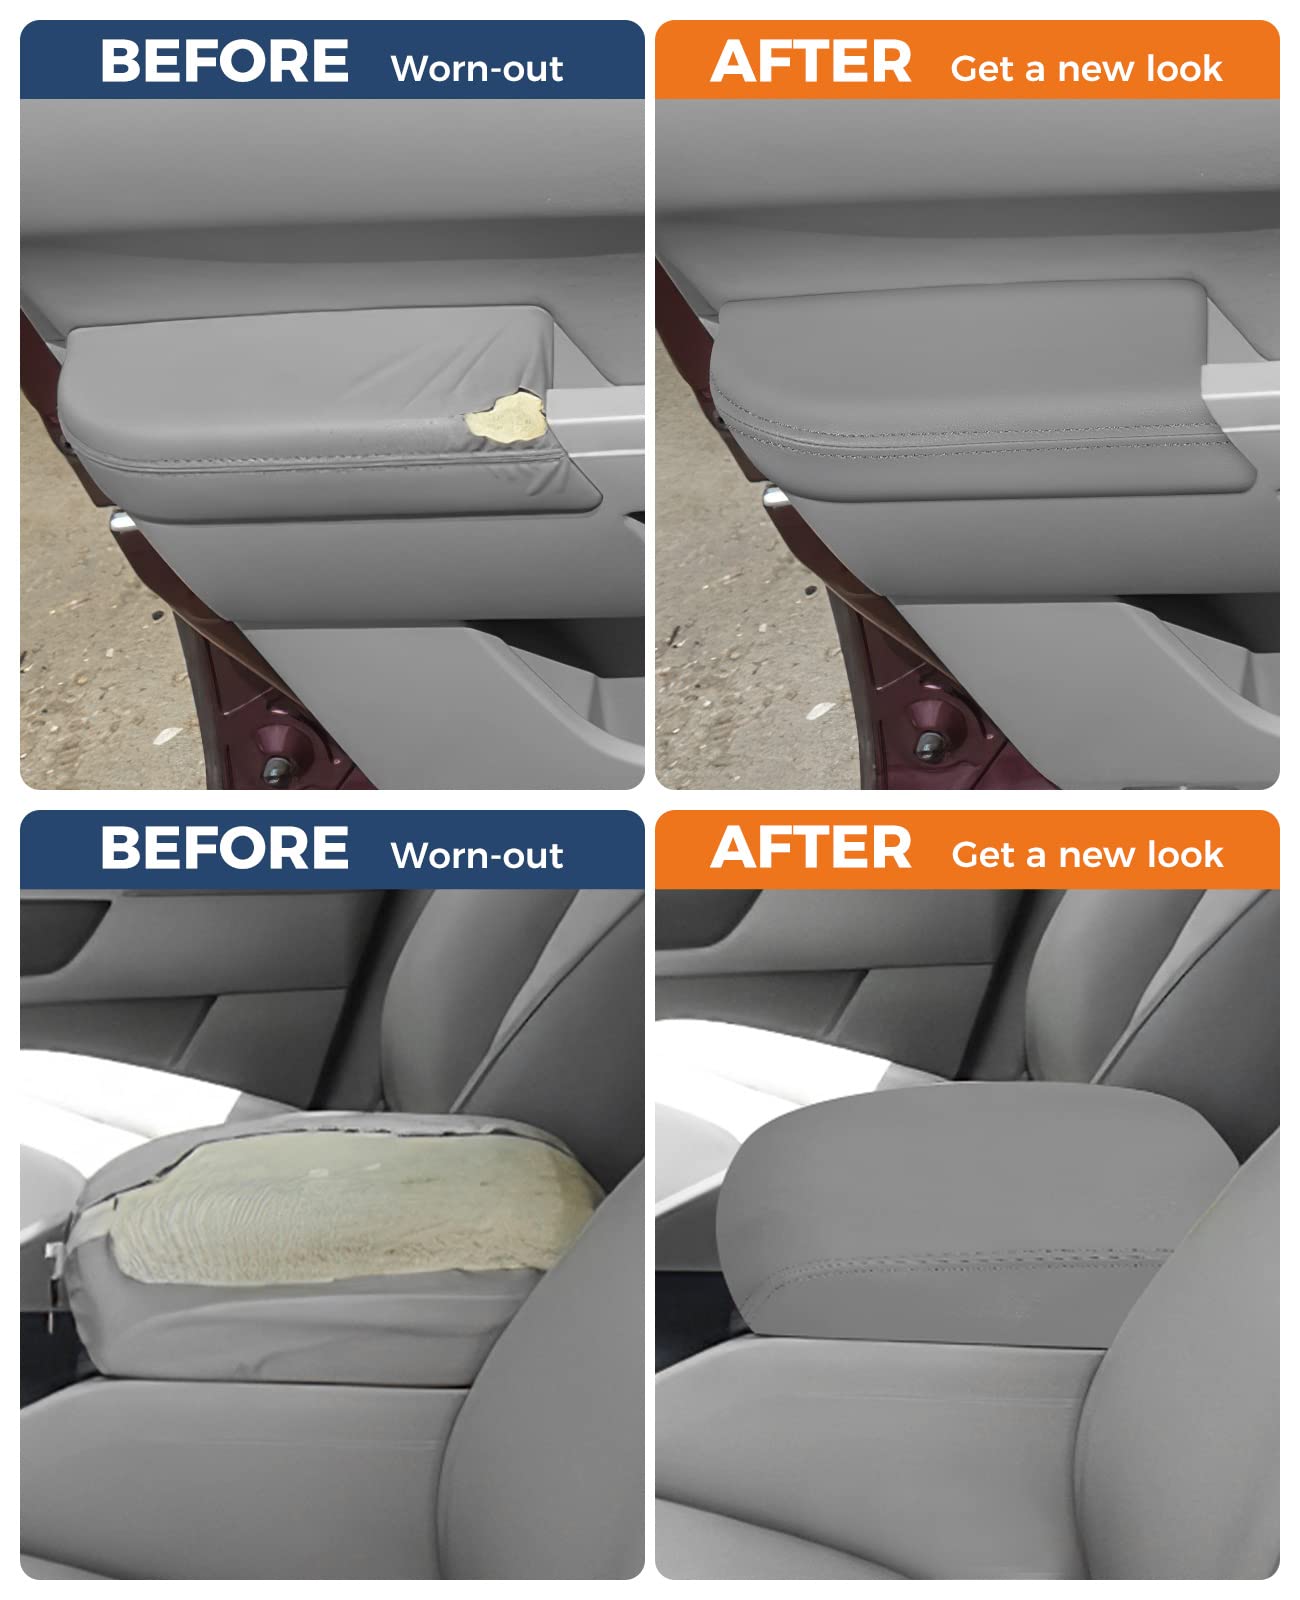
A small hole appeared on the middle console cover of our 2010 Honda Pilot about five years ago. Since then, the hole has gotten bigger and the surrounding leather is loose (see photo). The cost to replace the entire cover is around $300 according to our local Honda dealership, so we’ve lived with this deformity for a while. I finally found this product when I decided to search for repair options on Amazon. Wish I’d thought to check much sooner! The quality of this product is great. In fact, the material seems more durable than the original. The color is also a perfect match.I only gave it 4 stars because of the time-consuming installation process, which took me about three hours. Also, the product doesn’t come with instructions, so I had to check YouTube. However, most of the process is pretty self-explanatory once you remove the cover from the car and begin removing the old leather.NOTE: You will need a Philips head screwdriver and crazy glue for installation.NOTE: My new leather cover came with a crease across the middle because it was folded. I decided to place a t-shirt on the underside and iron it on a low heat setting. This worked well, and I’m glad I took the time to iron it because I doubt the crease would have disappeared over time.Step-by-step Process:1) Lift the console cover and remove the four screws from the underside. After doing this is when I had to refer to YouTube because the underside doesn’t come off easily and I was afraid it would break if I yanked it off. Don’t worry about breaking it. You can in fact just pull hard on it to remove it.2) Remove the four screws connecting the hinge to the cover. The hinge stays put, and the cover comes loose. Take the cover inside.3) Lie the cover on a flat surface and remove the latch (two simple screws).4) The leather on my cover was secured all the way around the underside with little staples, which were quite difficult to remove. I pried them loose with a teeny tiny screwdriver and then pulled them out with needle nose pliers.5) Remove the old leather (should peel away easily at this point). Lie the new leather on a flat surface and place the console cover CENTERED on top of it.6) Get to work securing the new leather fabric to the console cover with glue on the edges and all around the underside. This step took the longest for me to complete. Make sure you pull the cover tight as you secure it with glue. I started by securing the midpoints of the ends and the the sides. Then I cut slits to match where the underside of the cover has little prongs to tuck the leather behind. This made it much easier to pull the sides tight before securing the fabric with glue. Don’t worry what it looks like because you’ll be screwing the cover back on the underside after you reattach it to the hinges anyway. Mine looked like a mess with glue leaking out everywhere. If you have a small staple gun, you can also secure the fabric with staples—mine staple gun was too big, so I only used glue.7) Reattach the latch to the cover.8) Take the console cover back to your car and reattach it to the hinges.9) Reattach the underside cover.While I was installing the new fabric, my husband asked if I wished I’d just paid for a brand new one. Since I saved well over $250 by replacing the fabric myself, I’m definitely glad I purchased this product despite how long it took to install. Great quality and looks even better than the original in my opinion.
Q**.
Require some small hand tools and upholstery stapler.
Love the fit, it is right on. Proper installation would require removal of the old cover and the new cover glued in place and stapled peripherally on the lip.I cheated and just stretch the new cover over the old.Process:1) Remove the arm rest by removing the screws from the hinges with a Philips screw driver. I work on the cargo area surface like a work bench.2) Remove the plastic panel under the arm rest using an interior panel tool or just a butter knife will do.3) Remove the locking mechanism, again use a Philips screw driver.4) Stretch the cover material around the hand rest. Staple in place. (I used a powered stapler) Press down very tight as working on the cargo area as well as the foam in the armrest will absorb the impact not allowing the staples to penetrate. Use 1/4 inch long staples but becareful in the back ledge of the armrest, the staples would be too long and protrude a bit, enough to feel the end of the staples if you press your elbow down hard. I use a pair of pliers to bend the tips down resulting in a line of perforation on the back edge, not a big deal, you'd have to look for it to see it.It'll take a little work, it is not just a cheap over wrap like cheap overwrap (shower cap style) so for those who aren't handy with hand tools, this is not for you.Edges where you have to clear the waffle mold injected stiffening pattern of the arm rest, I just trim around these features but be careful not to over trim exposing the cuts to the upper side beyond the internal panel making it unattractive.I used hot glue to tack things in place as I was doing this by myself and hot glue is a good third hand.Over all job took me just over an hour but, plan it out, have all your tools ready and go at it.Good luck, take your time and you will be rewarded with a nice new looking hand rest. Mine was light gray and the material's color is a 95% match. You'd have to look close to notice it isn't the same material/color but is a very good looking attractive enhanced the look especially if your original armrest cover is torn.Definitely recommend.
J**A
Great fit and color
Fit great for 2015 Honda pilot. Took 1-2 days to work into the console fully latching. Color close enough- makes a world of difference from my torn vinyl! Highly recommend
Trustpilot
3 days ago
1 month ago