Desert Online General Trading LLC
Dubai, United Arab Emirates
Desert Online General Trading LLC
Dubai, United Arab Emirates


✨ Peel, Stick, Impress — Your backsplash’s glow-up starts here! 🏡
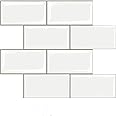
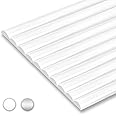
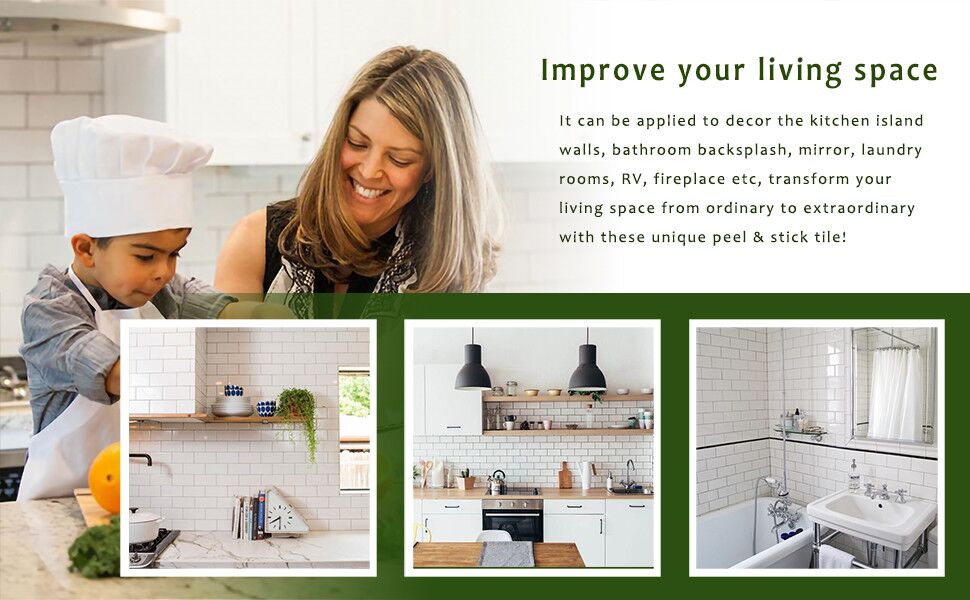
STICKGOO’s 10-sheet peel-and-stick subway tile set features a thicker 2-2.5mm design with 3X stronger adhesive, covering 7.4 sq.ft (40% more area) per pack. Waterproof, heat resistant, and anti-scratch, these polished white tiles transform kitchens and bathrooms with easy, mess-free installation—no grout or professional help required.


| Brand | STICKGOO |
| Color | White |
| Recommended Uses For Product | Bathroom, Kitchen, Living Room |
| Theme | Solid |
| Special Feature | Waterproof, Heat Resistent, Anti Scratch, Thick, Strong Adhesive |
| Number of Pieces | 10 |
| Style | Subway |
| Reusability | Single Use |
| Item Form | Sheet |
| Pattern | Subway |
| Indoor/Outdoor Usage | Indoor |
| Finish Type | Polished |
| Water Resistance Level | Waterproof |
| Number of Items | 10 |
| Product Dimensions | 12.6"L x 10.6"W |
| Size | 12.6" X 10.6" |
| Manufacturer | STICKGOO Direct |
| Part Number | 06A-T |
| Item Weight | 2.35 pounds |
| Item model number | 06A-T |
| Finish | Polished |
| Thickness | 2.5 Millimeters |
| Horsepower | 1 Horsepower |
| Installation Method | Self-Adhesive |
| Item Package Quantity | 1 |
| Coverage | 7.4 sq.ft |
| Special Features | Waterproof, Heat Resistent, Anti Scratch, Thick, Strong Adhesive |
| Usage | Backsplash for Kitchen and Bathroom |
| Batteries Included? | No |
| Batteries Required? | No |
| Warranty Description | Not real tile! |
K**S
30-Year Kitchen Finally Gets an Update - Easy DIY with Stunning Results!
I haven’t updated my kitchen in over 30 years. Honestly, it was a little embarrassing - but since everything still worked fine, a renovation was never a priority. Then I realized I could do a simple, budget-friendly upgrade using peel-and-stick tile. After a little research and help from AI (yes, really!) to choose colors and estimate quantity, I decided on this thicker subway-style backsplash and grabbed four boxes - at 20% off during Prime Days (used 3.5 boxes of 10 sheets each).This backsplash project was Phase 1 of 4 for my DIY kitchen refresh: 1) Backsplash, 2) Painting the cabinets - dark grey, 3) Peel-and-stick vinyl flooring - dark, and 4) Possibly a vinyl wrap for the countertop.I spent 8 hours total, including cleaning, prep, and installation. I took my time measuring (three times, minimum!) - especially around outlets, edges, and corners. Cutting the sheets was easy with either a utility knife and straight-edge or a good pair of scissors, but I found the utility knife gave cleaner results using 3–4 light passes rather than deep cuts. One tip: be sure to position the tile right the first time - once it’s stuck to the wall, pulling it off can damage drywall or reduce stickiness. So, I would test size & placement before peeling off the backing. Then, I'd cut several pieces of a row using the previous as a perfect pattern.Removing the backing paper was honestly the most time-consuming part! But once it was off, the tile applied easily and held firm. I’m really impressed with the quality and gloss - the partial mirror finish gives it a sleek, modern feel. I had just one dime-sized bubble behind a sheet, but it's barely noticeable due to the tile’s reflective surface.The result? I absolutely love how this simple project transformed my kitchen. It looks dramatically better (see before & after pics) - and friends have instantly noticed. Several have complimented my “craftsmanship,” which feels good, especially since I’ve installed traditional tile in the past and know how much harder that is.
J**B
Great money-saving time-saving backsplash stick-on tiles
These trompe l'oeil fake stick-on tiles look amazingly good - it's actually hard to tell they are not real. The only thing is that it is super hard to peel off the backing to get to the sticky stuff. I solved this by scoring it with a box cutter or scissor and then bending the cut a little to release the covering. The first lot I put up I added more glue, but I really did not need it. Amazing quick fix for a backsplash and a tenth of the price of tiles. Now I am going to do the other wall.
M**
Love these peel and stick tiles
Love the look of these tile sheets. Used in the mudroom behind the washer and dryer. I cleaned the wall with rubbing alcohol first. Tiles are really sticking well as it’s been over 2 weeks since I finished the project. Only issue was removing the backing which was tough to peel.
L**I
Quality
The quality of the product is good. Easy to apply and cut to shape to the wall. It is challenging to take off the plastic on the back where it adheres to. Otherwise, overall it is great. The color is exactly what I was looking for and it really brightens up the kitchen.
M**.
Easy to install, Budget Friendly
Product looks great installed and price is very affordable if you are looking for a cheap way to install a backsplash that will give you the look of real stone. My only concern is if the adhesive will hold or it may come apart as time passes-but still I wld recommended
A**N
So cute
Can’t even tell it’s peel and stick!!! Super easy and way cheaper than the real thing so if I change my mind later I can!!
T**N
You get what you pay for
I’ve used other stick on tiles before and they’re way better than these despite being thinner. These don’t have an overlap section on the edge of each tile so getting the seams right is excruciating. You’ll need to use caulk on the seams to make sure they are waterproof and don’t curl up. I think installing REAL tile might actually be easier than installing these (unlike other stick up tiles).However they are cheaper than any other tiles (real or stick up), and the thickness could be a selling point if you know the edge will be visible. They do stick to the wall nicely, though I am suspicious of the glue holding the vinyl tile to the foam. If you decide to go with these, this is my advice:1 - if you need it to be waterproof, apply a tiny line of caulk on the edge of each seam BEFORE placing the next tile against it, while it’s still wet. Once they’re together, peel the clear plastic off and smooth the silicon carefully with your finger or a credit card corner. (don’t worry about smudges, you can rub them off and clean with an alcohol swab when done). Doing the caulking AFTER putting them up is a nightmare and I do not recommend. Clear caulk will require less cleanup but won’t hide the seams as well so you may want to invest in both. Caulk is cheap.2 - get the roller thingy. It’s cheap. I used a flat scraper meant for installing wallpaper and it was difficult to apply enough pressure. I am praying that I applied enough.3 - there is a top and bottom to the tiles based on the thickness of the “grout”, make sure to pay attention to that4 - cut with a sharp new utility knife blade on a cutting mat. Cut from the BACK, it is much much easier.5 - if you have gloopy dried paint in any areas behind the tiles, scrape or sand it away and paint a new thin layer over it. You will need to wait 3 weeks for the paint to dry before installing the tiles. This may sound like a pain but your tiles will stick and be much flatter this way. You may also consider putting a layer of primer on the entire wall for extra stickage.6 - be patient and go slowly, take breaks, and allow yourself to take a few days to finish. Start in a less visible place as practice. Once these are up they are stuck there so it’s best to take your time. I definitely cut some corners or made some bad decisions because I was exhausted and just wanted them done.
Trustpilot
3 days ago
1 day ago