Desertcart purchases this item on your behalf and handles shipping, customs, and support to Greece.
🌌 Unlock the Universe: See More, Track Better, Stargaze Smarter!
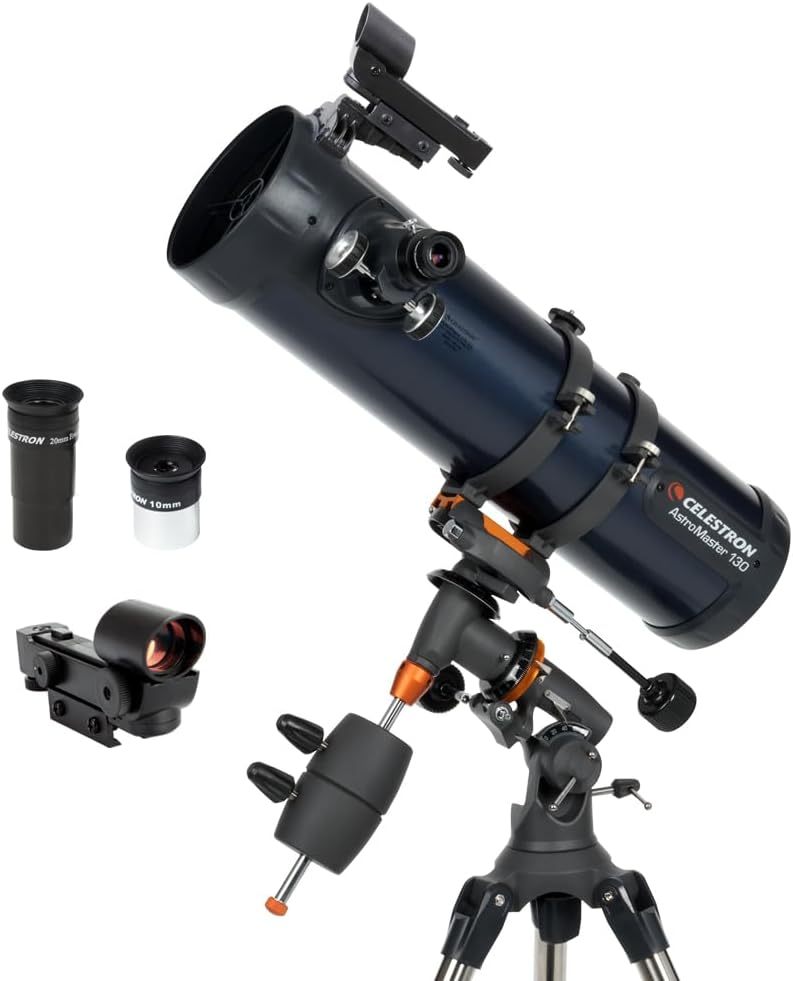
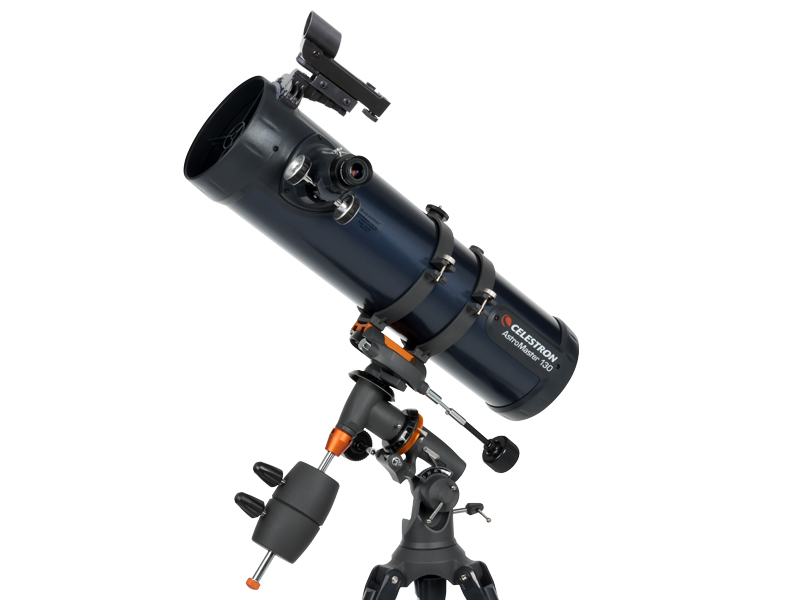
The Celestron AstroMaster 130EQ is a beginner-friendly Newtonian reflector telescope featuring a 130mm aperture with aluminum and SiO₂ coated mirrors for enhanced brightness and contrast. Its German equatorial mount with slow-motion controls enables precise manual tracking of planets and deep-sky objects. Quick, tool-free assembly and an adjustable tripod ensure comfortable viewing for all ages. The package includes two eyepieces, a red dot finderscope, and free astronomy software, supported by a 2-year warranty and US-based customer service—making it an ideal entry point for aspiring astronomers eager to explore the cosmos.


| ASIN | B000MLL6RS |
| Additional Features | German Equatorial Mount with Slow-Motion Control Knobs, Permanently Mounted StarPointer, TheSkyX - First Light Edition Astronomy Software |
| Best Sellers Rank | #268 in Camera & Photo Products ( See Top 100 in Camera & Photo Products ) #3 in Telescope Reflectors |
| Brand | Celestron |
| Built-In Media | 20mm eyepiece with built-in erect image corrector, Optical tube, Red-dot finderscope, Standard 10mm eyepiece, Tripod and mount (preassembled) |
| Coating | Glass mirrors coated with aluminum and SiO₂ |
| Compatible Devices | iPhone, iPad, Android devices |
| Customer Reviews | 4.3 out of 5 stars 3,437 Reviews |
| Dawes Limit | 0.89 arc_sec |
| Exit Pupil Diameter | 1.44 millimeters |
| Eye Piece Lens Description | Standard 10mm eyepiece |
| Field Of View | 0.67 degrees |
| Finderscope | Built-on StarPointer™ red dot finderscope |
| Focal Length Description | 650 millimeters |
| Focus Type | Manual Focus |
| Global Trade Identification Number | 00050234310451 |
| Item Dimensions D x W x H | 38"D x 38"W x 56"H |
| Item Weight | 17 pounds |
| Manufacturer | Celestron Acquisition LLC |
| Manufacturer Part Number | 31045 |
| Model Name | AstroMaster 130EQ |
| Model Number | 31045 |
| Mount | Equatorial Mount |
| Number of Batteries | 1 Lithium Metal batteries required. (included) |
| Number of Items | 1 |
| Number of Packs | 1 |
| Objective Lens Diameter | 13 centimeters |
| Optical Tube Length | 55.2 centimeters |
| Optical-Tube Length | 55.2 centimeters |
| Power Source | Not Battery Powered |
| Telescope Mount Description | Equatorial Mount |
| UPC | 050234310451 |
| Unit Count | 1 Count |
| Warranty Description | TWO-YEAR LIMITED WARRANTY |
| Zoom Ratio | 90 multiplier x |
F**K
Blown away by the quality!
The Celestron AstroMaster 130EQ exceeded every expectation I had as a beginner. Setup was surprisingly straightforward. The instructions were clear, and within a short time I had everything assembled and ready to go. The adjustable tripod is sturdy and makes it easy to get a comfortable viewing position whether you’re standing or sitting. The real magic happens when you look through it. The views are incredible—crisp, bright, and detailed. I was able to clearly see the Moon’s craters. For a beginner telescope, the level of detail is seriously impressive. The manual equatorial mount takes a little bit of getting used to, but once you understand it, tracking objects across the sky becomes smooth and actually pretty fun. It adds to the overall experience rather than taking away from it. The included accessories and astronomy software package are a huge bonus. They really help you learn the night sky and get the most out of the telescope, especially if you’re just starting out. Build quality is excellent—everything feels durable and well-made without being overly heavy. It’s easy to move around and set up in different locations. If you’re even remotely interested in astronomy, this is an amazing starting point. It’s powerful, user-friendly, and delivers views that honestly feel unreal the first time you see them. Highly, highly recommend!
C**R
Great telescope to get beginner interested in hobby
So there's been a lot of discussion in the reviews about if this is a beginner telescope or not. As a person who never touched a telescope (except maybe in high school a thousand years ago) until I decided it was something I wanted to try out this year, I emphatically say YES! This is a great beginner scope. Here's the problem with most people's definition of a "beginner" anything. They want it to be rock-bottom priced, and ultra-easy to use. The problem with this mentality, is that often you go so cheap that you wind up getting a product that does not really expose you to the prospective hobby, and while trying to find something ultra-easy to use, it winds up being extremely difficult because it lacks the more expensive tools that were specifically designed to enhance the human ability when performing certain tasks.... NET RESULT: You wind up putting the hobby down out of frustration without ever really trying it out. I think the reality with getting into telescoping (is that a word?) is that you have to first decide that it is something you truly want to try, so that you don't go by a $74 telescope at W*****t (like I did) and expect to actually be introduced to this hobby. So after trying the $74 failure I got this scope due to the (mostly) good reviews, and because of the brand name. Never being in the hobby myself, I still had heard of Celestron. Many reviews showed broken parts. This wasn't the case for me. Everything was intact and assembly was relatively easy for a novice. A few reviews said this was not a beginner telescope because you had to adjust the mirrors, which apparently was a very difficult task to do. I researched this requirement ahead of time, found that for just over $20 you can buy a laser collimator that allows you to do this adjustment in just a few minutes, and decided that wasn't too much to ask to have an opportunity to enjoy this hobby. P.S. when I got the telescope, I used the laser collimator just to find out that the mirrors were perfectly aligned and I didn't need to do any adjusting. But apparently mirror adjusting is inevitable with Newtonian telescopes, so I'll just keep the laser collimator in my kit bag. Now about the beginner using this scope: 1. The red dot starfinder is a life saver! At first I thought you could just look through the starfinder, see what you wanted to look at, then see it in the telescope. NOPE! You really need that red dot to put the object into the site picture of the scope (especially on a low MM eyepiece). My only complaint might be that I couldn't perfectly adjust the red dot. When I first got the scope I focused in on a house way down the street, then tried to calibrate the red dot so that it was pefectly centered on the center of what I saw in the eyepiece... It was close, but wasn't perfect. HOWEVER. It is more than sufficient for my beginning level telescoping. With my $74 flunkee scope, I would use the cross hairs to try to align the scope to an object, yet even on a large MM eyepiece I could never find anything smaller than the moon! With this red dot starfinder, I have (easily) been able to align the telescope to both Jupiter and Saturn. 2. I may have started of with the starfinder, but the equitorial mount is probably the show winner with this thing. Not to keep referring to my $74 fail, but it is good to have a frame of reference when explaining why sometimes you have to make an investment even for entry-level equipment into a hobby. The $74 fail used a super cheap camera tripod. Problem with these tripods is they don't adjust at a fine enough level to make the small changes to put an object into the site picture. And, despite the fact that the cheap scope didn't weigh anything, it still would drift on the tripod... basically making it impossible to do anything except look at the moon. The Celestron is big and heavy, yet the EQ mount holds it masterfully in position, but the real winner is the fine tuning knobs. I didn't realize just how fast objects move in space (I mean.. I get it. The earth is spinning at 1000 mph, I just never put that together to mean objects move out of a telescope site picture QUICKLY). But with one hand on the fine tuning knob, I can follow the object for a reasonable amount of time to enjoy viewing it. NOTE: I recently bought a motor that I am suppposed to be able to connect to the knob, so that it can automatically hold the picture for me (again... spending more to get the right tools to enjoy the new hobby). Only complaint I have is that one knob seems to be able to adjust indefinitely while the other can only change maybe 20 degrees (10 in each direction) before it hits a stop. After additional study, I think this is because space objects only move in one direction, so if you properly polar align the scope, you should only need one knob to get the object where you want (left and right) and then not touch that again, then solely use the (up and down) knob to follow the object as it moves in the sky... but hey.. I'm new.. I'll learn to use this better too :-) Other than that, the only thing left is the scope. Like I said, I've looked at Jupiter, Saturn, Moon. I can't really speak to the provided eyepieces. Understanding from my research about focal length, and deciding that as a beginner it would help if I had an adjustable eyepiece (so that I can start zoomed out, find the object easier, then zoom in), so I bypassed the provided eyepiece and went straight to a x2 barrow with an 8-24mm adjustable eyepiece. So far it's been great! Saturn is still a little small, so I'm going to see if I can go even smaller on MM and higher on barrow zoom to see if I can really clearly make out the rings. ....but do you see what Celestron did? They created a (relatively) affordable telescope that grabbed my interest in the hobby and now I am full on exploring new ways (EQ mount motors, higher zoom barrow, lower MM eyepieces) that I can explore the universe above!
A**R
This was an excellent purchase. This was my second purchase ever in ...
This was an excellent purchase. This was my second purchase ever in Astronomy. It has a clean look, gives crisp views and not terribly priced for a beginner scope. CON's: NOT FOR ASTROPHOTOGRAPHY! I thought I had researched allot about what I wanted in my telescope, but I was wrong. I could not in any reviews where it was stated that astrophotogaphy with this telescope was going to be possible. So, I figured I'd be the one to warn. Please don't misunderstand, this is an outstanding scope for the money. Modifications need to be done to the scope in order to bring a subject into focus. I have read everything from cutting off a portion of the tube, removing a portion of the focus tube allowing for more in-focus (please take a look through Cloudy Nights-a forum for astrophotography) and modifying the mirrors position in the telescope. It can be done, so don't be discouraged if this is the scope you absolutely want. The star finder is not a star finder either. The reviews in here which denote that piece of equipment as a pain, well, agreed. What I have learned is that the telescope mount is absolutely key. I purchased the RA motor mount that goes with this setup, and it will not help you much. In order for the image to reach the DSLR chip, you have to use a barlow lens which increases the focul length, and proportionately, the difficulty in tracking DSOs. The better the tracking and shorter the focul length, the longer you can expose for. The longer duration exposure allows for more photons to reach your DSLR chip, and finally rendering you a nice image of nebula's, galaxies, etc. The mount is pretty sturdy despite some of the reviews here, with slight modification. I only extend the legs approximately half way or less out. This decreases the number of seconds required to allow the mount to steady itself before taking photos, or even achieving focus. The RA motor allows you to increase and decrease tracking speed. I have not found a perfect setting just yet. I have only been able to capture .3 second frames, which is just enough to capture a tiny glimpse of nebula and only the brightest stars. Out of frustration, I mounted my $70 Celestron PowerSeeker 70mm refractor to the mount and was able to achieve a maximum of 6 second subs before star trails appeared. This was while I framed it in BackyardEOS, and also while i was constantly adjusting the speed to keep Orion Nebula in place. I have attached two photos, one with the Astromaster and one with the PowerSeeker. The refractor is not better quality than the Astromaster, the mount is just better able to keep the lighter refractor on point just a fraction longer. When I had done my research, I could not find any photos from this setup, so I will attach one from the PowerSeeker. I was unable to render a useable photo utilizing the Astromaster 130. I intend on purchasing the Celestron AVX mount with the Astromaster 130. It is a much more accurate mount. Visually. this is an awesome scope. Jupiter, moon, viewing Orion Nebula, it's wonderful. Conclusion, this is a wonderful scope and mount for viewing the heavens, not for astrophotography.
T**E
Worth the extra cost over the Powerseeker 127EQ
Tried the Powerseeker 127EQ first and was only acceptable. Then I bought the Astromaster 130EQ and found it to be a fine quality sharp image excellent Reflector Telescope. You should be prepared to learn a bunch before feeling accustomed to this Reflector but you will be rewarded for your efforts. A laser collimator is a must to check, and if necessary, realign the mirrors, known as Collimating. I spent some time learning how to collimate this Scope, or align the mirrors and I devised an additional step in the beginning as I am a former technical writer. First, making sure the laser Collimator is NOT in the focuser tube and is definitely OFF, stand a few feet in front of the opening or aperture of the telescope and look into the opening where you will see the cross frame in front, the mirror in the back, and the reflection of the front cross frame in the back mirror. Then slowly and carefully concentrate on what you see and move your view slowly so the mirror and reflection of the cross frame appear centered within each other and the telescope tube. The point is to confirm that the main mirror is perpendicular to the axis of the tube such that all parts viewed appear to be all centered or concentric with each other. If looking straight down the tube center, you see the reflection of the secondary mirror frame up front off center and offset from the actual frame up front, then carefully adjust the primary mirror in back so everything looks aligned. That means the back mirror reflection of the front cross frame should be aligned behind the frame when looking absolutely down the center of the tube and the mirrors appear correctly centered. After you have assured a nearly aligned primary mirror when viewed from the front, then you can proceed to install the laser collimator into the eyepiece focuser with the indicator target pointing forward as the telescope does. Turn on the laser and DO NOT LOOK into the front of the telescope until you are done and the laser is out and OFF. Slowly adjust the secondary mirror up front carefully and slowly loosening and tightening very delicately each of the three screws until the laser dot is centered on the target. Remember to very delicately loosen and tighten the screws slowly and in steps between the three until you become accustomed to how the adjustments affect the laser dot on the target. Once you have centered the dot on the target adjusting the secondary mirror up front, then TURN OFF the laser and rotate the laser Collimator in the focuser tube such that the target opening is facing the back of the Telescope where the primary mirror is. Turn on the laser and observe the laser dot on or near the target. The dot should be centered in the target and likely will be close or off towards the outer part of the target. Very carefully loosen the locking phillip screws of the back large primary mirror to allow further adjustment with the larger knurled knobs that adjust the mirror. Very slowly adjust one knob at a time while you become accustomed to the results of each adjustment as they affect the movement of the laser light dot on the target of the collimator. Do this all slowly until you gradually learn the tricks to collimate. Do not make big adjustments to the primary mirror unless you have to. When done, turn OFF the laser collimator and remove it from the focusing tube. Once again, DO NOT look at the laser beam or the front of the telescope while the laser is in use. Now that the eyepiece focuser tube is open, look in the tube and you should see a reflection of your eye's pupil in the center of the small secondary mirror and mirrors and cross frame should all look centered upon each other or concentric. NEVER LOOK AT THE LASER BEAM END, ONLY THE DOT ON THE TARGET WHEN IT IS INSTALLED IN THE TELESCOPE. A laser collimator really is a must for easy collimation testing before each use of the telescope and especially after transporting the telescope as vibrations may change mirror alignment or collimation. I highly recommend pointing the telescope horizontal during mirror collimation outdoors as the laser light may be considered offensive by planes with resulting complaints and possible law actions. I collimate indoors. DANGER; never look at the laser beam as eye damage can result. Only look at the light dot on the target when the collimator is installed in the telescope. The laser collimators are very low power but safety practices should always be a way of life. In actual use, I just barely saw the cluster of galaxies between Virgo and Leo on a dark night near the new moon and gladly told myself it was worth the money and effort to have seen the dim but visible galaxies with the fuzzy center nuclei of stars. Dark conditions and eyes adjusted to the dark are necessary. I also viewed Jupiter and five of it's moons in very good detail on a marginal seeing night. The planet was actually too bright and required a filter to lower the the brightness and improve contrast. For the price, it is an excellent light gatherer. I also have a Powerseeker 80EQ Refractor that exhibits very clear images. The Telescope paid for itself when I could see deep space distant galaxies. That is a result of the larger light gathering ability of the Reflector. I recommend Dean Fuller's video on YOU TUBE on how to operate an equatorial mount and polar align for beginners. It was faster and easier to understand than the written instructions.
D**.
Excellent astronomic equipment and good price
Already I have had opportunity to do a few tests of this telescope and can comment to them that the image is excellent. The construction and the design is robust enough. Only I found two negative details of design. First the screw that is used for adjustment of this latitude evil designed. When one increases the latitude due to the weight of the this assembly it becomes hard to manipulate and when one tries to diminish the latitude, that is to say to slacken the screw in order that the set goes down, the plastic piece separates of the metallic screw turning out to be very inconvinient to do that the assembly goes down almost to the point of remaining united. I come second, the unions of the tripod of stainless steel to the assembly are plastic, these should be metallurgies to give him better permanence in the time. A recommendation for CELESTRON, they must improve the protection of the packing of the Mount CG3, it(he) is not alone to put it in a box without any protection, this one should come protected by rubber(gum), to avoid what happened to me, that in the sending(parcel) and due to the weight of the mount, the mount I strike and there was doubled the screw of Slow Movement in DEC. Lamentably I cannot do claim for guarantee since I am in Venezuela, and the costs of movement going and return of the equipment(team) they be be very high in comparison with the cost of the Telescope. I do not still have mas remedy that to try to repair the piece. David Trujillo P. Barquisimeto, Edo. Lara Venezuela Español. Ya he tenido oportunidad de hacer unas pruebas de este telescopio y les puedo comentar que la imagen es excelente. La construcción y el diseño es bastante robusta. Solo encontré dos detalles negativos de diseño. Primero el tornillo que se usa para ajuste de latitud esta mal diseñado. Cuando uno incrementa la latitud debido al peso del montaje este se torna duro para manipular y cuando uno intenta disminuir la latitud, es decir aflojar el tornillo para que el conjunto baje, la pieza plástica se separa del tornillo metálico resultando muy incomodo hacer que el montaje baje casi al punto de quedarse trabado. Segundo, las uniones del trípode de acero inoxidable al montaje son plásticas, estas deberían ser metálicas para darle mejor durabilidad en el tiempo. Una recomendación para CELESTRON, deben mejorar la proteccion del empaque de la Montura CG3, no es solo ponerlo en una caja sin ninguna protección, este debería venir protegido por goma, para evitar lo que me pasó, que en el envío y debido al peso de la montura, la montura se golpeo y se dobló el tornillo de Movimiento Lento en DEC. Lamentablemente no puedo hacer reclamo por garantía ya que me encuentro en Venezuela, y los costos de traslado ida y vuelta del equipo serían muy altos en comparación con el costo del Telescopio. No me queda mas remedio que tratar de reparar la pieza. David Trujillo P. Barquisimeto, Edo. Lara Venezuela
B**R
Awesome I'm very happy but has only one CON
I just received this telescope today and couldn't wait for tonight.... Having said that I haven't had a telescope since I was a kid(a very long time ago) I researched telescopes for a long time looking for one I could use with my Nikon D5200. After about 3 weeks I decided on this one mainly for the price and having the basic requirements for astrophotography other than being a refractor. After about an hour of putting it together, which wasn't to bad seriously tho how much fun is putting anything together but it was painless and easy. Tripod fairly sturdy better than I expected, mount is heavy duty and simple to install, telescope is big (or at least I thought) but we'll build and simply slides and you lock it in place. This makes it easier to move around in your house and to the great outdoors. After setting up outside when the sun went down I had a little trouble finding Saturn, but a little patience and very slight tuning here and there I found it in about 15 minutes. I could see clearly the round planet with a perfectly visible ring. I used a 20mm to find it and switched out lenses to get a closer view. It was spectacular! I have never seen it through my own telescope. CONS The finder scope is kinda useless it's hard to tell where to put your head to align, after giving on that I stood behind the telescope and bent way down looking straight up the tube on the top and aligned it that way and found Saturn within a few minutes. Now I'm waiting on the T adapters for my camera to see what I can capture. My viewing ended early tonight due to clouds rolling in or I would have stayed out there instead of writing this review. Definitely worth the money and a great starter telescope. If I can work it so can you. I now can't wait for the moon( it's a new moon right now so I have to wait)
L**E
A Good Place to Start for the Money
After having several inexpensive scopes over the years I decided it was time to take a small step up and get one with an equatorial mount. After using it for the first time I have to agree with some of the other reviewers. This scope has some definite pros and cons. First the pros: - The optics are pretty good. They are very clear compared to what I have used in the past. - The eyepieces are also quite good for the price. There are 10mm and 20mm eyepieces that are perfect for beginners. - The tube is made of sturdy, rolled sheet metal, with good quality heavy duty plastic at either end. Now the cons: - The tripod is actually made of light steel tube and it's not very stable with all the weight on top of it. - The mount is not so good. The RA adjustment is relatively smooth, and adding a little silicon grease helped a lot, the Declination adjustment is very rough. I have read several reviews about the spotter scope being "useless" , but I had no trouble with it. I used the top of a distant radio tower to align it and it worked perfectly. On the first try I was able to pick out Venus, Saturn and Jupiter with no trouble, and some dimmer objects with a little effort. Once you have the scope on an object you have to focus carefully and not touch the scope so the vibration settles down, which takes a few seconds. I was able to keep objects in view with the RA adjustment, but again, you have to let it settle after each adjustment, which takes a few seconds. Overall this is a good starter scope for a child who is not into instant gratification, or someone like me, who isn't expecting to discover a comet, but just likes looking up there every now and again. Reviewer's problems with the mount are well founded until you Google them and see how much good ones cost. That said, if you are a parent willing to learn and work with an interested child, this scope is a good place to start. If they show real interest in astronomy, then you can look at better scopes later.
K**N
Great beginner scope for the price
I think this is a very fair telescope for the price. I used to own a 10" telescope that cost $3000 and had the full electronic controls. I was looking for something more portable as the other one was very large and weighed at least 50 pounds. I was surprised that this one worked pretty well, again for the price. Its not a substitute for $1000 or $3000 scope. Here's what I would want to know if I was new to telescopes and considering buying this. You MUST by the extra lense kit for an additional $150. The lense that comes with it is not that powerful. You'll thank yourself by taking the time to learn how to set up the equitorial mount correctly. And also learn about lenses - you can't just pop in the most powerful lense and get a clear image. Download the celestron app and plan out what you want to see before you're standing outside excited to see something. Astronomy is a lot of fun, but there's a lot to learn. Finally, temper your expectations. You will get great close-ups of the moon. Mars will appear as a reddish dot with no detail. You won't see the colors of Jupiters stripes like a picture from NASA. You'll see that Saturn has a ring, yes it will appear as one light band, not several. And with this scope, nebulae will appear as more of a haze than a colorful exploding cloud. Unlikely be able to make out a galaxy except if you're on a mountain top on a very clear night. If you're a beginner, buy this scope with the additional lense kit and patiently learn how to use it. If you're not a beginner, save your money and get an 8" at least.
F**Z
Alın ve uzay macerası yaşayın.
Çok iyi bir teleskop. Başlangıç için 50AZ modelini almıştım ama arasında çok fark var. Andromeda, jüpiter, saturn ve niceleri telefonumda var ama "AMAZON TÜRKİYEDE RESİMLERİ AÇSA GÖSTERECEM!" Eğer çok üst segment alıp para basmayacam diyorsanız ideal. Çok ekmeğini de yedim ürünün ;) 2 eksisi var el ile taşınmaz çok ağır. Ekstra lens alıp geliştirmek lazım. Jüpiterin 2 büyük çizgisi ve büyük kırmızı gözü lens yardımı ile gözüküyor. Ayrıca fotozeynep ile 1 günde kapınızda.
S**P
An out of the world experience
Amazing is just not enough to describe what you see and feel looking through the eyepiece. Venus was my first stop, "wow" was the word that came out when the image got focussed for the first time. I could see the phases of venus with just the 20mm eyepiece. 10mm made the image a bigger one and astonishing. Moon was playing hide and seek with the clouds but when it was well above the horizon and shining brightly, I was spell bound with its beauty. Honestly you could spend hours just looking at the moon. 10mm eyepiece gave an even closer look at the Carter's, the shadows casted by the craters and the mountain ranges on the moon. Jupiter looks like a 2mm ball with very faint bands of methane distinguishable if observed for longer durations. The four moons of Jupiter are just a very minute dots if observed very minutely. But I felty it requires more magnification power to observe Jupiter with it's methane bands and the giant red spot. (May be collimation issue is there) Couldnot see the most beautiful planet Saturn as clouds came in hope to see it when conditions are perfect. These were my first experience of amature astronomy with my first telescope. I don't write reviews at all but this Celestron Astromaster 130eq is such amazing piece that it made me to write such a review. Though there are some points which I would like to list to get the most out of the telescope. 1. Lots of patience is required to be able to see what you actually want to see, trust me patience will give you all that you want from this telescope. 2. Try to see the videos and go through the instructions manual before beginning assembly of the telescope as it's quite critical for one who has no idea of any such kind before. 3. Lot of things has to go right to get the perfect views, if not getting the perfect view wait for the perfect condition to occur. 4. The equatorial mount is very heavy and of solid built quality but the pointers are just not right and you can't be sure which degree u are setting on it. 5. The tripod is also of heavy construction but if expanded fully it feels more shakey so I don't expand it. 6. The secondary mirror was dangling loose when I first unpacked the telescope which totally dishearted me but I did manual collimation as per the instructions manual provided and it was fairly accurate but will eventually require a lazer collimation which again costs around Rs 6000/- to get more sharper images. 7. The telescope is very heavy (around 16kgs) and very difficult to move it around in assembled condition. It gave me body pains the next morning after my first setup and observations. 8. There are no cromatic abbrations as it is relfector telescope and the optics are of very good quality Those who are still reading this review and disheartened because I didn't post any pictures of moon or Jupiter for them I just want to tell that pictures just don't do justice to what you can actually see with your naked eye because human eye has 1000 times better dynamic range than any camera. Even I have gone through all the pictures posted in the other reviews. Trust me you are going to see 1000 times better with your naked eye that any of those pictures. If you want to go for this telescope go for it without any hesitation as it will finally give you and out of the world experience.
T**O
Excelente qualidade - Vale cada centavo
É bem preciso na busca de planetas quando se regula bem a buscadora. As lentes que vem nele é de altíssima qualidade e só fica "devendo" uma barlow para aumentar o zoom. - Antes de comprar, é importante saber a latitude e longitude da sua localidade. - Se vai comprar, compre uma barlow também. Respeitando a capacidade do telescópio - Zoom real máximo é de 260x (sem aberrações nas imagens) - Para ver a lua, fica muito bom com o filtro lunar e as lentes de 10mm e 20mm dão e sobram - A regulagem precisa é muito boa - Se for fazer imagens/vídeos, recomendo um suporte para celular ou câmera DSL
A**N
Great for first time users
After much searching and investigating I picked this telescope as it had the largest aperture for my price range. It is very well built and was easy to setup and build. The guide is useful, but ended up searching YouTube for a video guide - this also included how to balance the telescope [...]). The telescope itself was supplied with 2 lenses, a 20mm and a 10mm. The 20mm is plastic and I only use it as a starting lens to position the telescope first to what I want to see. The 10mm is a good little lens and give nice view of the stars and moon. I also purchased the 'Celestron AstroMaster Accessory Kit' at the same time - this included lens filters and additional 5mm, 15mm and 2x lenses. This gives more range of magnifications to use with the telescope. Viewing with the telescope is very good. The moon is amazing, but you will NEED a moon filter - it is very bright. You can clearly see the moons of Jupiter and with my additional 5mm lens I can just about make out the markings of Jupiter. As for the other planets they have not been visible in the evenings yet - but can't wait until Saturn appears! The only fault is the StarPointer. It's not that good, but you can work around/with it. I have even had my 4 year old daughter looking at the moon - which she found fascinating as she could see the craters very clearly. Since buying this, I have also contacted Celestron support (issue with the additional lens). They were quick and put me in touch with their local distributor (Hama) in the UK. Hama were also very helpful. All-in-all this is very good for the price it costs. I wanted a good telescope that would allow me to get started in Astronomy, without using it for a short while and having to replace it when I want more. This is a good start and with the right lenses will do for what I want it for. Good quality lenses are not cheap (it's the price of the telescope itself for a set), but I can now slowly upgrade this over time now that I have a decent telescope.
B**N
Celestron telescope
Arrivé très vite, très bien fait, très content.
Trustpilot
2 weeks ago
1 week ago