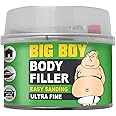
✨ Smooth it Out with Style!
SILVERHOOKBIG11 Body Filler is a 250-millilitre fine compound designed for a flawless finish. With added leveling properties, this lightweight filler is perfect for various surfaces, making it an essential tool for both professionals and DIY enthusiasts. Manufactured by Silverhook Ltd, it combines quality and convenience in a compact package.
Manufacturer | Silverhook ltd |
Brand | SILVERHOOK |
Model | BIG11 |
Package Dimensions | 10 x 10 x 8.5 cm; 480 g |
Item model number | BIG11 |
Manufacturer part number | BIG11 |
Special Features | Smooth Finish, Fine Compound |
Item Weight | 480 g |
Viscosity | faible ou moyenne |
M**E
The biggest of boys
Overall this is really good stuff. It comes with hardener and also a small flat scraper/smoother, about half the size of the normal ones. The lid can be a tricky to get off, but take your time with a flat head screw driver and work your way around the can jimmying and itll come free.It really stinks as filler does.I was mixing about a teaspoon at a time with a drop of harderner, it goes off quite quickly, maybe 2 mins tops working time. I could sand it after about 10-15 mins.Sanded nicely with some sandpaper- mainly 240 and 320 i used.It makes nice sharp edges if you work it right.Painted over with primer and it looks good!Adhered to the bare metal on a car body very well.
E**R
Excellent for 3D prints but cures fast
This is difficult to be critical of. It's a great filler, it's just about the only one I'd recommend for 3D printing or general use, can confirm I've used it with eSun PLA+ with great success. Tried several brands and technologies including AK, Vallejo, Toupret, and this came out on top. I can't speak for the other variants that Silverhook makes however. It sands real smooth and doesn't suffer from chipping provided the surfaces are prepared beforehand, adheres very well, very fine consistency too.I fully understand that 3D prints are not the intended use but it does work, only too fast. The solution to this is to do it in lots of small successive batches. For fellow 3D printing enthusiasts I've written some directions for use below, assuming the print is fresh off the printer:1. Buy generic Chinese sanding blocks (orange, blue, grey multipacks, 24 pack was the best value for me) and use from 60 to 220 grit to reduce print lines, keep sanding until the surface looks somewhat fuzzy.2. Buy generic chinese sanding PADS (red felt-backed, for attaching to power tools usually in an 18 pack) and use with a black and decker mouse until you're satisfied with the surface smoothness.3. Buy some bulk packs of clear pill measuring cups (50pk ~£5), and bamboo wax jumbo lollipop sticks (1000pk £10~15).4. Decant and stir up a very small batch say 10ml filler, to 1ml red catalyst (a pea sized amount).5. Mix it extremely thoroughly, fold and scrape, make sure none is left unmixed as it simply won't cure. You can tell by the shade of colour, uncured is lighter.6. Use a new lollipop stick to spatula it on, and add slightly more than you think you need. You can build up coats instead but there's really no point.7. Use generic Chinese sanding BLOCKS to take off the bulk of the excess, then use the PADS with a black and decker mouse until the surface is silky smooth.8. Prime with Jenolite and polish with the finest grade sanding pad.Best of luck!
J**H
Workable
This is considered one of the better fillers but from my experience the bright white makes it harder to base coat with some paints. Cure time is good. Filler works well on jobs that need a lot of filler while small filling and spot repairs this filler is harder to make work.
T**X
Easy to use, fast drying
Easy to use, did a good job, very quick setting so needs using very quickly after mixing but also ready to sand and paint quickly.
M**X
Super fine
First time using any kind of body filler to fill in two indicator 'holes' where my old indicators used to mount to on my motorcycle's ABS body panels. The mounting spots for the front indicators were about 20mm x 30mm with a short recess before curving out into the rest of the panel. I had re-wired the headlight 'aux/running' rights to be indicators by swapping the W5W bulbs for amber LED W5W units and swapping some cables so it meant I no longer needed the bulky stalk indicators and could fill in the hole.This stuff worked just as I had hoped. I was going to use some mouldable glue like 'Sugru' however I thought this would be a more permanent and neater solution. The only difficulty I had is that I didn't want to use the entire tub at once as I didn't need that much. I only needed to use about 1/10th whats in the tub but theres no measurements to how much hardener I need per random amount of whats in the tub. I did it by eye and I appeared to have got it right as it hardened just fine.It stinks, as a warning. It lets of a lot of vapour and you wanna do this outside in a well ventilated area. Mask up the area you're working with as you don't want this stuff to cure on any surface you don't want to get ruined. When it was fully cured (I left it for 2 days, this wasn't required I was just able to) it was time to sand it down to match the curvature of the panel. It's super satisfying and so so easy to sand this material as it just turns into powder and doesn't clog up sandpaper. Once finished, it's immediately ready for paint and it takes a coat super well.The end results were far from perfect, as I said this was my first time, I wasn't expecting a bodyshop finish. Close up, you can tell, but that wasn't my goal I just wanted to fill them in. I'll edit my review if they crack or fall out as it does say on the tin that it *may* not stick to some plastics. However it felt very firm and didnt move at all during sanding.In summary, this stuff is great to work with and has amazing sanding properties. I highly recommend using this stuff instead of mouldable glue as you'll get a much better finish. However, be prepared as it's harder to do and you need much more prep beforehand.
Trustpilot
4 days ago
2 weeks ago