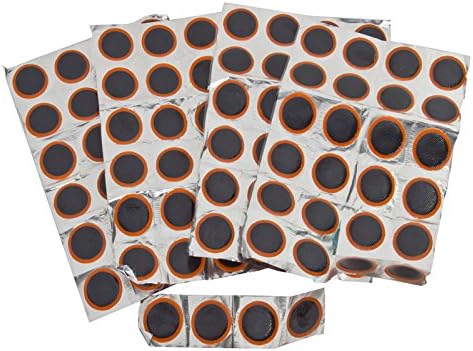
Sunlite Bulk Patches, 25mm Diameter, 100 per Box
Product ID: 2630672
📏25mm Diameter
📦100 Patches/Box
🔧Versatile Use
Desertcart purchases this item on your behalf and handles shipping, customs, and support to Greece.
Patch it up! 🛠️ Your go-to solution for every fix.
Sunlite Bulk Patches come in a convenient box of 100, each with a 25mm diameter, making them perfect for a variety of applications, from home repairs to creative projects. Durable and easy to use, these patches are designed to meet the needs of both professionals and DIY enthusiasts.
G**F
Work great.
These are economical and work great. I bought the 100 pack and went to my local automotive store to buy a larger can of cement for patches.
M**E
Directions
Needs directions, badly, and yes the patch is large. I am sure the patch can be sliced with a sharp razor and work fine for smaller tubes but scissors bend the patch and separate it from the foil. Seriously what this product needs is directions, I have found two effective ways to use these patches one is to use a vice and cinch it overnight, this works great. Lets face it if you get a flat your probably on the road so on the road this is the only successful way I found to use these patches. Step 1 find the leak, now I to be honest the first time I used this patch I missed the leak, it only caught the very end and the outside of the patch did not hold, so I began this as a part of step one, make the hole bigger, the patches are an inch in diameter make the hole so you can see it when the tire is flat. Step two, roughen up the surface and clean, I have used both the "screen" from old kits and sandpaper, they work equally well. Next (step 3) Apply the glue, this is important in almost every other patch kit I put very little glue, one drop then spread it around the surface, with these for some reason you need a little more, about 1/32 of an inch, not a lot but more than any other patch I've used, I should mention I used mostly leftover glue from old patch kits but while trying to find out how to use these effectively I shopped around a bit and eventually settled on Elmers wrinkle free rubber cement, sold by Amazon as an add on, but 1.89 at Target for 4 ounces and so far has worked better than any in any kit. Step 4 Wait... yeah this part sucks you have to let the glue settle, most kits say to wait until it's completely dry, not the case with these, give it about 2 minutes ( live in sunny California, so where you live may be different). Step 5 Apply the patch, peal the foil off the back while holding on to thin plastic on top, it's there so you don't get dirt and oil on the back, use it, hold the patch tightly to the tube for 1 minute. Step 6 insert the tube into the tire, the patch is big so the ends may start to peal off, as long as you centered the patch reasonably well it should not be a problem. Step 7, use a HAND pump to fill the tire with air, air compressors push the air to fast and separate the patch from the tube creating a leak, be patient, when the patch is completely dry you can use an air compressor, I made this mistake 3 times before realizing that the slower hand pump allows the patch to wrap around the tube and dry with a great seal. I wish you all luck, 4 dollars (two for patches and 2 for glue) is great for a 100 patches.
K**R
Just as good and half the price
I consider the Rema patches the gold standard. I ride a mountain bike in an area where I pick up thorns on a regular basis. So I go through a box of 100 every few years. This time I thought I'd try saving a few bucks and get a cheaper brand. I was ready to be disappointed. I have now used about 10 of the patches. They work just fine. One comment I read said the patches tend to bubble on the tube. That will happen with any patch if it is applied when there is any air in the tube. If the tube is completely deflated then the patch will be the same size as the rubber of the tube under it and it will stay flat when uninflated and stretch a bit when inflated. My method of patching is (1) locate the hole and mark it with a felt tip pen (2) clean and dry the area thoroughly, especially if you use talc in the tire (3) buff the area where the patch will be applied with 100 grit sandpaper, or what comes with the kits (4) apply a small amount of glue on the area of the patch up to about 1/4" beyond the edge and let it dry thoroughly (5) while the glue is drying remove the foil from the patch but not the plastic (6) apply a little more glue to the area and immediately press the patch in place, applying pressure all the way around. If you don't need the tube immediately let it dry overnight. However, after a few minutes it is safe to reinflate the tube and check for more holes. I recently patched a tube only to discover two more holes after I had mounted it on the bike. I like to inflate the tube to about 1 1/2 times its normal diameter then submerge it to find those really small holes. I have never had one of these patches leak after it has been applied - ever. Be sure to run your fingers along the inside of the tire several times to check for thorns that remain. Putting talc on the inside of the tire makes this easier.Buying patches by the 100 is the only way to go. It costs about the same as a couple of kits. The kits come with a variety of sizes of patches. I have never used any but the small circular patches. Waste of money.
R**D
Excellent performance-Use with Elmer's Rubber Cement
I had a back log of tubes with punctures, and I got tired of shelling out 5 bucks every time for a new tube. At one point I had 3 punctures in 3 weeks of commuting. The little portable patch kits don't really have enough in them to do as much patching as I needed, so I bought this super sized version. I used about 10 patches to get my back log taken care of. I used the patches with Elmer's wrinkle free rubber cement (about 3 bucks at any Walm*rt) as the patch glue, and it works well.Typically I clamp the patch to the tube with a standard squeeze type clamp and let it sit overnight. I had no failures due to the patch, and I tested each tube after the patch dried to make sure it would hold.I think the size of these patches are a good medium size compromise between the need for a larger patch and a really minor puncture, and I patched over some larger punctures than I probably should have or normally would do.UPDATE: I found two more uses for these patches and my trusty rubber cement. We have a standard bed size air materess for camping. It developed a puncture on the top (flocked) side. I used some sandpaper to sand off the flocking and then put a bicycle patch with rubber cement on and clamped it for 24 hours. Fixed that problem. We also had a water bladder that had a pin hole leak in one corner. I attacked it with my trusty rubber cement and bicycle patches again. Its holding air at the moment, I have yet to try it with water, but it should hold for a pin hole.UPDATE 2: Still using in 2020, since buying in 2012. They're still soft and usable.
Trustpilot
1 month ago
1 month ago